That little side table next to your sofa is doing way more than holding your coffee mug. It’s prime real estate for personality, texture, and visual interest — but only if you style it right. A flat, single-layer arrangement (lamp, book, done) just doesn’t have that magazine-worthy charm.
The secret? Height variation and intentional layering. Once you start thinking in levels instead of just “stuff on a table,” everything clicks.
Let’s break down exactly how to get that effortlessly curated look.
Start With Your Tallest Anchor Piece
Every great side table vignette starts with a vertical anchor — something tall that draws the eye upward and sets the scale for everything else.
Good options include:
- A table lamp with a sculptural base
- A tall vase with branches or dried florals
- A small framed piece of art on an easel stand
- A slim ceramic or glass bottle vase
Place this piece slightly off-center, not dead-middle. Off-center placement instantly feels more curated and less “showroom display.”
Tip: Your tallest item should generally be about 1.5x the width of the table for proportion that feels balanced rather than top-heavy.
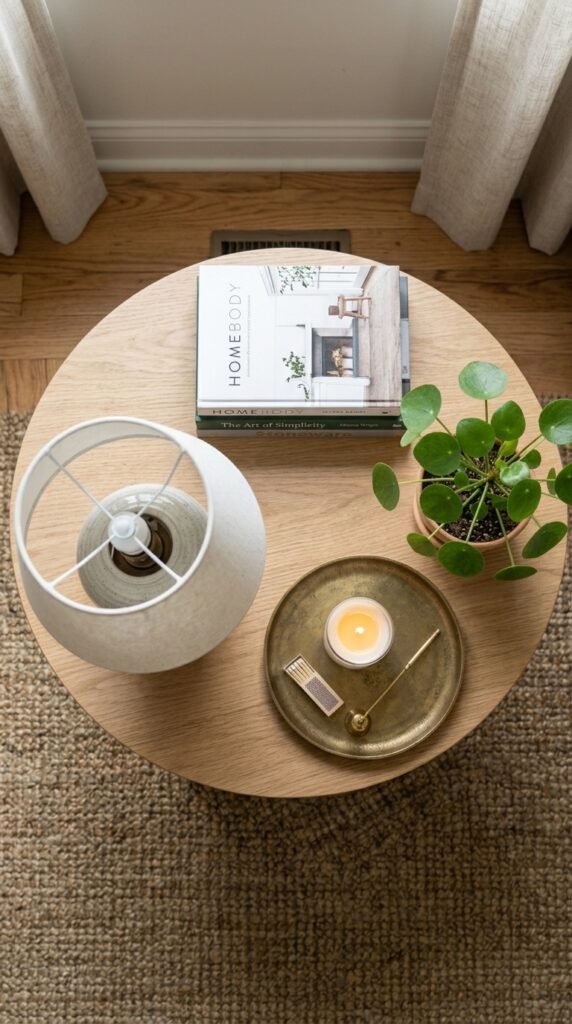
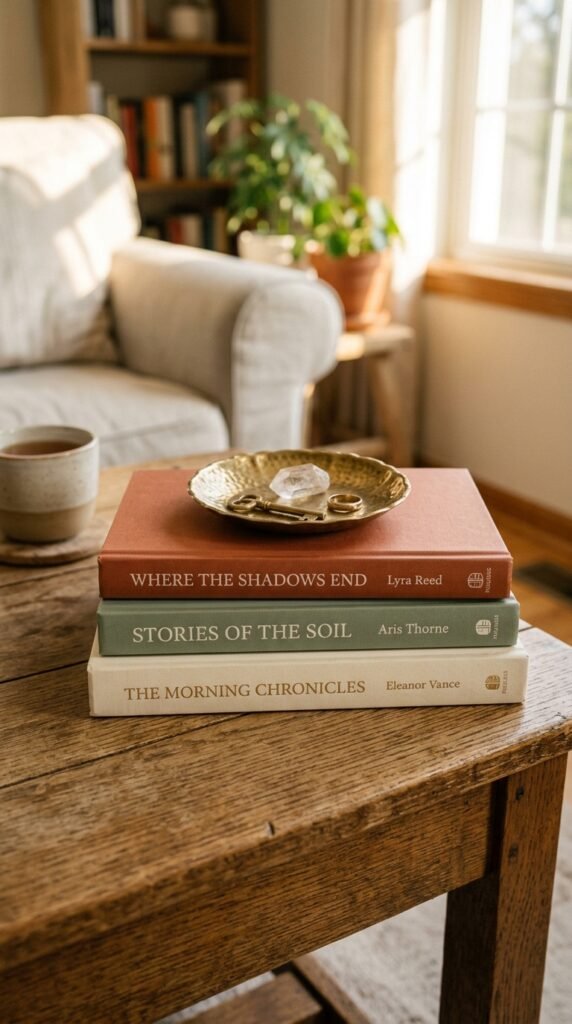
Build the Middle Layer With Books
This is the layer most people skip, and it’s the one that makes the biggest difference. A stack of 2–3 books creates an instant “step” in height, bridging the gap between your tall anchor and smaller decor pieces.
- Stack books largest to smallest, bottom to top
- Turn spines inward for a clean, color-coordinated look, or outward if you love the visual texture of titles
- Choose books with covers or spines in colors that complement your room’s palette
This middle layer is also functional — it’s the perfect place to rest a small object like a paperweight or trinket dish on top.
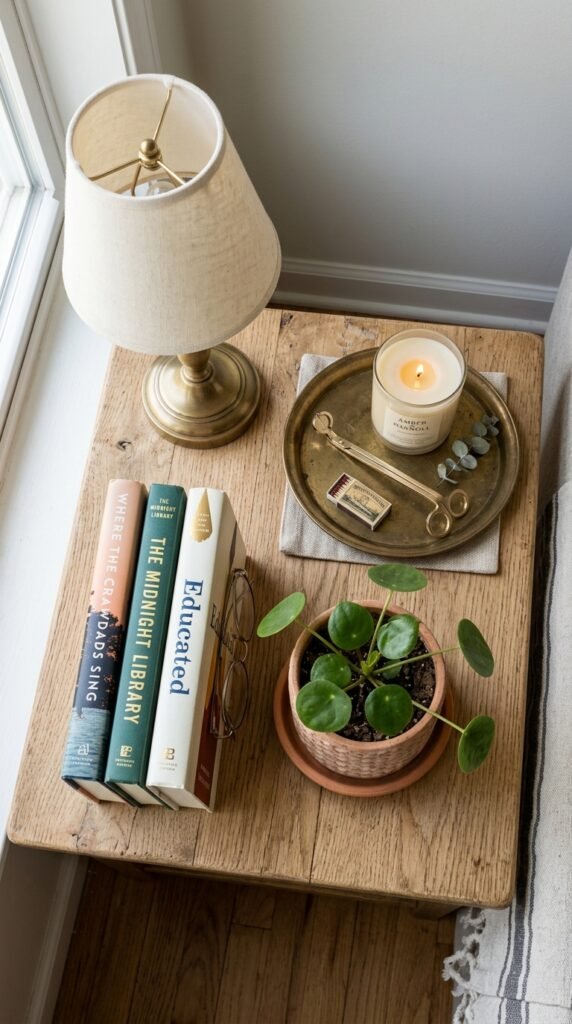
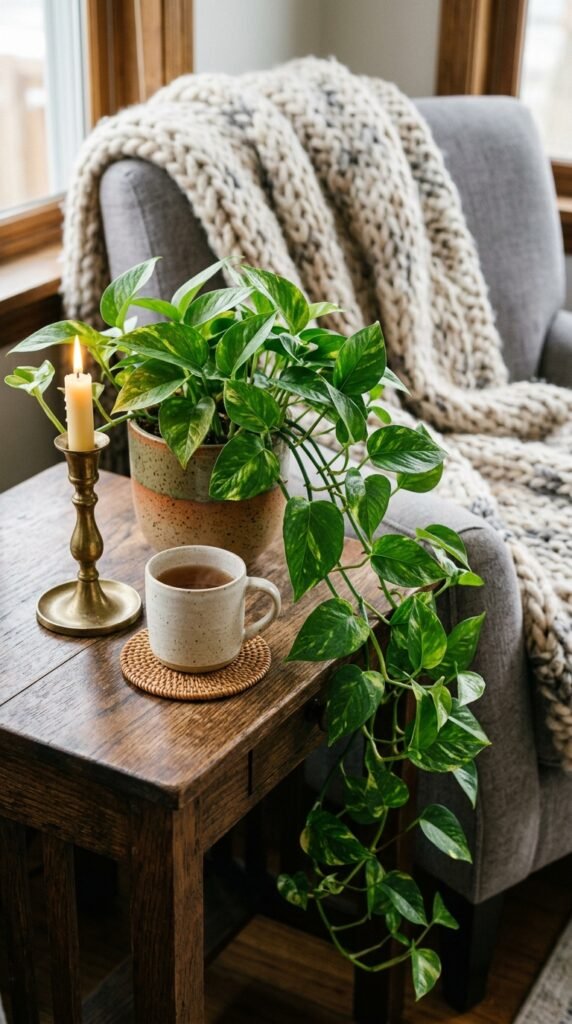
Add a Low, Grounding Element
Now bring the eye back down. A low-profile object balances out your tall anchor and book stack, keeping the whole arrangement from feeling lopsided.
Try one of these:
- A small potted succulent or low plant
- A textured ceramic bowl or dish
- A candle in a short holder
- A smooth decorative stone or sculptural object
This piece should sit at the opposite side of your table from the tall anchor, creating a natural visual triangle when you step back and look at the whole setup.
Layer In Texture and Greenery
Texture is what separates “styled” from “staged.” Once your heights are sorted, start layering in materials that feel tactile and alive.
- A trailing plant like pothos or ivy draping slightly over the table’s edge softens all those straight lines
- Mix matte and shiny finishes — a matte ceramic vase next to a polished brass tray adds depth
- A small woven or rattan coaster under your candle adds warmth without adding clutter
Use a Tray to Anchor Small Items
If you’ve got several tiny objects — a candle, a matchbox, a small dish — don’t just scatter them. Group them on a small tray. This instantly makes loose items look intentional rather than messy, and it adds yet another subtle layer of height since the tray itself sits slightly raised.
- Choose a tray material that contrasts with your table’s finish (wood table, metal tray, or vice versa)
- Keep the tray grouping to 3 items max — any more starts to feel cluttered
- Round trays soften a table with sharp edges; rectangular trays add structure to a round table
Step Back and Check the Triangle
Before you call it done, step back and look at your table from across the room. You’re aiming for an asymmetrical triangle shape: tall on one side, medium in the middle, low on the other.
Quick checklist:
- ✅ Tall anchor piece (lamp, vase, or art)
- ✅ Mid-height layer (books + small object on top)
- ✅ Low grounding piece (plant, bowl, or candle)
- ✅ At least one textural element (greenery, woven material, or mixed finishes)
- ✅ Nothing perfectly centered or symmetrical
Final Thoughts
Styling a side table with layers and varying heights isn’t about owning expensive decor — it’s about arrangement. The same three items thrown together randomly versus thoughtfully layered by height can look like two completely different price points.
Start with your tallest piece, build down through books and texture, and finish with a low grounding element. That’s really all it takes.
Save this guide for later so you’ve always got a go-to formula next time you’re refreshing a tabletop! 📌