You open the cabinet to grab a pan, and an avalanche of lids comes crashing down. Sound familiar? A disorganized kitchen doesn’t just waste time — it drains your energy before you’ve even started cooking. The good news? You don’t need a bigger kitchen or a massive budget to fix it. You just need a smart system.
Let’s build that system — step by step.
Step 1: Pull Everything Out First
Before you organize, you have to see what you’re working with. Clear out one cabinet at a time and lay everything on the counter or kitchen table.
As you sort, ask yourself:
- Do I use this regularly? If not, donate or store it elsewhere.
- Do I own duplicates? Keep the best one, let go of the rest.
- Does this even belong in the kitchen? You’d be surprised what hides in cabinets for years.
This edit is the most important step. Organization only works when you’re not trying to fit too much into too little space.
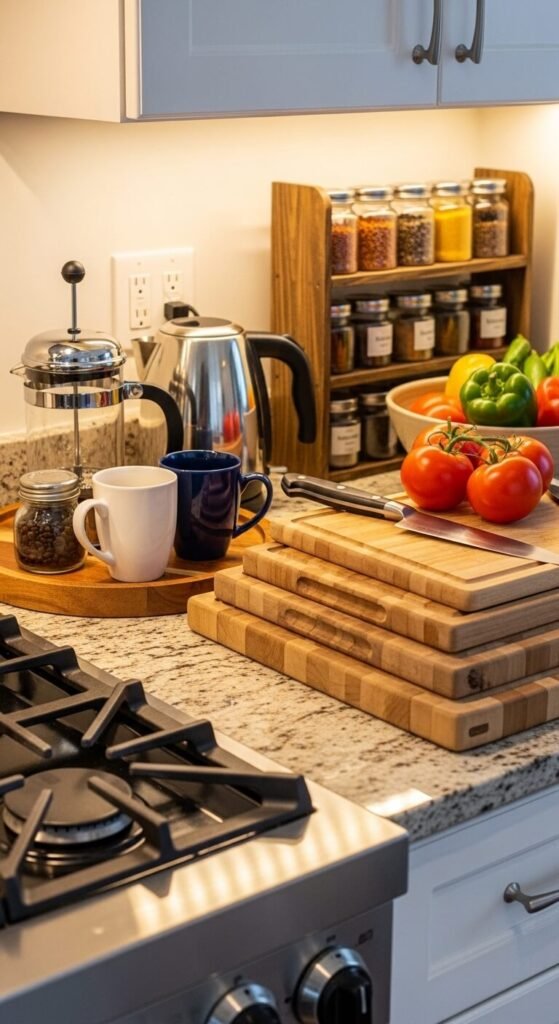
Step 2: Group Items by How You Actually Use Them
Forget organizing by category alone. Organize by habit. Think about what you reach for together, at the same time, during the same task.
Create zones like these:
- ☕ Coffee & breakfast station — mugs, coffee pods, oats, protein powder
- 🍳 Cooking zone — oils, spices, frequently used pans
- 🥗 Prep zone — cutting boards, mixing bowls, measuring cups
- 🫙 Pantry zone — canned goods, grains, snacks
When everything lives near where you use it, your kitchen practically runs itself.
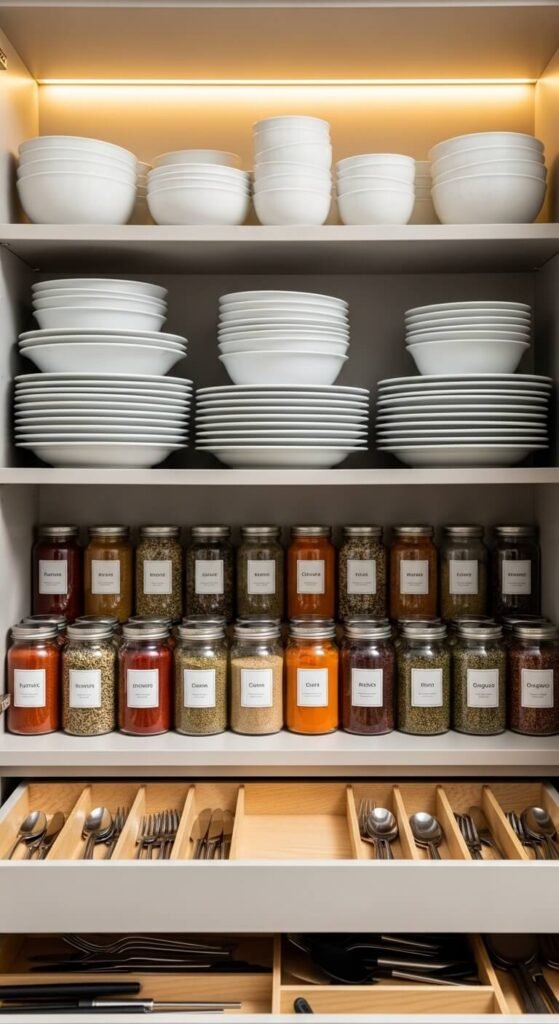
Step 3: Use Vertical Space Like a Pro
Most people stack things horizontally and wonder why they can’t find anything. The secret? Go vertical.
Here are the best tools for this:
- Shelf risers inside cabinets to double your usable space
- Plate racks to store dishes upright instead of stacked
- Door-mounted organizers for spices, foil, or cleaning supplies
- Pot lid holders so lids stand on their own instead of sliding everywhere
Going vertical means fewer things buried, less digging, and a much calmer morning routine.
Step 4: Decant and Label the Pantry Items
One of the most game-changing habits for a tidy kitchen? Decanting — transferring dry goods from bulky bags into uniform containers.
It sounds fussy, but here’s why it works:
- Uniform containers stack and fit neatly on shelves
- You can see exactly what you have at a glance
- Bags and boxes take up far more room than they need to
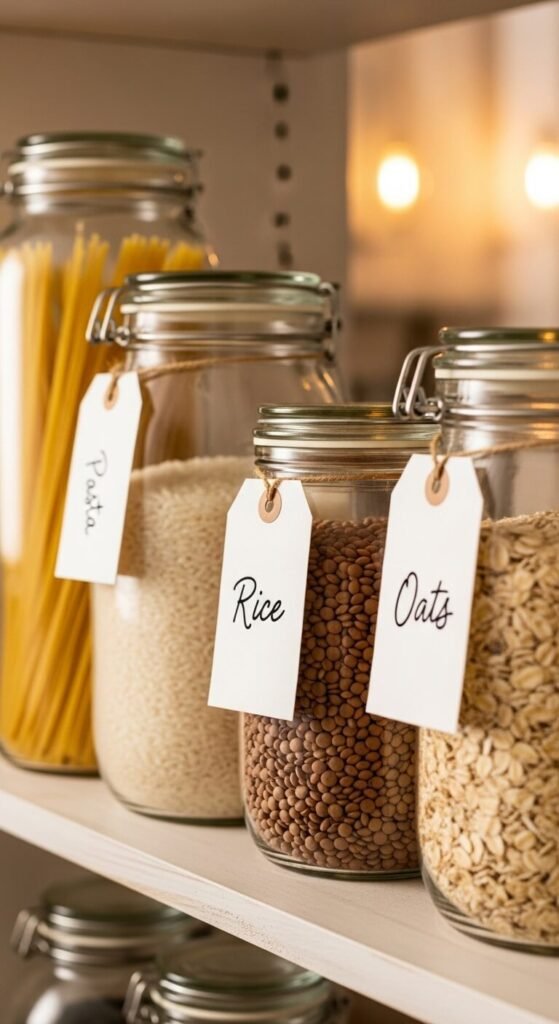
Use clear glass or acrylic containers with airtight lids. Label everything — even if you think you’ll remember what’s inside. (You won’t. Nobody does.)
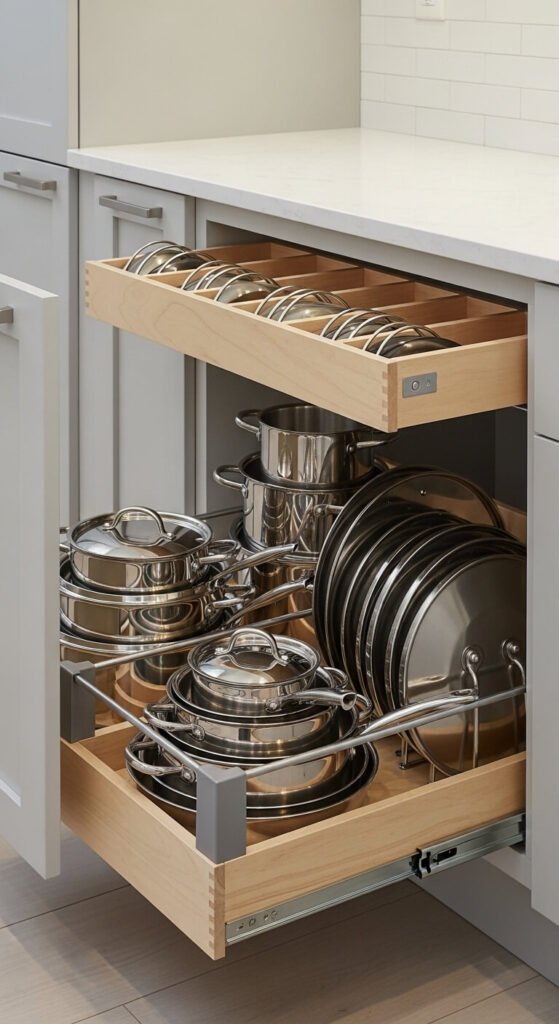
Step 5: Store Things at the Right Height
Where you store something should depend on how often you use it.
| Frequency | Best Storage Location |
|---|---|
| Daily use | Eye level or easy reach |
| Weekly use | Upper shelves or lower drawers |
| Rarely used | Highest shelves or deep storage |
Heavy items like cast iron pans and stand mixer bowls should always live at the lowest level — both for safety and because you’ll thank yourself every single time you lift them.
Step 6: Create a “Home” for Everything — and Stick to It
The final (and most important) rule of an organized kitchen: every single item needs a designated home. Not a general area. A specific spot.
When something has a home, putting it away takes two seconds. When it doesn’t, it gets set down somewhere and the clutter starts all over again.
A few habits that help it stick:
- Do a 2-minute reset after cooking — return everything to its spot
- Involve everyone in the household so they know the system too
- Reassess every few months — life changes, and your kitchen should adapt
Your Kitchen, Finally Working For You
Organizing your kitchen cabinets isn’t about being perfect — it’s about creating a space that makes your daily life easier and faster. Start with one cabinet today. Just one. You’ll be amazed how quickly the momentum builds.
Save this guide, share it with a friend who’s drowning in cabinet chaos, and come back when you’re ready for the next zone! 🏡✨