Ever walked into a room and felt like something was off — only to realize the artwork was hanging way too high, like it was trying to escape the ceiling? You’re not alone. Hanging art is one of those deceptively simple tasks that trips up even the most design-savvy homeowners. The good news? There’s a foolproof formula, and once you know it, you’ll never hang a crooked, too-high, or awkward-looking piece again.
The Golden Rule: 57 Inches Is Your Magic Number
Interior designers and museum curators swear by this: the center of your artwork should sit 57 inches from the floor. This measurement aligns with the average human eye level and is the industry standard for a reason — it just feels right.
Here’s how to apply it:
- Measure 57 inches up from the floor and make a small pencil mark on the wall.
- That mark is where the center of your artwork should land.
- From there, calculate where the hanging hardware hits (usually a few inches below the top of the frame) and mark accordingly.
It sounds technical, but once you do it once, it becomes second nature.
How to Account for Furniture Below the Art
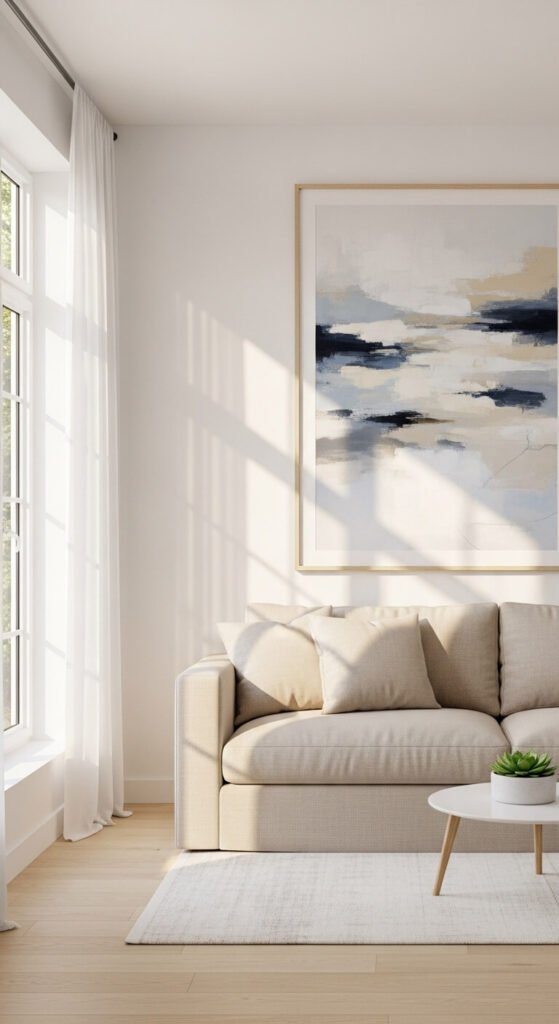
When art hangs above a sofa, console table, or bed, the 57-inch rule gets a slight adjustment. You don’t want a big gap between the furniture and the frame — it makes both pieces feel disconnected.
The sweet spot: Leave 6 to 8 inches between the top of your furniture and the bottom of the frame.

- For sofas and beds, this creates a cohesive, “anchored” look.
- If your furniture is very tall (like a tall headboard), you can reduce that gap to 4–6 inches.
- Always step back and eyeball it — your eye is the final judge.
The Tools That Make It Effortless
You don’t need a contractor’s toolkit, but a few basic supplies will save you from unnecessary nail holes and frustration.
What you’ll need:
- A tape measure
- A pencil
- A level (even a small one makes a huge difference)
- A hammer and the right picture hooks for your wall type
- Optional: painter’s tape to mock up placement before committing

The level is non-negotiable. What looks straight to the naked eye is often slightly tilted, and you’ll notice it every single time you walk past it afterward.
Hanging a Gallery Wall Without Losing Your Mind
Gallery walls are stunning, but the process can feel overwhelming. The trick is to treat the grouping as one large piece of art and find its collective center.
- Lay all your frames on the floor first and arrange them until you love the composition.
- The center of the entire arrangement should hit — you guessed it — 57 inches.
- Start with the largest or most central piece first, then work outward.
- Keep spacing consistent: 2 to 3 inches between frames looks clean and intentional.

Trace each frame onto kraft paper, cut it out, and tape the paper templates to the wall before driving a single nail. It’s a game-changer for getting the layout right without commitment.
A Quick Cheat Sheet to Remember
- Center of art = 57 inches from the floor (standard rule)
- Above furniture = 6–8 inches of breathing room
- Gallery walls = treat as one piece, center the whole arrangement
- Always use a level, always
Now Go Hang Something Beautiful
The difference between a wall that looks like a hotel hallway and one that feels like a curated, intentional space often comes down to a single measurement. With the 57-inch rule in your back pocket and a little patience, you can hang artwork with total confidence — no guesswork, no regrets, no extra nail holes.
Save this guide for your next decorating project, and share it with anyone who’s ever hung a picture three times before getting it right. (We all know someone.)