You’ve pinned dozens of gallery wall ideas. You’ve collected the frames. You’re ready — and then you freeze, staring at your blank wall wondering how on earth you’re going to make this work without turning it into a game of “patch the mistake.” Sound familiar?
Good news: hanging a gallery wall doesn’t have to mean a wall full of wrong holes and crooked frames. With a few clever tricks, you can get it right the first time.
Step 1: Gather Your Frames and Plan Your Layout First
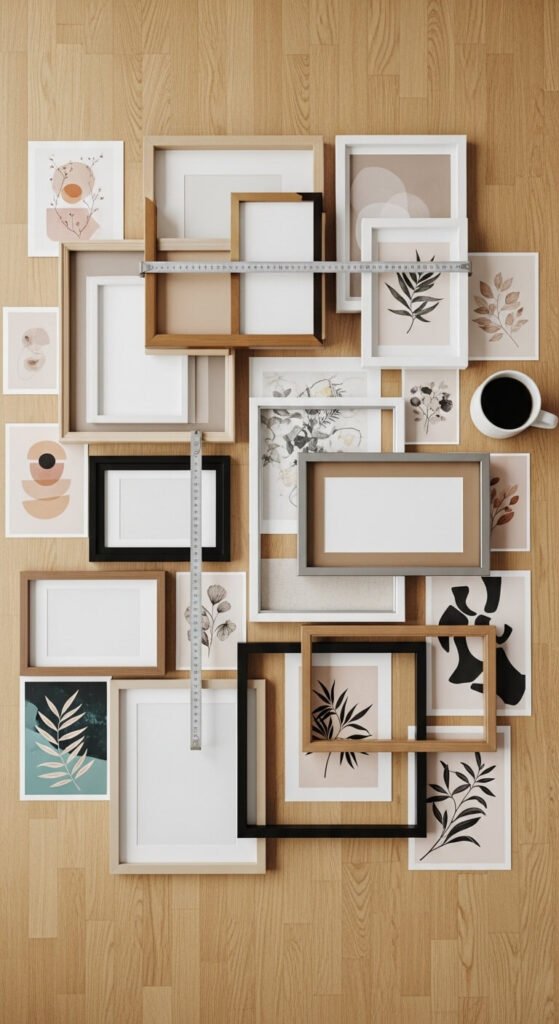
Before a single nail goes in, do all your decision-making on the floor.
- Lay your frames out on the living room rug or a large flat surface
- Play with arrangements until you love what you see
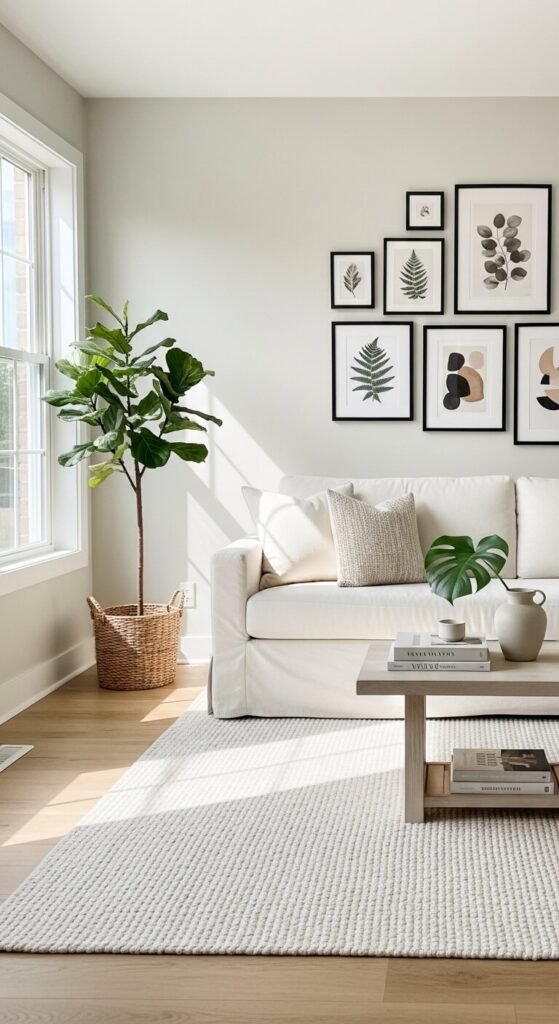
- Mix sizes intentionally — anchor with one large piece, surround it with smaller ones
- Keep spacing consistent (2–3 inches between frames is the sweet spot)
This is your “dry run,” and it’s the most important step most people skip.
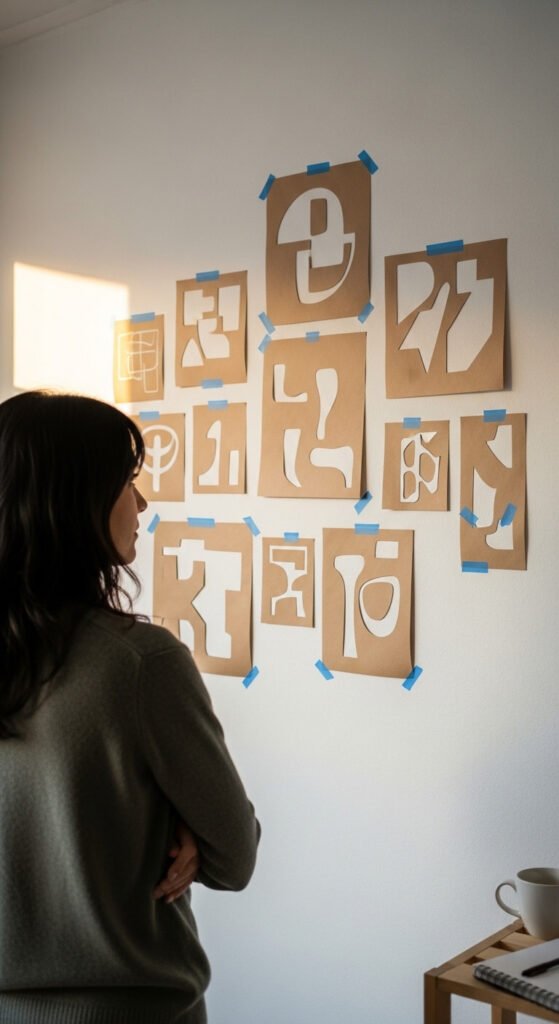
Step 2: Trace Your Frames on Kraft Paper
This is the game-changer tip that professional interior designers swear by.
- Trace each frame onto kraft paper or newspaper
- Cut out each shape and label it (so you don’t mix them up)
- Use painter’s tape to stick the paper templates directly onto your wall
Now you can step back, squint, rearrange, and move things around as many times as you want — without a single hole. Shift templates left, right, up, or down until the arrangement feels balanced and right for the space.
Step 3: Find Your Center and Work Outward
The biggest gallery wall mistake? Starting at one corner and working across. Instead:
- Identify the visual center of your wall (or center it above your furniture)
- Place your largest or most prominent frame template at the center
- Build outward from there, balancing visual weight on each side
- Step back every few templates to check the overall feel
Pro tip: Eye-level center is typically 57–60 inches from the floor — this is the standard used in most galleries and museums.
Step 4: Mark and Nail — With Confidence
Once your paper templates are exactly where you want them:
- Mark the nail point directly through the paper template while it’s still on the wall
- Use a small pencil dot or a pin poke right at the hanging hardware location
- Remove the paper template
- Hammer your nail right on that mark
No guessing. No “measure twice, drill once” anxiety. The paper did all the work for you.
For heavier frames, use a stud finder or adhesive picture-hanging strips rated for the weight. Always check the back of your frame for the hook placement before tracing — this is where people sneak in an error.
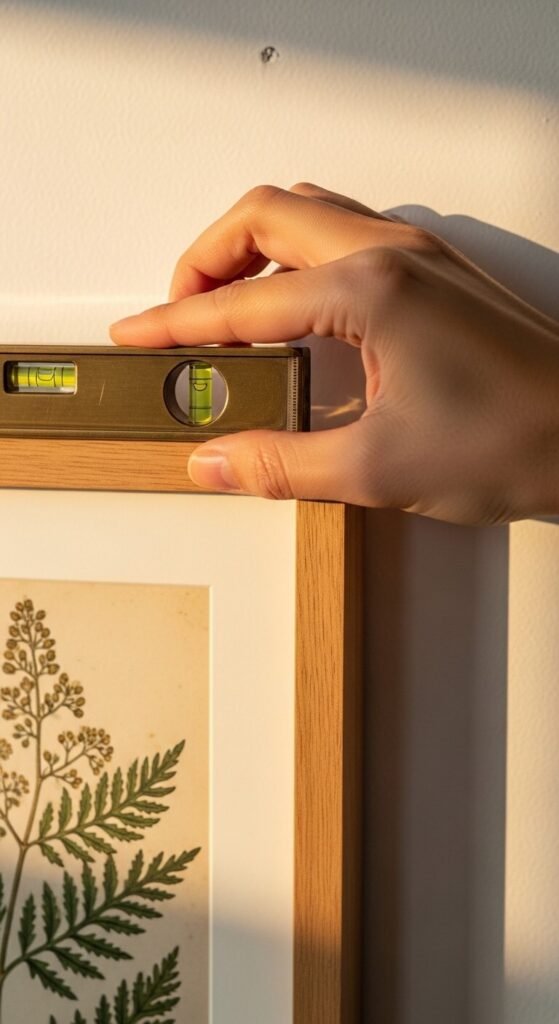
Step 5: Hang, Level, and Style
Now for the satisfying part.
- Hang each frame on its nail
- Use a small level (or the free bubble level app on your phone) to straighten each one
- Step back after every 2–3 frames to assess the full composition
- Add a small piece of museum putty to the bottom corners of each frame to keep them from shifting
Final Touches That Elevate the Whole Look
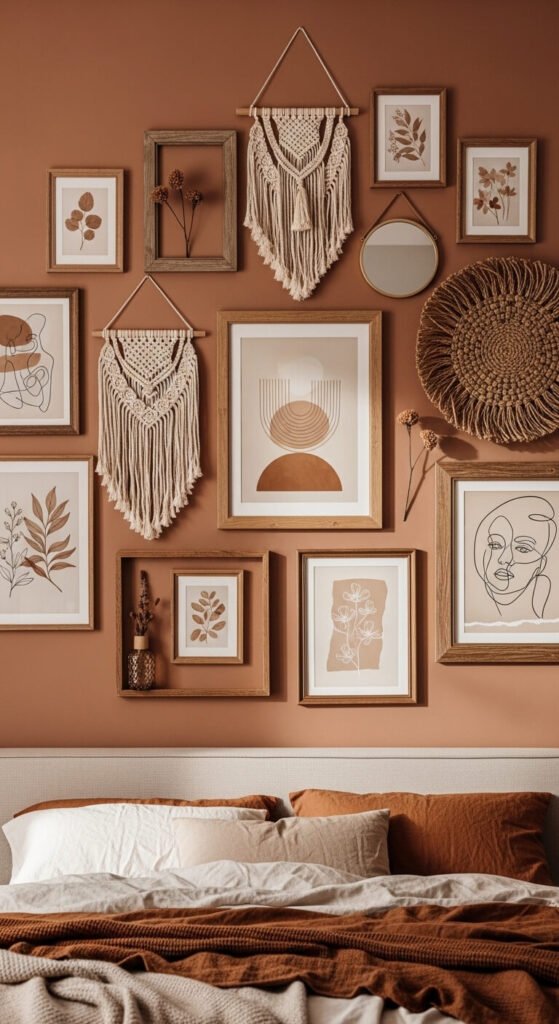
A gallery wall isn’t just frames — it’s a story. Here’s how to make it feel curated, not cluttered:
- Mix textures: Combine photos, art prints, mirrors, and even small shelves or wall objects
- Stick to a color palette: 2–3 accent colors across the artwork keeps it cohesive
- Vary the frame finishes: Black, wood, and gold can all coexist beautifully
- Add one unexpected element: A small clock, ceramic, or woven piece adds personality
You’ve Got This — Go Make Some Art
A gallery wall that looks like it belongs in a design magazine is 100% achievable in a single afternoon — no contractor, no stress, no wall full of regret holes. Just paper, tape, and a little patience.
Save this guide before your next weekend project and share it with a friend who’s been putting off their own gallery wall! 🖼️