Ceilings get ignored more than any other surface in the home. Walls get paint, floors get rugs, but the fifth wall stays blank white year after year. That’s a missed chance. A little color, texture, or pattern overhead can make a small room feel taller, a plain room feel finished, and a boring hallway feel like something worth walking through twice. Below are 26 ceiling treatments anyone can try, from quick weekend paint jobs to small structural upgrades, all without gutting the budget.
1. Paint It a Moody Dark Color
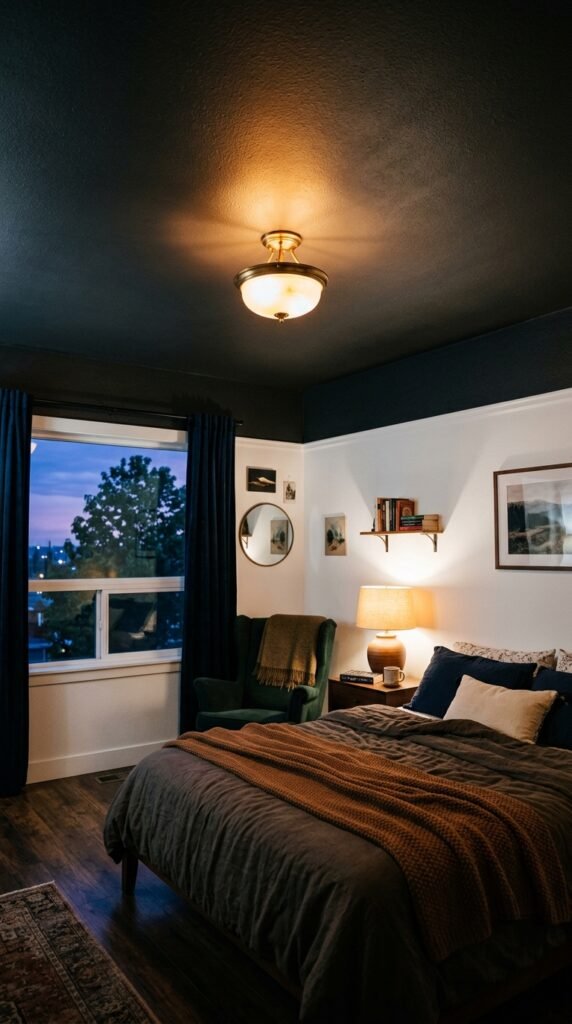
A dark ceiling sounds risky. It’s not. Charcoal, navy, or deep green can make a room feel cozy instead of cramped. Painters call it the “cocooning effect.” Start small with one quart of paint and a tester swatch. Use a flat or matte finish to avoid glare. Pair the dark tone with lighter walls so the room still breathes. This works best in bedrooms, dining rooms, and reading nooks. Budget tip: leftover wall paint in a darker shade from another room often works perfectly here.
2. Add Wood Beams for Instant Character

Real beams cost a fortune. Faux wood beams don’t. They’re lightweight, made from polyurethane, and install with adhesive and a few screws. A single beam over a kitchen island or dining table adds instant warmth. Paint them to match your trim or stain them for a farmhouse look. Most home improvement stores carry pre-finished options under $40 each. DIY tip: measure twice, use a stud finder, and have a second set of hands for installation since the beams are long and awkward to hold alone.
3. Try a Bold Wallpaper Overhead
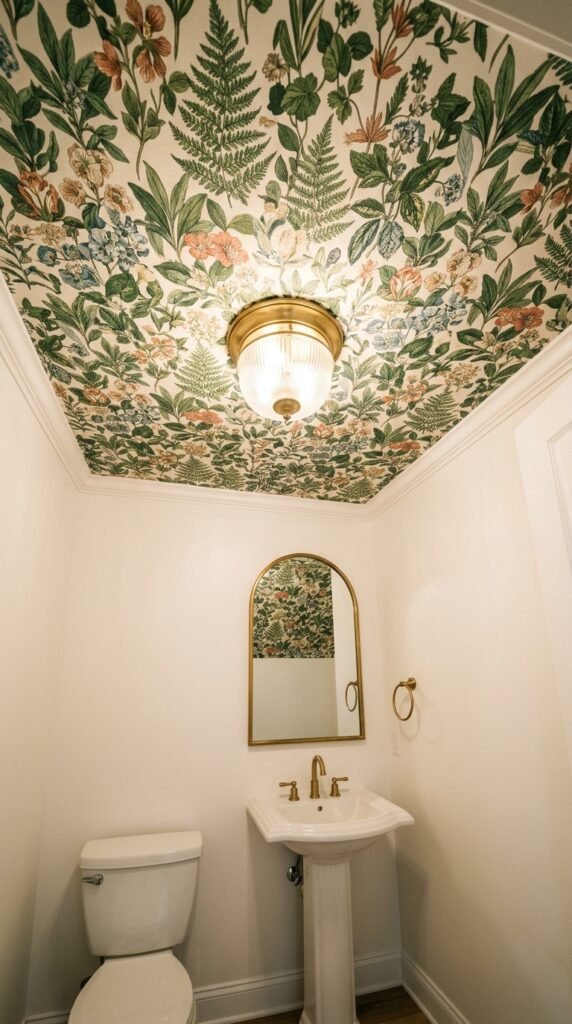
Wallpaper isn’t just for walls anymore. A patterned ceiling in a small bathroom or hallway turns a forgettable space into a moment. Peel-and-stick wallpaper makes this a true weekend project. No paste, no mess, no professional needed. Pick a bold floral or geometric print for drama, or a subtle texture for something quieter. Powder rooms are the easiest place to start since the ceiling is small and mistakes are cheap to fix. Budget tip: a single roll often covers an entire small bathroom ceiling.
4. Install a Statement Light Fixture
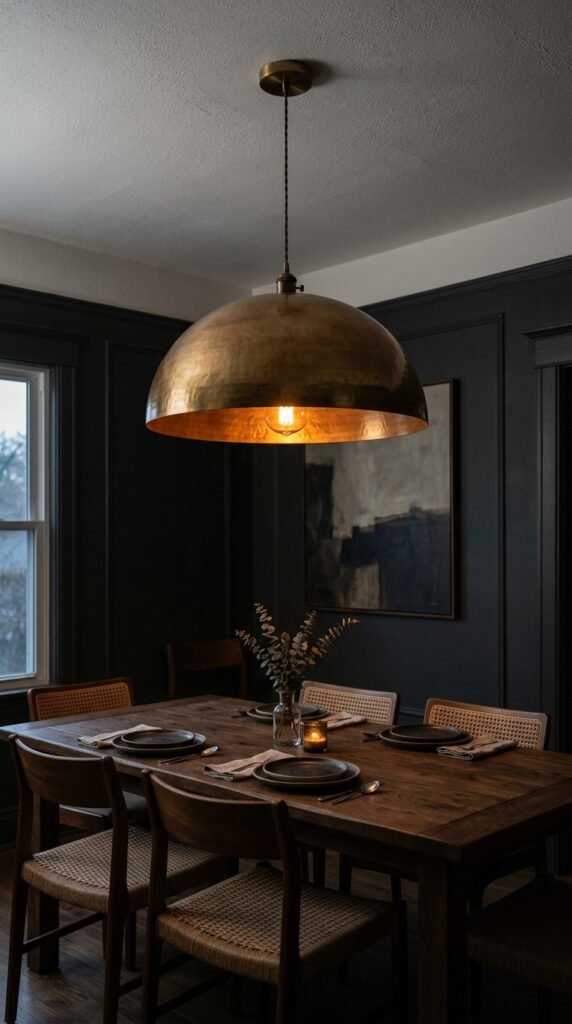
Sometimes the ceiling treatment isn’t paint or panels. It’s what hangs from it. A bold pendant light, chandelier, or sculptural fixture draws the eye up without touching the surface at all. Swap a builder-grade flush mount for something with personality. Vintage shops and online marketplaces often have unique pieces for less than retail. DIY tip: turn off the breaker, take a photo of the existing wiring before disconnecting it, and most homeowners can finish a fixture swap in under an hour.
5. Add Crown Molding for a Finished Look
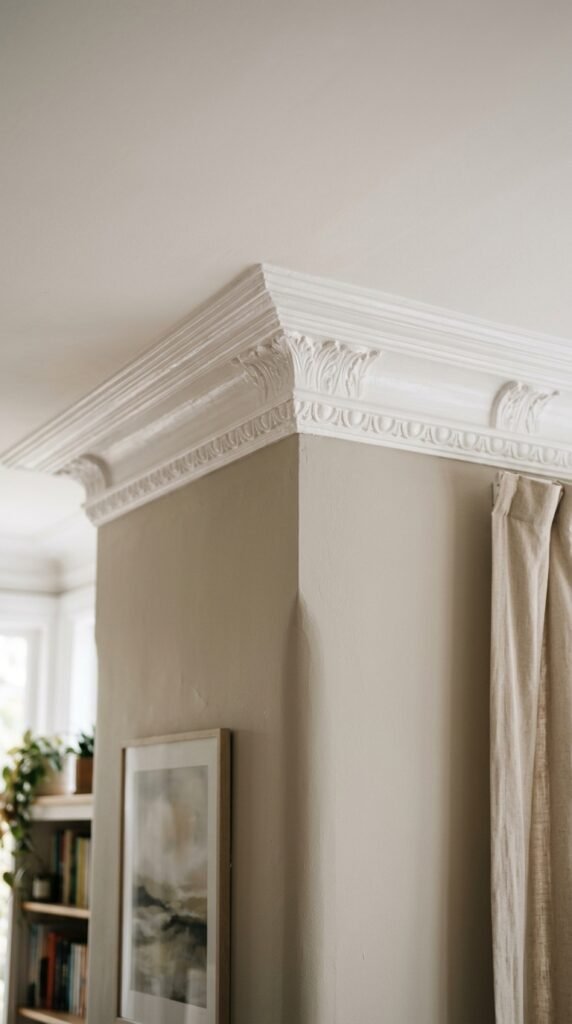
Crown molding is the trim that quietly upgrades a whole room. It softens the harsh line where wall meets ceiling and adds a built-in, custom feel. Lightweight foam molding is budget-friendly and beginner-safe. It cuts with a basic miter box and attaches with adhesive caulk instead of nails. A 100-square-foot room can be finished in a single afternoon. Budget tip: stick with simple, narrow profiles. They cost less and still deliver a polished result.
6. Stencil a Pattern by Hand
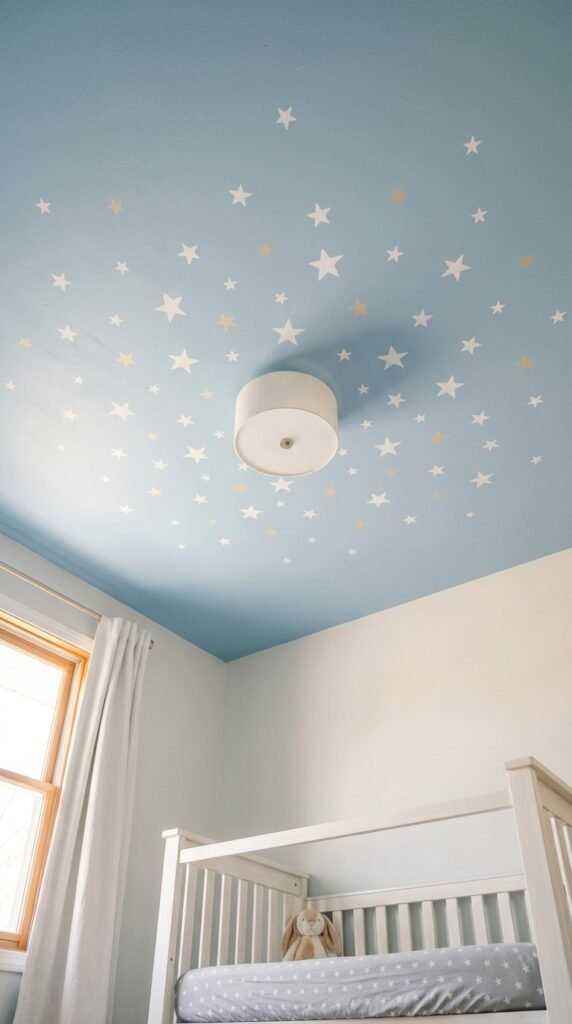
Stenciling is the cheapest way to get a designer ceiling look. One stencil kit, one can of paint, and an afternoon is all it takes. Stars for a nursery, a Moroccan motif for a hallway, or simple geometric shapes for a home office all work well. Practice on cardboard first to get the spacing right. Tape the stencil firmly so paint doesn’t bleed underneath. DIY tip: use a foam roller instead of a brush for cleaner, more even edges.
7. Use a High-Gloss Finish
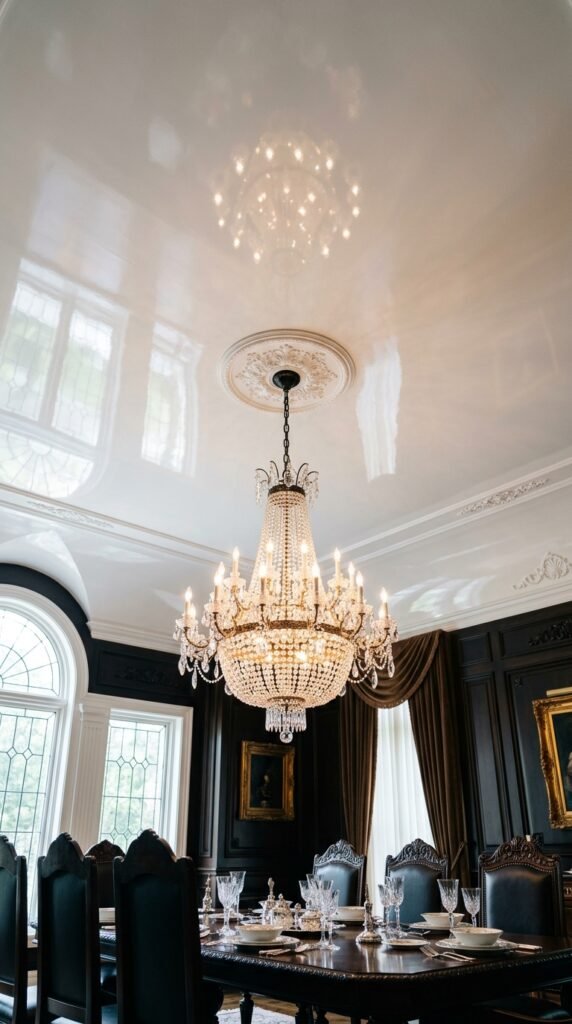
A high-gloss ceiling bounces light around a room like nothing else. It works especially well in dining rooms and entryways where a little drama is welcome. The trade-off is that gloss shows imperfections, so a smooth, well-prepped surface matters. Sand lightly, fill any cracks, and use a high-quality gloss paint formulated for ceilings. Budget tip: test a small section first since gloss paint behaves differently than the flat finish most people are used to rolling on.
8. Hang a Canopy of Fabric
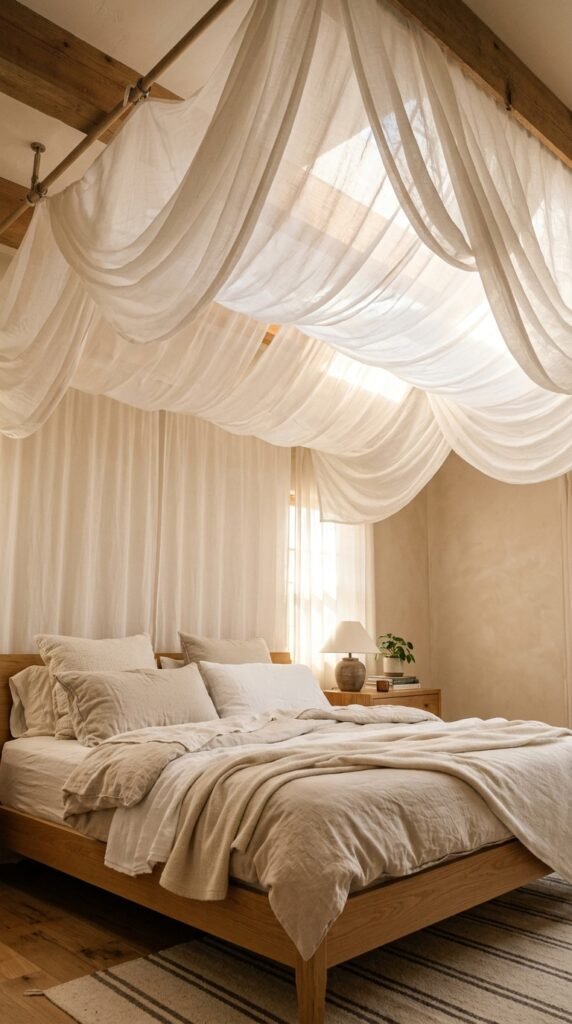
Fabric draping is one of the fastest, cheapest ceiling transformations around. Sheer curtains, muslin, or lightweight cotton can be hung from hooks or curtain rods to create a soft, tented effect. This works beautifully in bedrooms or over a reading nook. No painting, no permanent changes, easy to remove for renters. Budget tip: buy fabric by the yard at a craft store instead of pre-made curtains. It costs a fraction of the price for the same dramatic effect.
9. Try a Two-Tone Ceiling
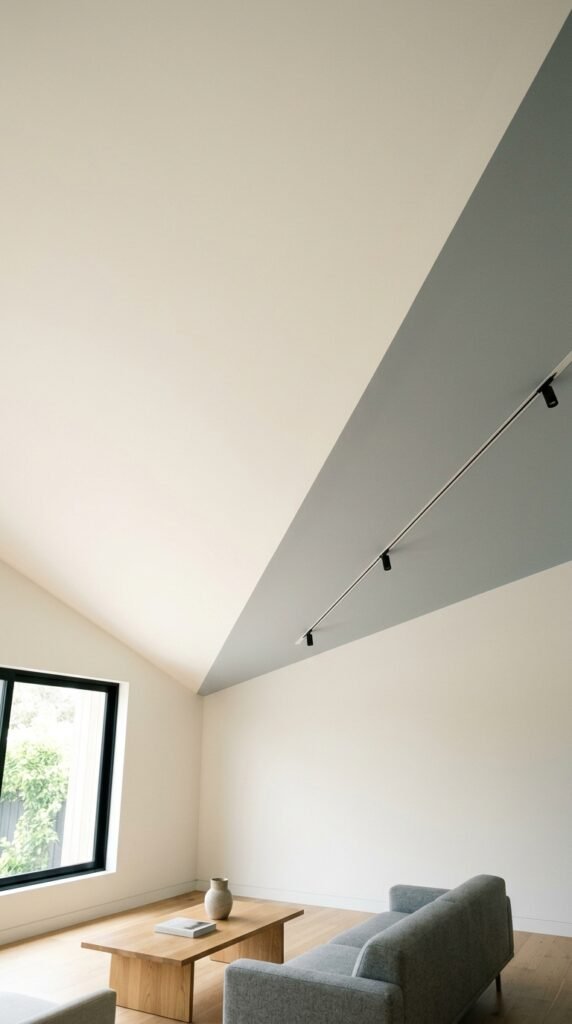
Splitting a ceiling into two colors or finishes adds depth without much extra effort. Paint the perimeter one shade and a center panel another, or separate a sloped section from a flat one. This works well in rooms with architectural quirks like dormers or vaulted sections. A roll of painter’s tape and a steady hand are all that’s required. Budget tip: choose two shades from the same paint family so the look feels intentional, not accidental.
10. Add Shiplap Overhead

Shiplap isn’t just for accent walls anymore. Thin, lightweight planks installed across a ceiling create texture and a cottage feel fast. Pre-primed boards from a hardware store cut down on prep work. A nail gun and a level make this a manageable weekend job for two people. This treatment shines on porches, mudrooms, and farmhouse-style kitchens. DIY tip: start from the center of the ceiling and work outward so the boards stay symmetrical on both sides.
11. Paint a Soft Ombre Effect
Ombre ceilings feel like a sky captured indoors. Pick two or three shades of the same color family and blend them with a damp sponge or brush while the paint is still wet. This technique forgives small mistakes since blending hides brush marks. It works especially well in kids’ rooms or nurseries for a dreamy, calming feel. Budget tip: sample-size paint pots are enough to cover most ceilings and cost far less than full gallons.
12. Install Decorative Ceiling Tiles
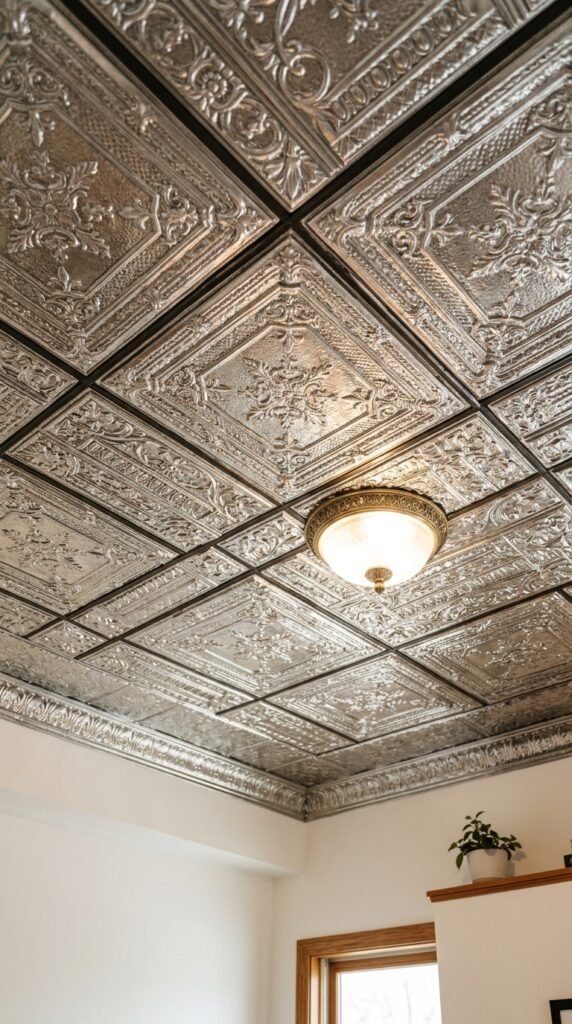
Faux tin tiles bring old-world charm without the old-world price. Lightweight PVC versions install with adhesive and look nearly identical to the real metal thing. They come pre-finished in silver, copper, white, and more. This treatment suits kitchens, bathrooms, and home offices that want a little vintage flair. Budget tip: order a sample tile first to check the finish in person before committing to a full ceiling’s worth of material.
13. Add a Skylight or Sun Tunnel
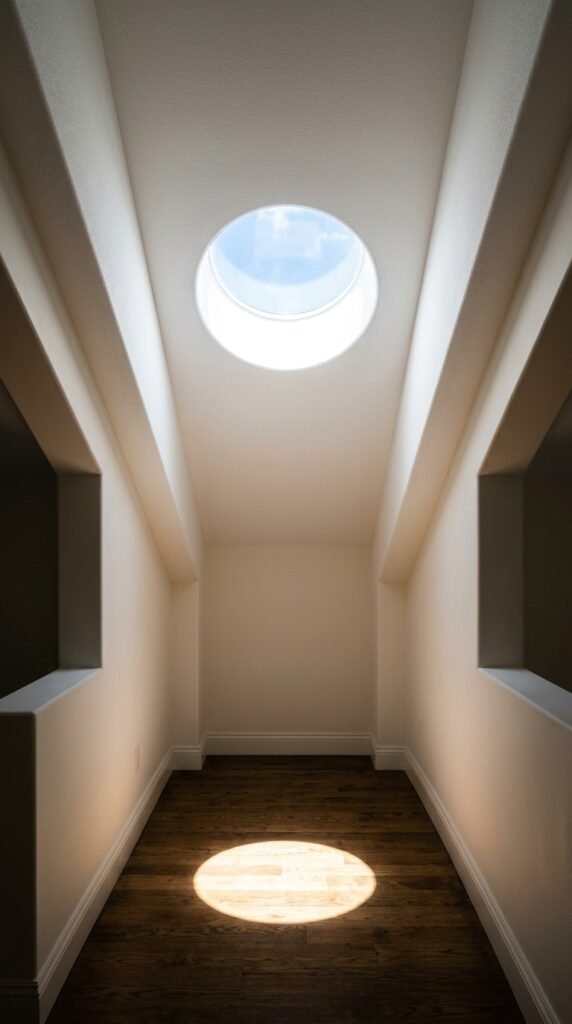
A sun tunnel is the budget cousin of a full skylight. It’s a small reflective tube that funnels natural light from the roof into a dark hallway or windowless bathroom. Installation is faster and cheaper than cutting in a traditional skylight, and many kits are designed for a single contractor to finish in a day. Budget tip: check with the local utility company first, since some offer rebates for natural daylighting upgrades.
14. Paint Exposed Ductwork or Pipes

If exposed pipes or ductwork are unavoidable, work with them instead of hiding them. A coat of matte black or dark bronze paint turns an eyesore into an intentional industrial detail. This works especially well in basements, lofts, and converted garages. Use a paint formulated for metal so it adheres properly and doesn’t peel. DIY tip: a small foam roller reaches tight spots around pipes better than a brush and leaves a smoother finish.
15. Hang String Lights for Ambient Glow

String lights aren’t just for outdoor patios. Indoors, they add a soft, layered glow that overhead fixtures can’t match. Drape them across exposed beams, weave them through a pergola, or run them along a covered porch ceiling. They’re inexpensive, easy to hang with small adhesive hooks, and instantly cozy. Budget tip: look for warm white LED string lights, since they use less energy and last far longer than older incandescent versions.
16. Create a Tray Ceiling Illusion with Paint
[Image Prompt: A bedroom ceiling photographed from below, painted border creating the illusion of a recessed tray ceiling, soft shadow lines suggesting depth, warm ambient light, shot on a professional camera with attention to subtle trompe l’oeil detail.]
A real tray ceiling requires construction. A painted one doesn’t. Use painter’s tape to mark a rectangular border a foot or two from the walls, then paint that inner section a slightly different shade or add a subtle shadow line. From a distance, it reads as a dimensional, architectural feature. This trick works in bedrooms and dining rooms where a tray ceiling would look right at home. Budget tip: a soft gray shadow line sells the illusion better than a hard black one.
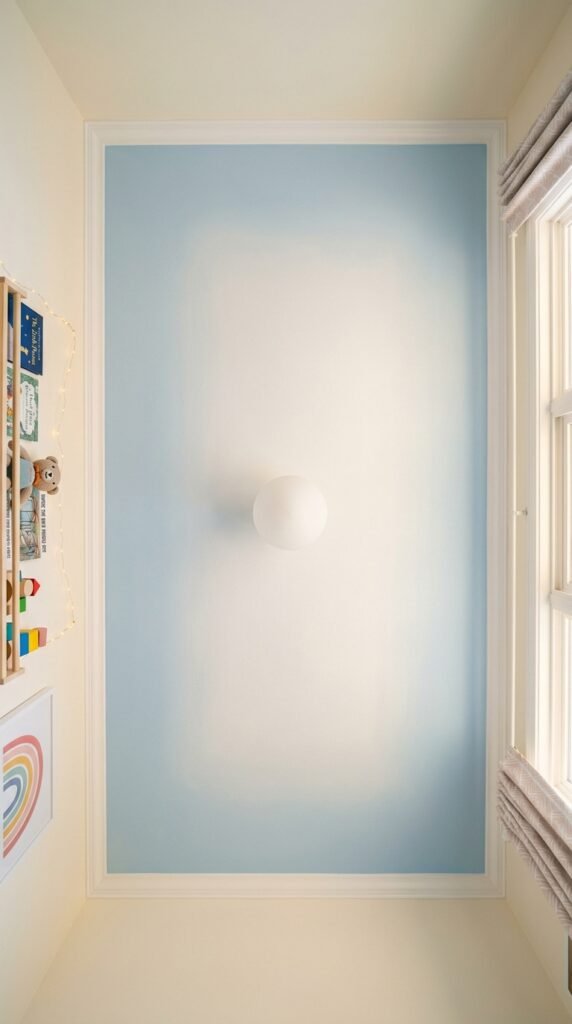
17. Add a Mural for a Statement Wall Above
[Image Prompt: A child’s playroom ceiling photographed from below, a hand-painted cloud mural against a soft sky-blue background, natural light filtering through sheer curtains, toys scattered on the floor below, shot with a high-end camera capturing soft pastel tones.]
A ceiling mural turns a plain room into a memory. Clouds in a nursery, constellations in a teen’s bedroom, or a simple leafy pattern in a sunroom all work without needing professional art skills. Projector stencils make tracing a design onto the ceiling foolproof, even for first-time painters. DIY tip: rent a small projector for one evening to trace the outline, then fill it in over a weekend with basic craft paint.
18. Install Recessed Lighting for a Clean Look
[Image Prompt: A modern kitchen ceiling photographed from below, evenly spaced recessed lighting fixtures glowing softly, smooth white surface, minimalist cabinetry visible at the edges, shot with a professional camera capturing crisp, even illumination.]
Swapping bulky overhead fixtures for recessed lighting instantly cleans up a ceiling’s appearance. The light source disappears into the surface, leaving a smooth, modern look with no visible hardware. Retrofit kits make this manageable without opening up drywall, since they fit into the existing electrical box. An electrician can typically convert a room in a single afternoon. Budget tip: LED retrofit kits cost less to run long-term and rarely need replacing for years.
19. Paint Rafters and Trusses a Light Color
[Image Prompt: A vaulted living room ceiling photographed from below, exposed wood trusses painted soft white against a pale ceiling, natural light pouring through tall windows, airy and open feel, shot on a high-end camera with wide-angle framing.]
Dark, heavy wood trusses can make a vaulted ceiling feel smaller than it is. A coat of soft white or light gray paint opens the whole space up. This is a bigger project since it usually requires a sprayer and some scaffolding, but the payoff is dramatic. Many homeowners hire a painter for just this one job while handling smaller ceiling projects themselves. Budget tip: get quotes from at least three local painters, since prices for vaulted work can vary widely.
20. Add a Ceiling Medallion Around a Fixture
[Image Prompt: A formal dining room ceiling photographed from below, an ornate white ceiling medallion surrounding a chandelier base, soft ambient light highlighting the carved detail, neutral ceiling color around it, shot with a high-end camera and fine detail focus.]
A ceiling medallion is a small circular detail that frames a light fixture like a picture frame. Lightweight polyurethane versions install with adhesive in under thirty minutes. They instantly dress up a plain pendant or chandelier without any rewiring involved. This is one of the fastest upgrades on this list for the visual impact it delivers. Budget tip: paint the medallion the same color as the ceiling for a subtle look, or pick out the detail in a contrasting shade.
21. Use Peel-and-Stick Tin Tile Panels
[Image Prompt: A small kitchen nook ceiling photographed from below, silver peel-and-stick tin tile panels with a pressed pattern, warm pendant light glowing against the metallic surface, shot on a professional camera with reflective highlights visible.]
For renters who can’t paint or drill, peel-and-stick tin-look panels are a real option. They apply directly over existing ceiling material and come in dozens of finishes, from brushed silver to antique copper. No tools beyond a tape measure and scissors are needed. This works especially well in small kitchens, breakfast nooks, or over a kitchen island. Budget tip: measure the ceiling carefully and order a couple of extra panels in case of cutting mistakes.
22. Highlight a Sloped Ceiling with Wood Paneling
[Image Prompt: An attic bedroom ceiling photographed from below, light wood paneling following the slope of the roofline, natural daylight from a small window, cozy textured surface, shot with a high-end camera capturing warm wood grain detail.]
Sloped ceilings, common in attic rooms, often get ignored or painted plain white. Wood paneling along the slope turns an awkward space into the room’s best feature. Thin tongue-and-groove boards are lightweight and simple to install with a nail gun. Stain them light for a Scandinavian feel or darker for a cozy cabin vibe. DIY tip: prime and finish the boards before installing them, since painting overhead afterward is far more tiring on the arms.
23. Add a Geometric Wood Inlay Pattern
[Image Prompt: A study room ceiling photographed from below, a geometric wood inlay pattern in light and dark tones, natural light casting subtle shadows across the angular design, shot on a professional camera with sharp architectural detail.]
A geometric wood inlay sounds like a high-end carpentry job, but smaller versions are achievable with thin wood strips and a miter saw. Create a simple diamond or chevron pattern centered on the ceiling rather than covering the whole surface. This keeps material costs low while still making a real visual statement. Budget tip: pine strips from a hardware store cost very little and take stain or paint just as well as pricier hardwood.
24. Paint the Ceiling to Match the Walls
[Image Prompt: A cozy reading nook photographed from below, walls and ceiling painted the same warm terracotta tone, soft natural light wrapping the room in color, a single armchair visible below, shot with a high-end camera capturing enveloping warmth.]
Painting the ceiling the exact same color as the walls removes the visual stopping point where a room normally ends. The space feels wrapped in color, almost cocoon-like, and small rooms often feel larger because the eye doesn’t catch on a sharp line. This works particularly well in bold, saturated colors. Budget tip: one gallon of paint often covers both the walls and ceiling of a small room, cutting material costs in half.
25. Add a Built-In Ceiling Fan with Style
[Image Prompt: A sunroom ceiling photographed from below, a wood-blade ceiling fan with a vintage-style light kit, natural light streaming through surrounding windows, warm tones throughout, shot on a professional camera with detail on the fan’s finish.]
Ceiling fans don’t have to look like an afterthought. Modern designs come in brushed brass, matte black, and natural wood finishes that double as a design feature. Swapping a dated fan for a stylish one is a manageable DIY project for anyone comfortable with basic wiring. This upgrade pulls double duty: better airflow and a better-looking ceiling. Budget tip: check the fan’s blade span against the room size first, since an oversized fan can overwhelm a smaller space.
26. Frame the Ceiling with a Painted Border
[Image Prompt: An entryway ceiling photographed from below, a thin painted border tracing the perimeter in a contrasting color, soft natural light, clean white center, shot with a high-end camera capturing crisp, straight paint lines.]
A simple painted border along the ceiling’s edge is one of the easiest treatments to pull off. Tape off a few inches around the perimeter and paint it a shade darker or lighter than the center. The contrast draws the eye outward and gives the room a finished, framed feel. This is a great starter project for anyone testing out a bolder ceiling color without committing to the whole surface. Budget tip: a small sample pot of paint is enough to complete most rooms.
Conclusion
A ceiling is the largest blank canvas most homes have, and it rarely gets the attention it deserves. Whether it’s a coat of dark paint, a few faux beams, or a simple painted border, small changes overhead can change how an entire room feels. None of these projects require a full renovation budget or a professional crew. Pick one room, choose a treatment that fits the weekend ahead, and start looking up.