Shelves are one of the most underrated design tools in any home. Done right, they tell a story about who you live. Done wrong, they look like a storage problem in plain sight. The good news? You don’t need a designer budget or a perfectly decorated home to get this right. These techniques are practical, affordable, and built for real life — the kind of styling that looks collected over time, not assembled in an afternoon.
1. Start With a Neutral Base Layer
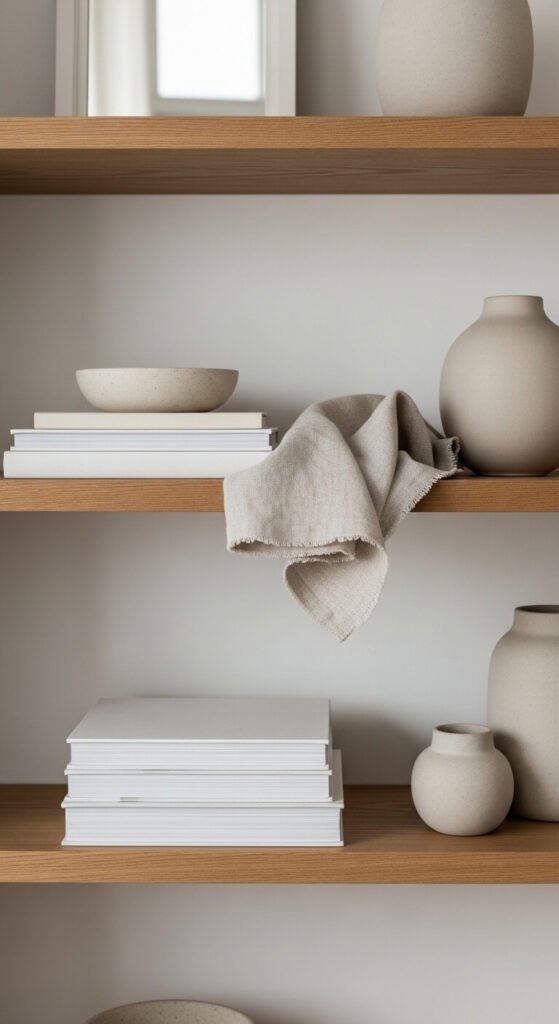
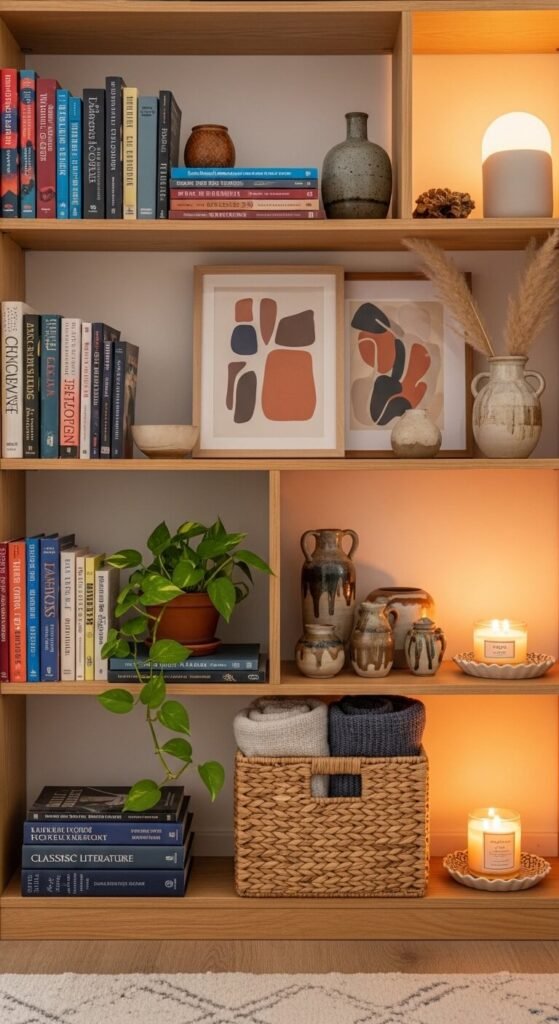
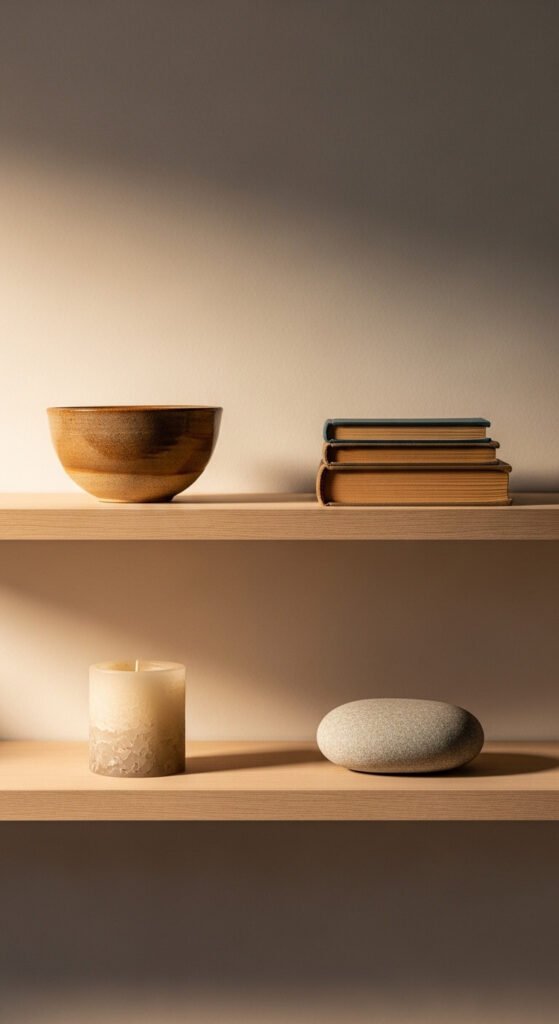
Before adding anything decorative, build your neutral foundation first. This means stacking a few books with their spines turned inward, placing one or two matte ceramics in cream or stone tones, and keeping things calm. Think of it as the background of a painting. Everything else layers on top. This approach stops shelves from feeling chaotic. It gives your eye a place to rest. Cost? Nearly zero if you already own books.
2. Use the Rule of Three
Group objects in threes. It’s one of the oldest styling rules — and it works because odd numbers create visual tension that feels dynamic, not static. Try: one tall item, one medium, one low. A vase, a candle, a small stack of books. Vary the heights so the eye moves around naturally. You don’t need to buy anything new. Raid your kitchen, bathroom, or bookshelf first and experiment before spending a cent.
3. Vary Your Heights Intentionally
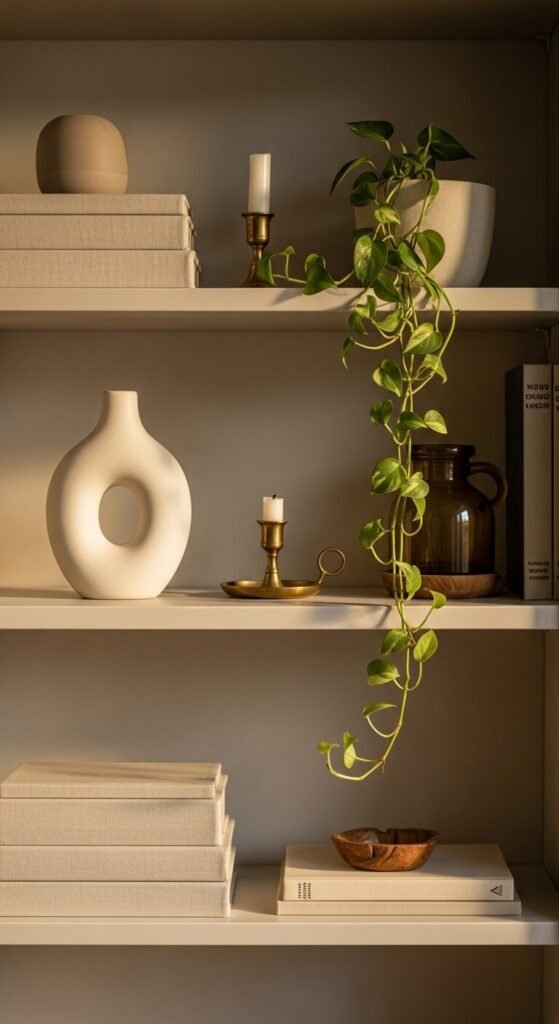
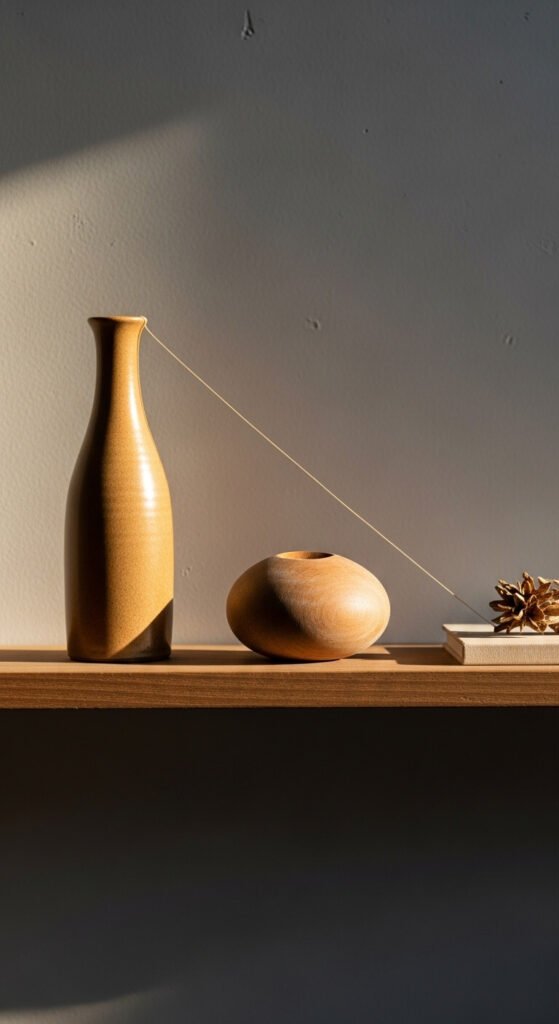
Flat shelves look flat. Height variation is what makes styling feel alive. Stack books to prop up smaller objects. Use a wooden riser or an upside-down bowl to add unexpected lift. Lean artwork at the back to create a tall anchor. Low, medium, and tall — that rhythm makes the eye bounce around instead of glazing over. A simple wooden block from the hardware store costs almost nothing and changes everything.
4. Lean Instead of Hang
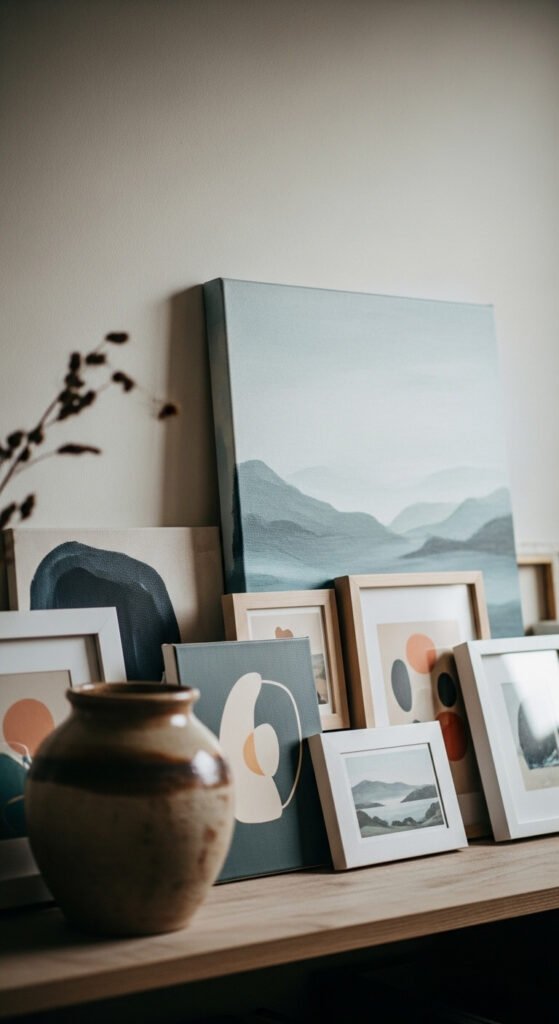
Leaning frames and art against the back of a shelf instead of hammering nails looks effortlessly relaxed. It also means you can move things around freely. Try leaning a small print behind a plant or a candle. Layer a postcard in front of a larger frame. This works especially well for renters. No tools required. Grab frames from thrift stores — the art inside barely matters when the overall composition does the heavy lifting.
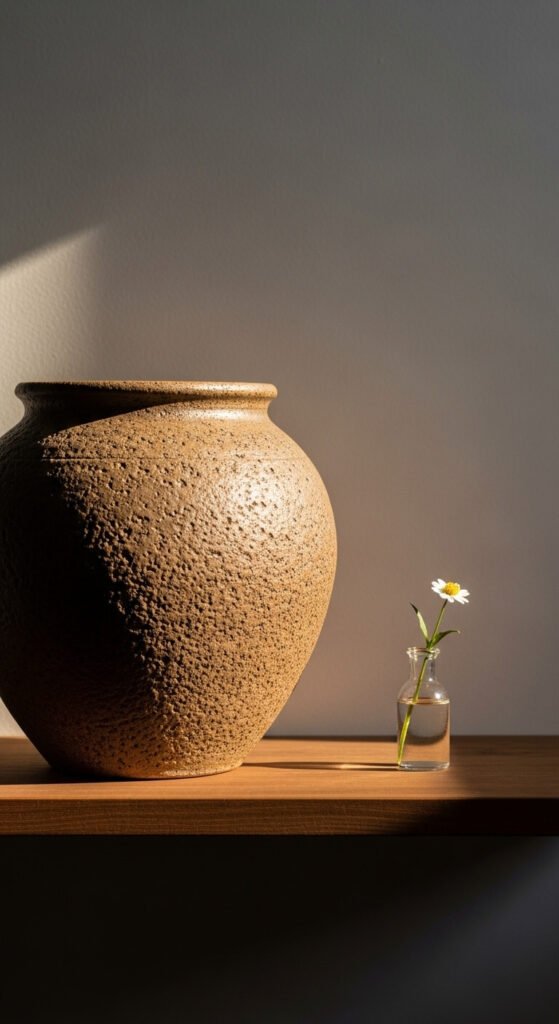
5. Add One Organic Element Per Shelf
Nature breaks up the rigidity of any shelf. One organic element per shelf — a small plant, a dried stem, a smooth river stone, or a piece of driftwood — adds life without overwhelming the space. A tiny pothos in a terracotta pot costs a few dollars and practically styles itself. Don’t overthink it. Just make sure the organic piece touches or overlaps something nearby. Isolation makes it look like an afterthought.
6. Create Depth With Layering
Shelves have depth — use it. Place items at different distances from the shelf edge to create a sense of dimension. Something at the back, something in the middle, something right at the front lip. This layering trick makes the shelf feel like a small landscape. It works especially well with books as the back layer. No money needed — it’s purely about repositioning what you already own.
7. Let Negative Space Breathe

Empty shelf space is not wasted space. It’s breathing room. Over-stuffed shelves look like a storage unit — not a styled home. Leave whole sections bare. Let one beautiful object stand alone with open air on either side. This is the fastest way to make your styling look more expensive. Resist the urge to fill every gap. Edit ruthlessly. Remove three things from your current shelf and notice how much better it looks immediately.
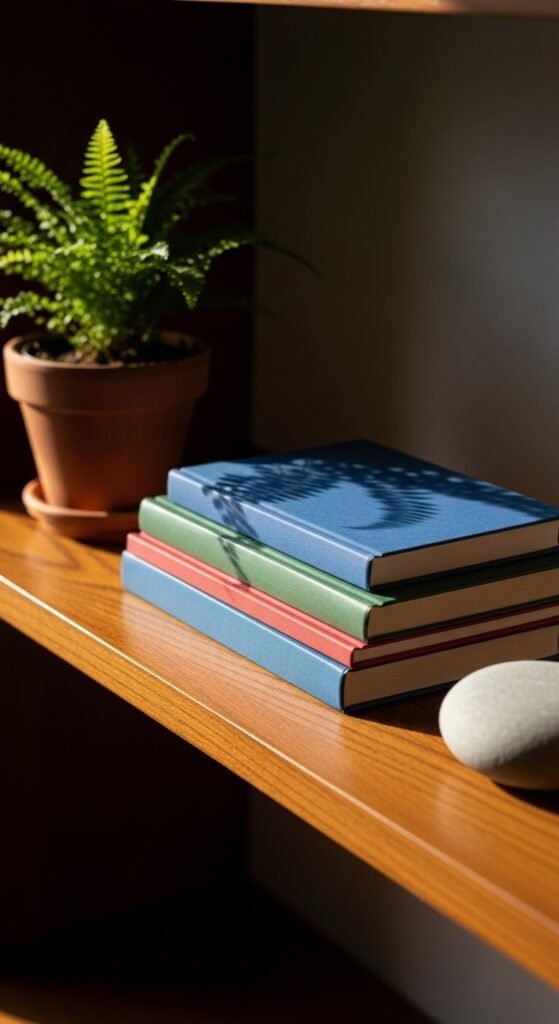
8. Stack Books Horizontally
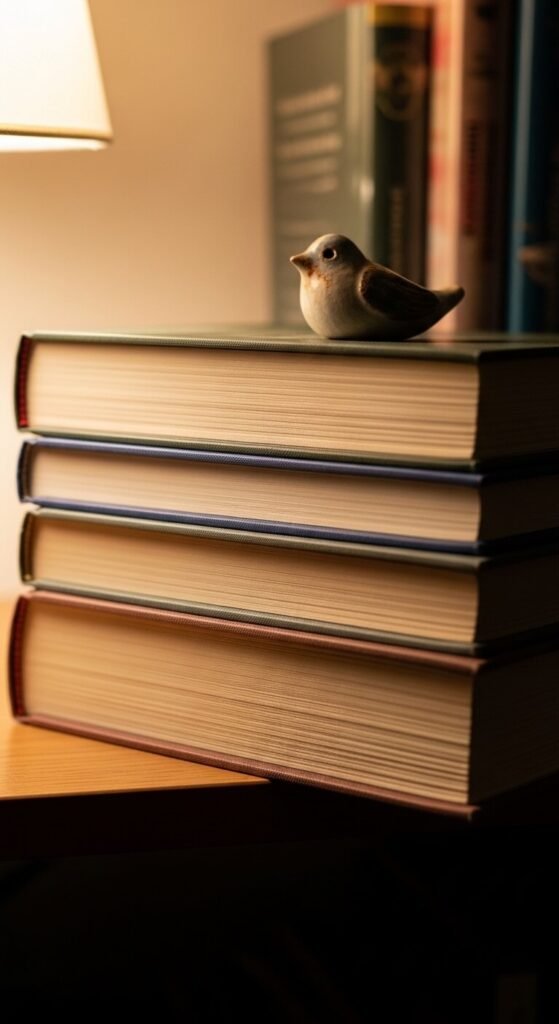
Horizontal book stacks are more useful than vertical rows. They create platforms for smaller objects — a candle on top, a small sculpture, a trailing plant that drapes over the edge. They also break the monotony of a row of vertical spines. Mix both orientations on the same shelf for visual interest. Remove the dust jackets from your hardcovers for a cleaner, more cohesive look — it costs nothing and makes a noticeable difference.
9. Group by Color, Not Category
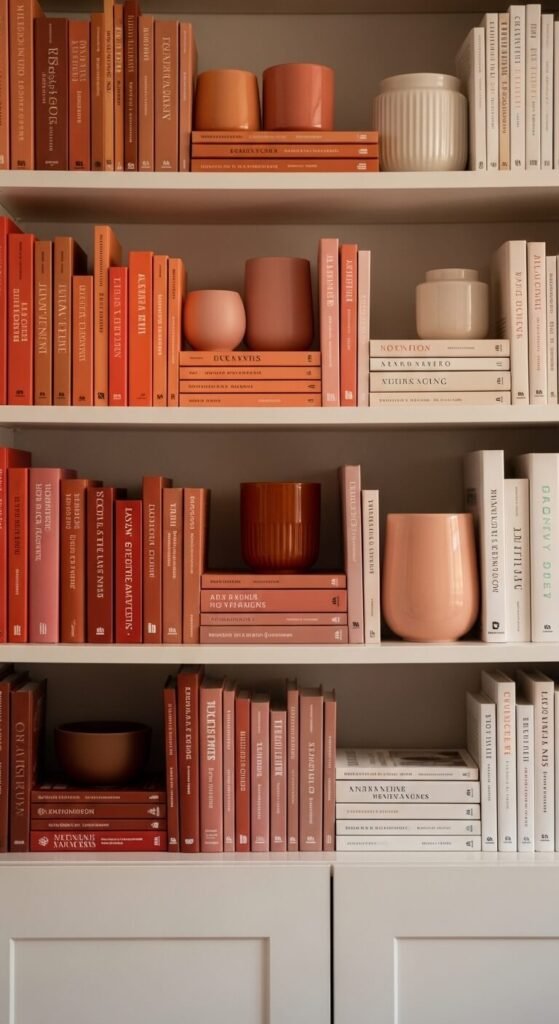
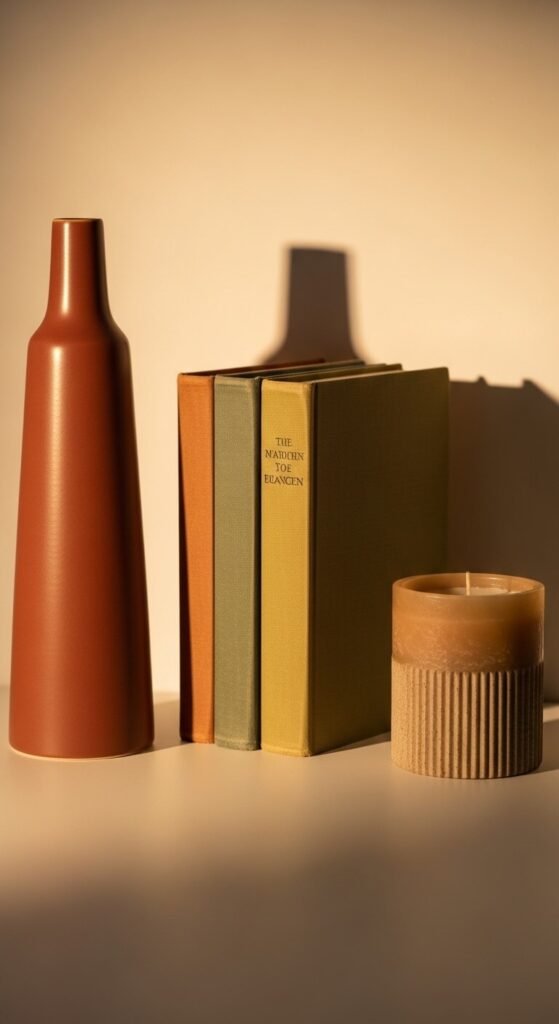
Instead of organizing by type, group things by color tone. Books, objects, plants — arrange them so warm tones sit together, cool tones cluster elsewhere. This creates a visual flow that reads as intentional. It works beautifully with books when you remove the dust jackets. The result looks like a curated gallery, not a random pile. You won’t spend anything — just rearrange what you already have.
10. Introduce Texture Contrast
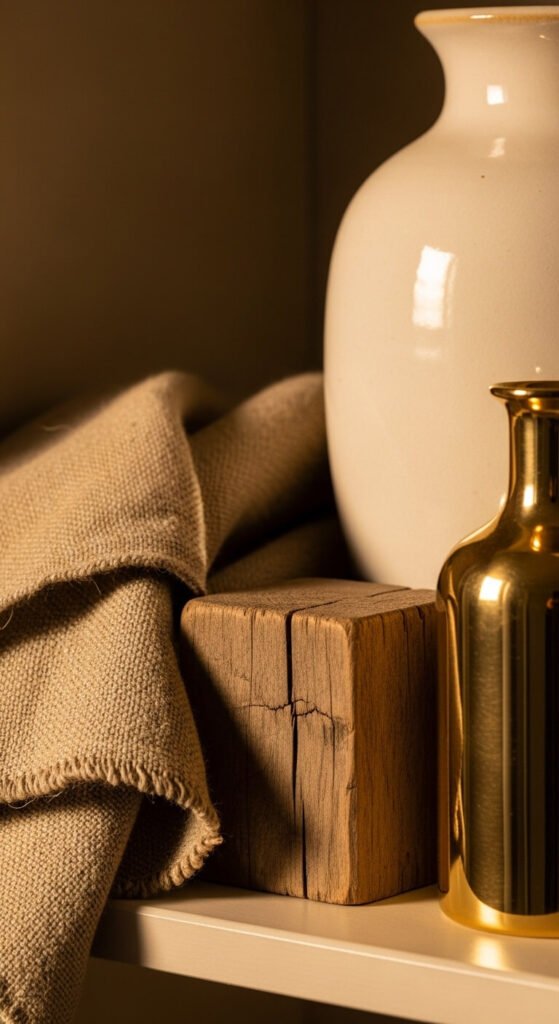
Texture does the work that color can’t. Rough next to smooth. Matte next to shiny. Woven next to ceramic. A raw linen runner under a glazed pot. A weathered wooden box beside a polished brass candle holder. You don’t need expensive pieces — you need contrast. A simple linen napkin from the kitchen folded under a vase adds instant warmth. Focus on how things feel visually, not just how they look.
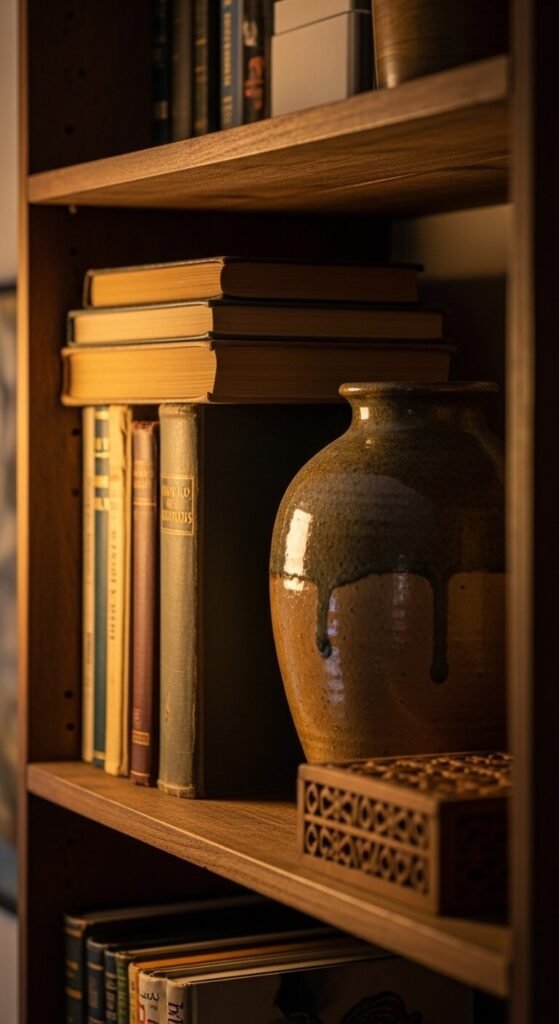
11. Use Books as Architecture
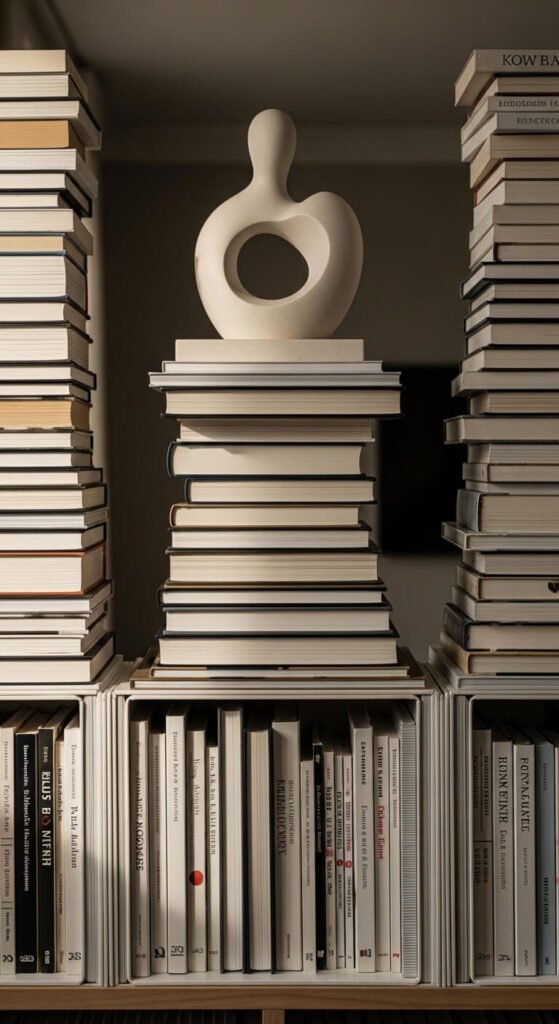
Books are structural tools, not just reading material. Use tall vertical stacks as bookends to contain a central arrangement. Build a low platform of horizontal stacks on one side. Prop a frame or small artwork against a leaning stack. Think of books as furniture within the shelf. Mismatched spines? Turn them inward. This is one of the easiest styling tricks that also clears up visual noise at zero cost.
12. Add a Mirror or Reflective Surface
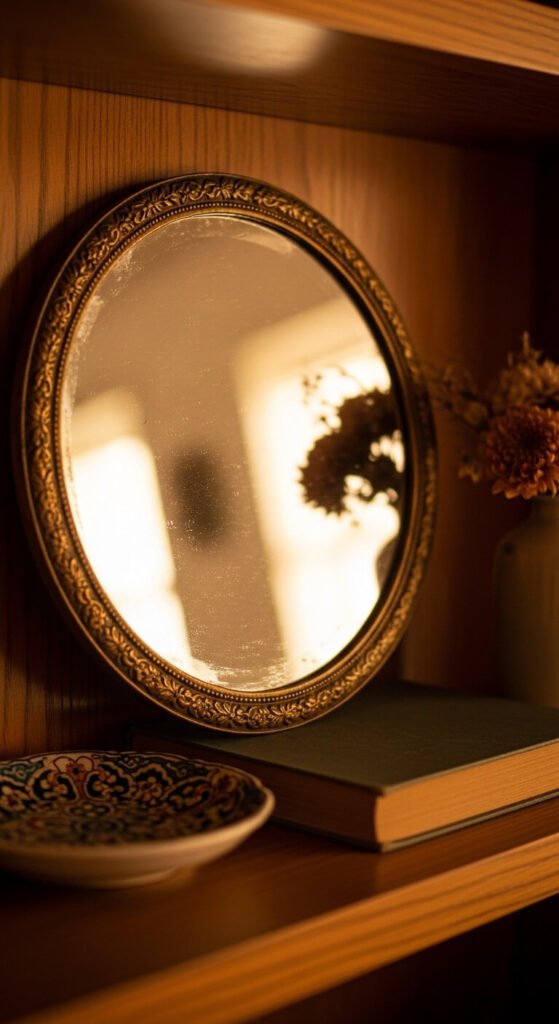
A small mirror on a shelf adds depth, light, and a sense of space — even in a dark corner. Lean it rather than mounting it. A convex mirror, an antique hand mirror, or even a small decorative mirror from a thrift store all work beautifully. The reflection picks up surrounding objects and doubles the visual interest of the arrangement. Thrift stores usually have several options for under $10.
13. Anchor With One Large Statement Piece
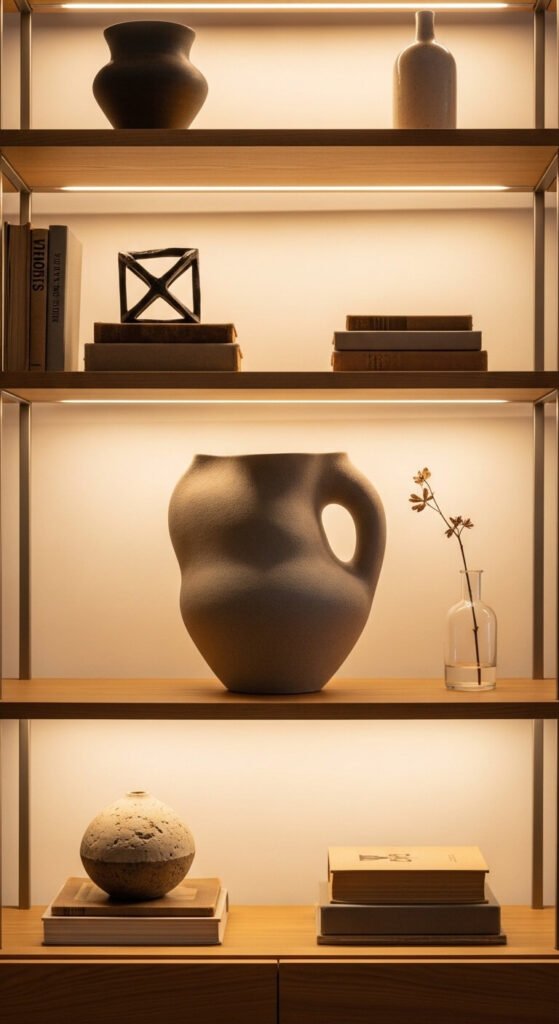
Every shelf arrangement needs one dominant piece that anchors the whole composition. A large ceramic, a bold piece of art, an oversized candle — something that immediately catches the eye. Everything else plays a supporting role. Without an anchor, a shelf looks like a collection of equally weighted objects competing for attention. You likely already own something large enough. Pull it forward and let it lead.
14. Try the Triangle Composition
Draw an imaginary triangle between your three main objects. Tall on one side, medium in the center or at an angle, low on the other end. This composition guides the eye in a loop rather than a straight horizontal line. It’s the same principle used in fine art composition — and it works just as well on a $30 IKEA shelf. Rearrange what you have using this triangle and the difference is immediate.
15. Incorporate Personal Objects Thoughtfully
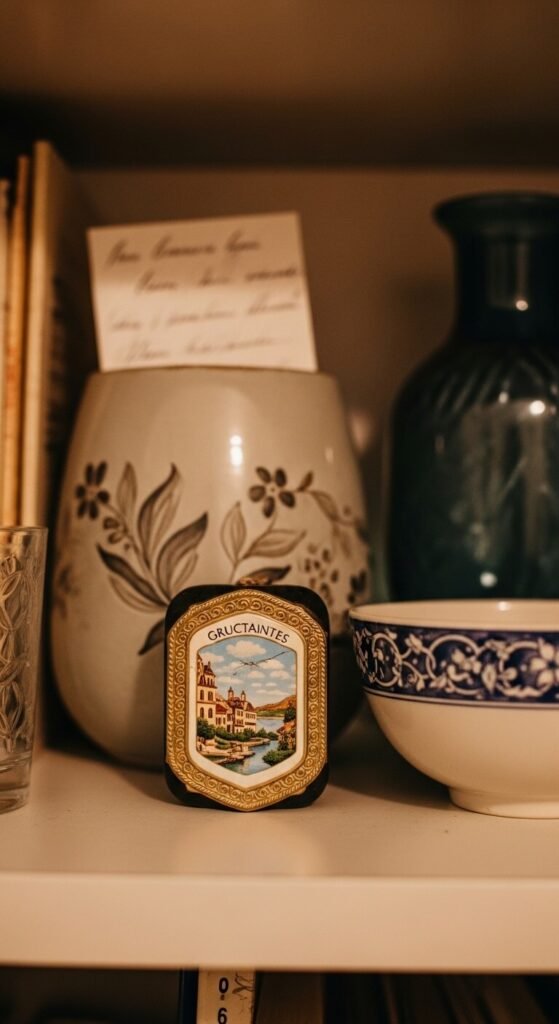
Meaningful objects make a shelf feel real, not staged. A travel souvenir, an inherited dish, a child’s small sculpture — these add soul. The trick is to style around them rather than just placing them randomly. Give each personal piece one or two supporting objects that share its scale or color tone. This frames the item without it looking out of place. You already own these pieces — it’s just about giving them the right setting.
16. Use Baskets and Boxes to Hide Clutter
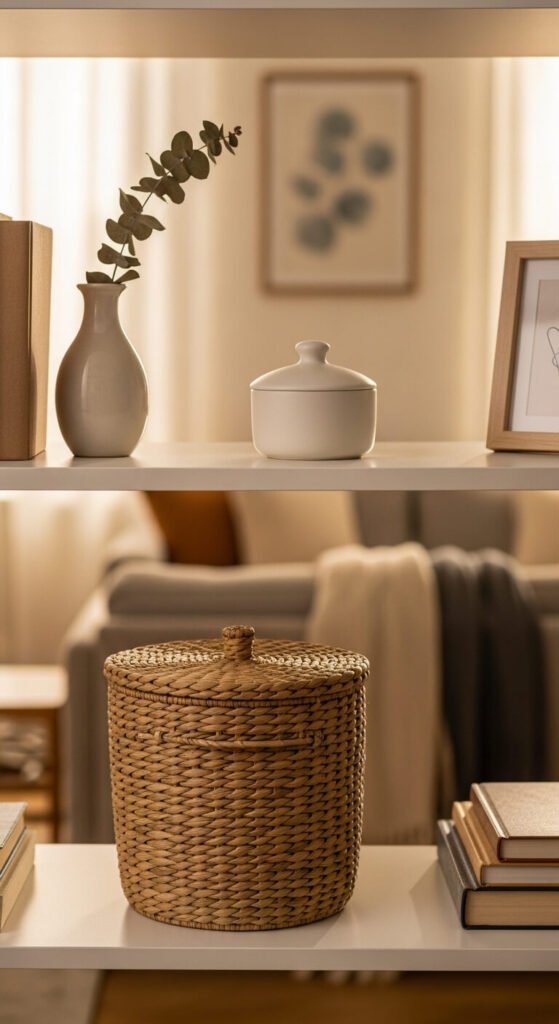
Concealed storage is part of styling. A woven basket on a lower shelf, a lidded ceramic box on an upper one — these hide clutter while adding texture and practicality. Style around them like any other object. Baskets from discount stores or thrift shops are usually under $15 and look far more expensive once placed on a shelf with a few curated items around them. Function and form in one move.
17. Play With Scale Contrast
Big next to small creates drama. A large ceramic beside a tiny bud vase. An oversized candle lantern next to a small stone. Scale contrast stops arrangements from feeling uniform and flat. It’s one of the most powerful and most overlooked tools in shelf styling. You don’t need to buy big — you might already have a large kitchen vessel or oversized bowl that could anchor a shelf beautifully.
18. Use a Color-Pulled Accent
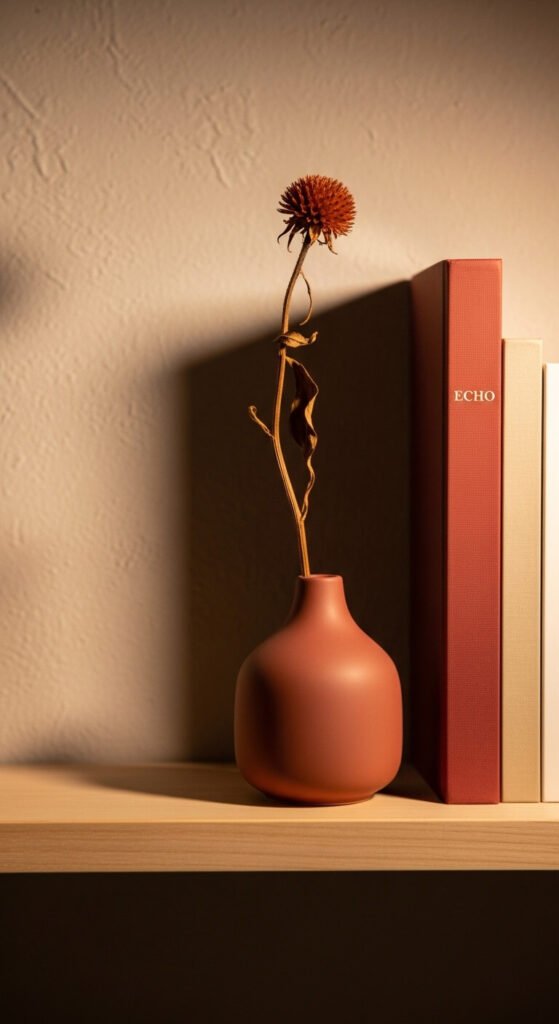
Pull one color from a book spine or artwork and repeat it in two other objects on the same shelf. A terracotta book cover echoed in a small clay pot and a dried flower stem. This color echo creates a sense of intention without feeling matchy-matchy. It’s a subtle trick that professional stylists use constantly. Scan what you already own for color matches before buying anything.
19. Style in Zones, Not Rows
Divide your shelves into zones rather than treating each shelf as a separate row. Group a cluster of objects on the left side of one shelf, leave the right open. On the shelf below, do the opposite. This asymmetry reads as thoughtful and artistic rather than overly organized. Think of each shelf as part of a larger composition — the whole unit should feel balanced when you step back and look at it from across the room.
20. Drape Something Soft
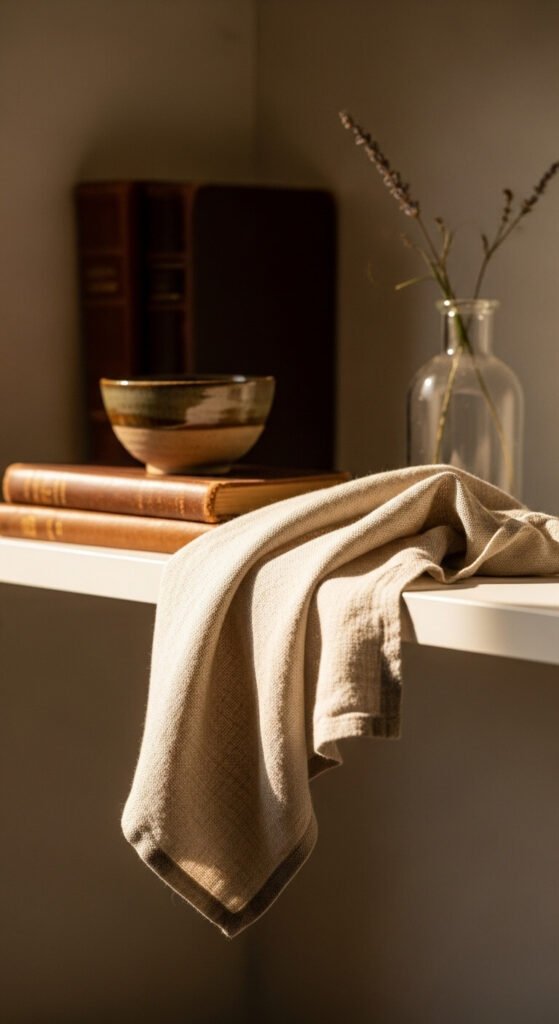
A piece of fabric changes the feel of any shelf. Drape a small linen cloth, a loose knit, or a cotton napkin over the edge of a shelf. Let it fall naturally — don’t straighten it. This soft, organic element makes a shelf feel warm and layered in a way that objects alone can’t achieve. A linen napkin from the kitchen costs almost nothing. Drape it casually, arrange a few objects on top, and the whole shelf softens.
21. Add a Trailing Plant for Movement
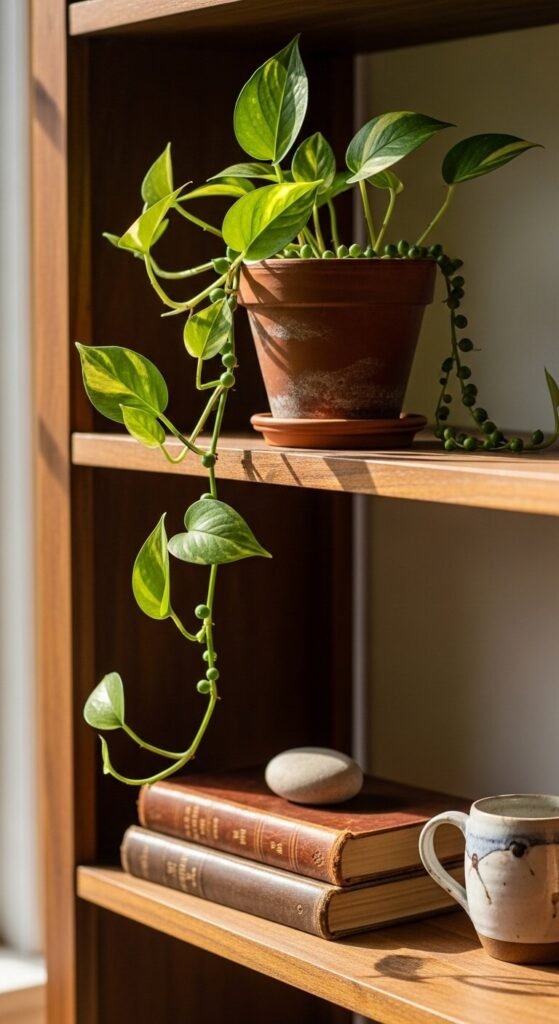
Trailing plants add movement — and movement makes shelves feel alive. A pothos, string of pearls, or ivy in a simple terracotta or ceramic pot with its vines draping over the shelf edge creates an organic, cascading effect. It draws the eye downward and adds a sense of growth to the arrangement. Pothos cuttings can often be sourced for free from friends or local plant swaps.
22. Edit Ruthlessly and Often
The best styling decision is often removal. Take everything off your shelf and put back only what you genuinely like. Be ruthless. If something doesn’t add anything visually, it doesn’t earn its spot. Most people’s shelves improve dramatically when 30–40% of the objects are taken off entirely. Store the extras in a box and rotate them seasonally. This costs nothing and is the single most effective thing you can do right now.
23. Use Candleholders at Multiple Heights

Candleholders create atmosphere and height variation at once. Group two or three at different heights — a short squat holder, a medium taper, a tall pillar stand. This cluster becomes its own styled moment. Unlit, they still look beautiful during the day. Thrift stores almost always have candleholders in interesting shapes for $2–5 each. Spray paint them the same color for a cohesive, expensive-looking set.
24. Anchor a Corner With Something Tall
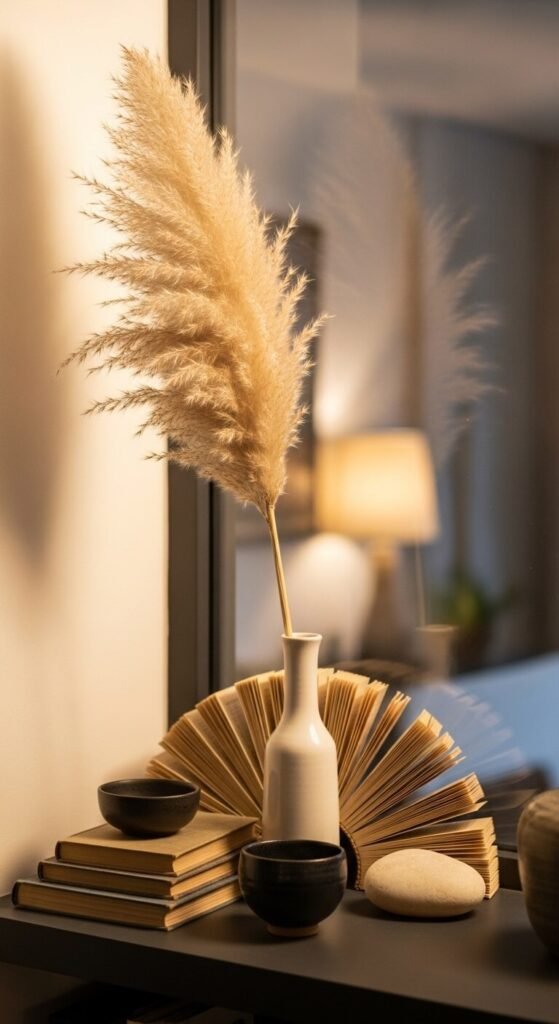
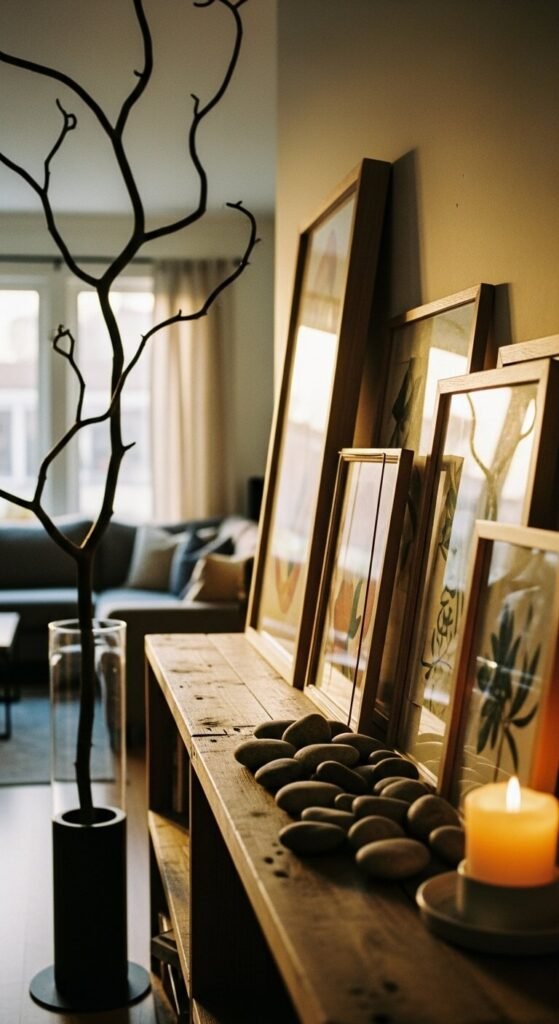
Every strong shelf arrangement needs a vertical anchor. A tall dried stem in a slim vase. A stacked tower of books. A slender sculptural piece. This tall element gives the arrangement a backbone that shorter objects can lean against visually. Place it slightly off-center rather than dead center for a more natural feel. Dried pampas or eucalyptus from a grocery store or farmers market is an affordable and long-lasting option.
25. Create a Mini Gallery Wall Behind Objects
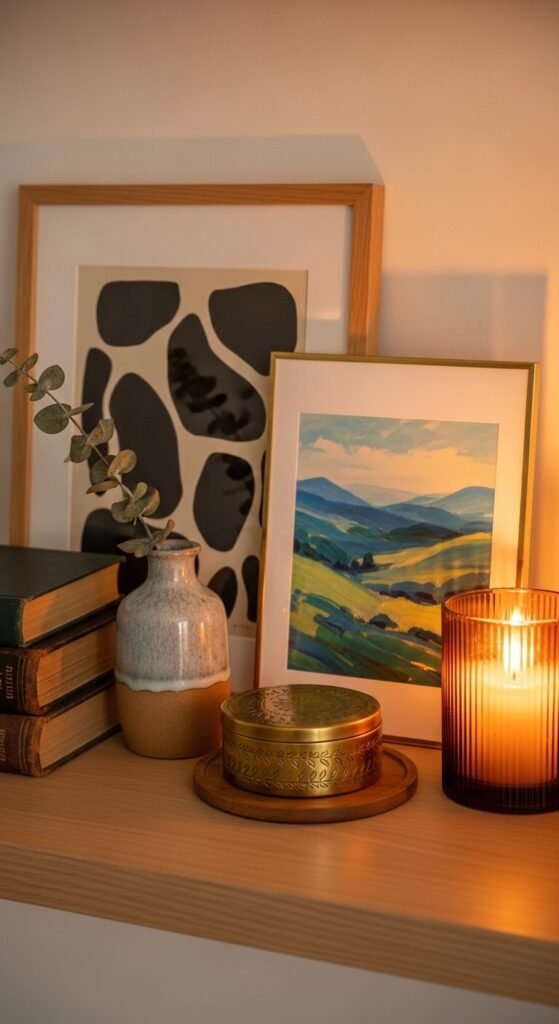
Layering small frames behind your objects creates a mini gallery effect right on the shelf. Lean two or three small prints or artworks against the back wall. Place objects in front at varying heights so everything overlaps slightly. This depth and layering makes a shelf look like a carefully composed still life. Frames from discount stores, filled with printed art or even torn magazine pages, work perfectly here.
26. Rotate Seasonally to Keep It Feeling Fresh
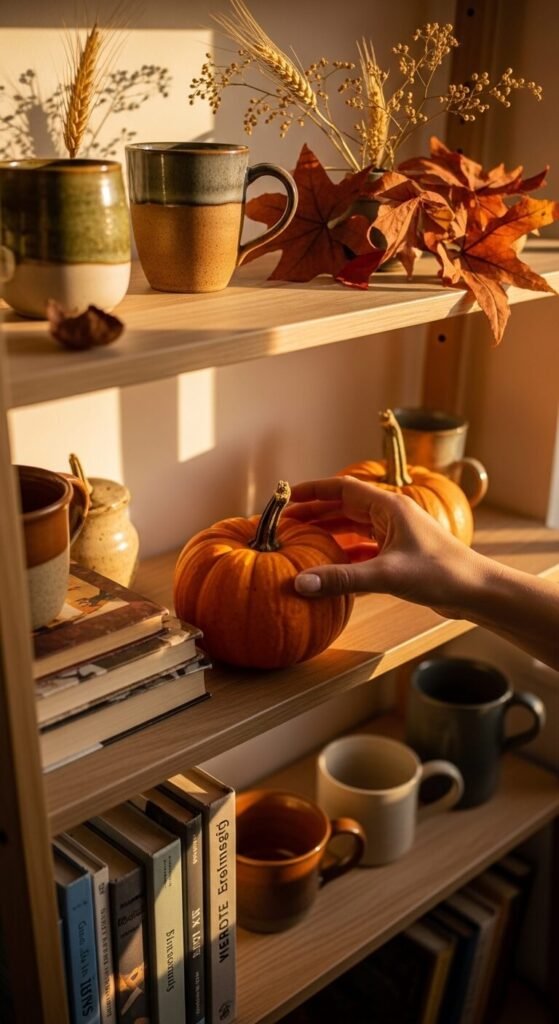
Shelf styling isn’t a one-time event. Swap in seasonal objects every few months — a small pumpkin in autumn, a pine cone cluster in winter, fresh florals in spring. Pull pieces from other rooms and rotate them onto the shelf. This habit keeps your space feeling current and considered without buying anything new. Keep a small box of styling objects — stones, candles, seasonal finds — that you can rotate in and out easily.
Conclusion
Styling a shelf well has nothing to do with how much you spend. It has everything to do with how you look at what you already own. Use height, texture, layering, and empty space as your main tools. Edit more than you add. Rotate things seasonally to keep the arrangement feeling current. Start with just one shelf — clear it completely, apply two or three of these techniques, and step back. You’ll see the difference immediately. Small, deliberate choices made repeatedly are what turn an ordinary shelf into something that looks like it belongs in a magazine.