Walking into an unfinished basement feels like staring at a blank canvas — raw potential hidden beneath dusty joists and bare concrete. That space beneath your feet could become a home theater, a guest suite, a kids’ playroom, or a quiet home office. The good news? You don’t need a massive budget or a contractor on speed dial. With the right approach, finishing your basement adds real square footage, serious resale value, and a room your family will actually use every single day.
1. Start With a Simple Framing Plan
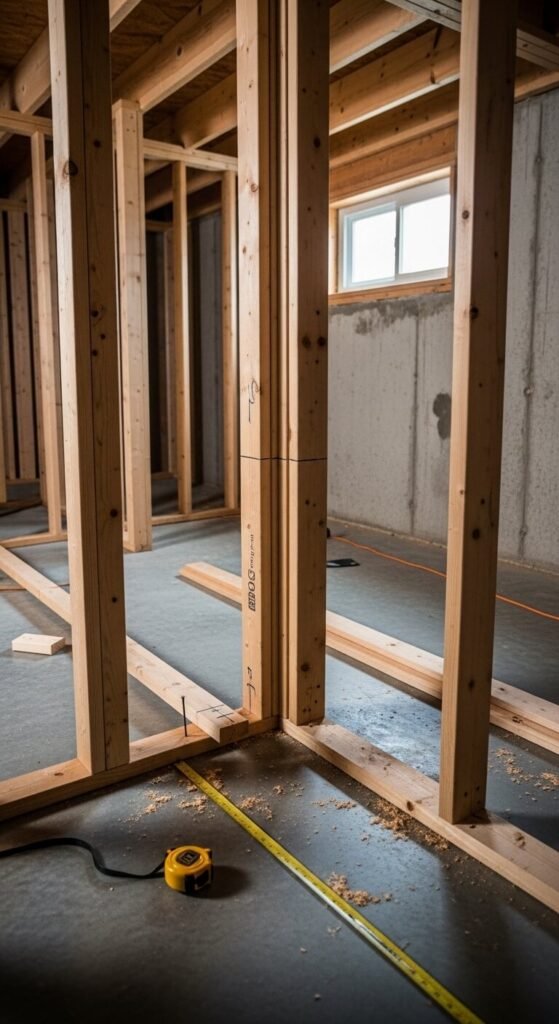
Framing is the skeleton of your finished basement. Start with a simple sketch before buying a single board. Identify where your walls will go, where doors are needed, and how to frame around pipes or beams. Standard 2×4 lumber on 16-inch centers works for most basement walls. Keep the framing 1 inch away from the concrete foundation wall to prevent moisture issues. A basic framing plan saves money and prevents costly mistakes later. Many DIYers frame a full basement in a single weekend with just a miter saw, drill, and some patience.
2. Install Drywall for a Polished Look
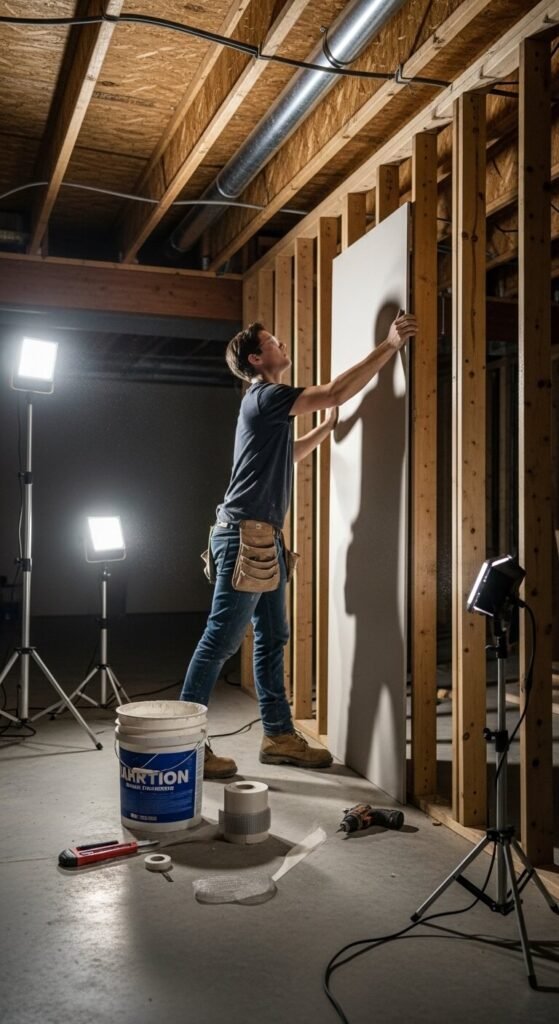
Drywall transforms a framed basement into a real room fast. Standard ½-inch drywall works on walls, but use moisture-resistant greenboard near any bathroom or utility area. Hang sheets horizontally for fewer seams. Tape, mud, and sand in three thin coats for smooth results — don’t rush this step. Budget around $1.50–$2.00 per square foot for materials. If you’re new to drywalling, watch a few tutorials first. The process is forgiving with practice. A smooth finish makes painting easier and gives the whole basement a clean, finished feel.
3. Choose Basement-Friendly Flooring
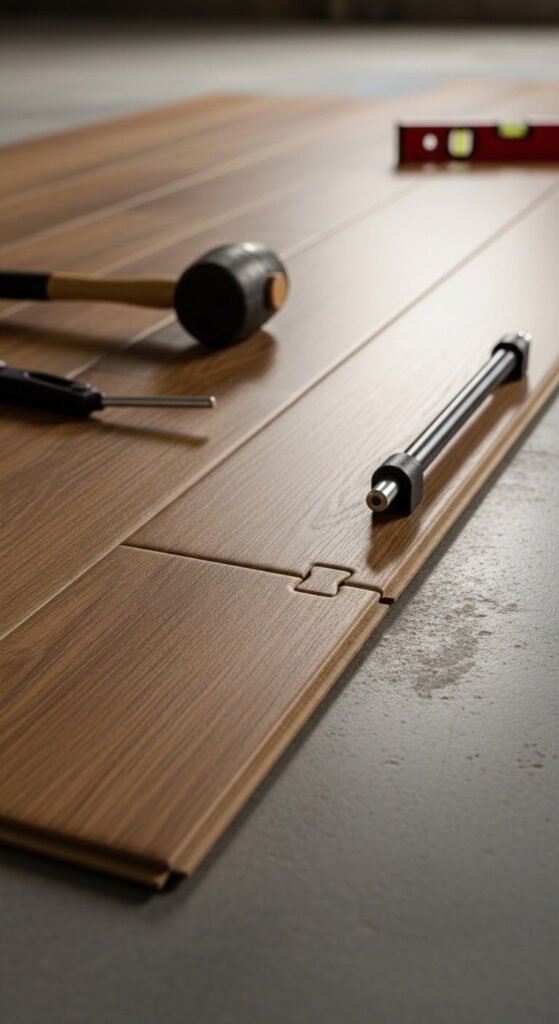
Concrete floors are cold and hard — nobody wants to live on them. Luxury vinyl plank (LVP) is the best all-around choice for basements. It’s waterproof, comfortable underfoot, easy to install, and comes in realistic wood and stone styles. A floating LVP floor can go directly over concrete with minimal prep. Budget around $2–$5 per square foot. Avoid hardwood — it warps with moisture. Laminate is risky too. If you want extra warmth, lay foam underlayment beneath the planks. It makes a huge difference on cold winter mornings.
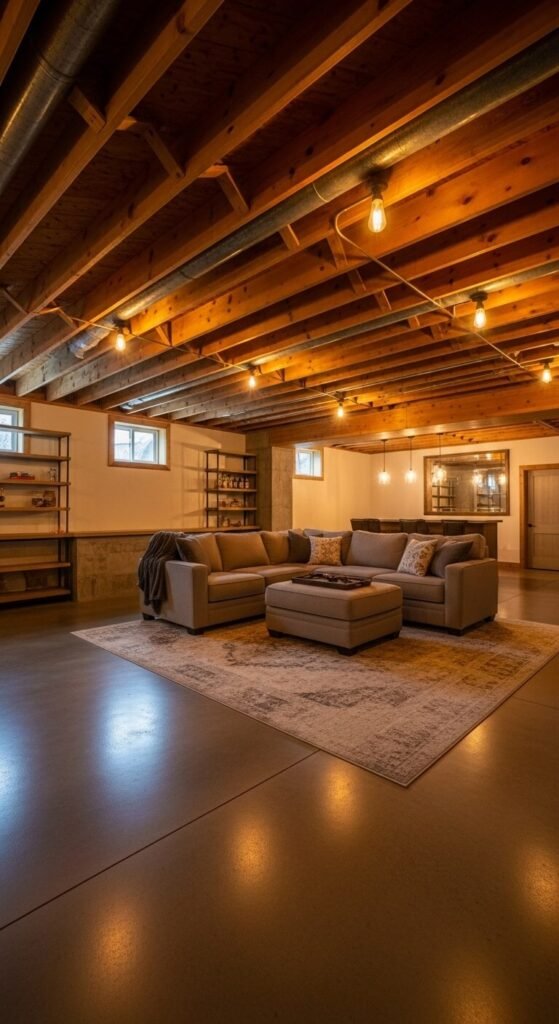
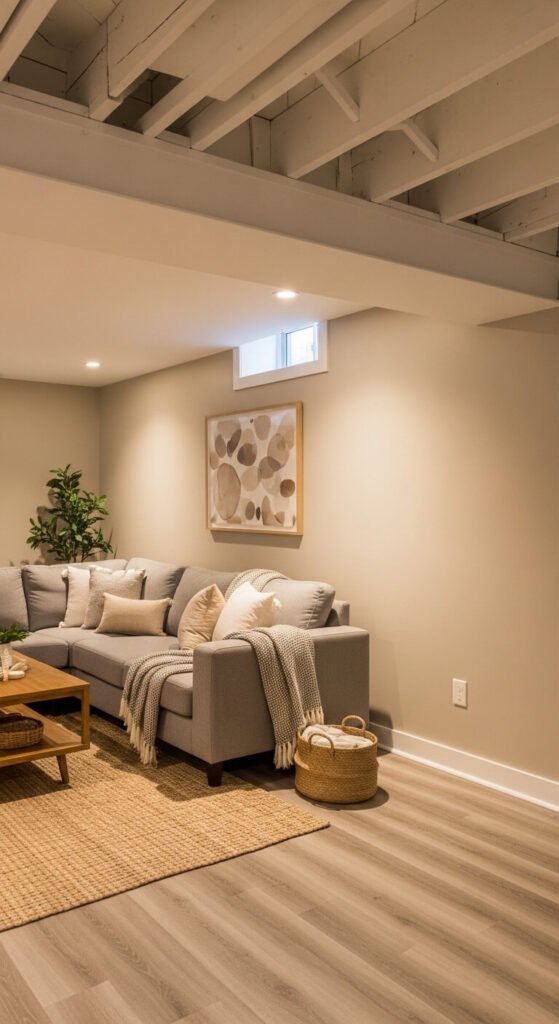
4. Drop Ceiling vs. Drywall Ceiling
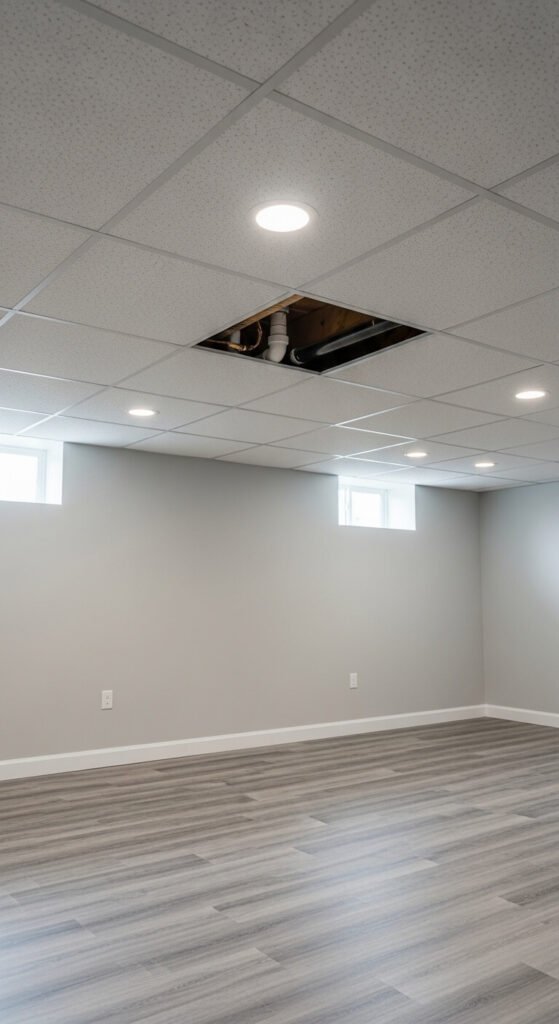
Ceilings define how a finished basement feels. Drop ceilings (suspended grid systems) are popular because they allow easy access to pipes and wiring above. They cost around $2–$4 per square foot for materials and go up quickly. Drywall ceilings look cleaner but hide all the mechanicals — future repairs become a bigger deal. If your basement has lots of plumbing or ductwork, drop ceilings win hands down. Want a modern look? Try a painted grid with acoustic tiles in a contrasting color. It can look surprisingly stylish on a tight budget.
5. Add Recessed Lighting for a Clean Finish
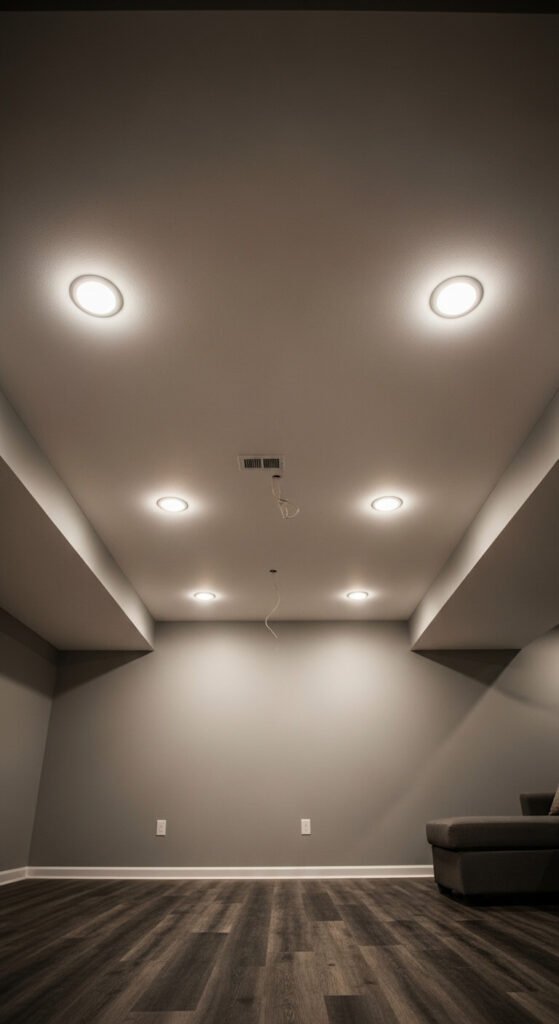
Overhead lighting changes everything in a basement. Recessed LED lights (also called can lights) are the go-to choice. They sit flush with the ceiling, look modern, and throw light evenly across a room. Space them about 4–6 feet apart in a grid pattern. LED retrofit kits make installation simple — even for DIY beginners comfortable with basic electrical work. A 6-inch LED recessed light costs around $10–$20 each. Add a dimmer switch for flexibility. Bright lighting makes basements feel less cave-like, which helps the whole space feel bigger and more welcoming.
6. Build a Home Office Nook

A dedicated workspace at home is worth its weight in gold. Carve out a corner of your basement for a home office — you don’t need a whole room. A floating wall-mounted desk, a comfortable chair, and good lighting are all it takes. Add a small bookshelf and cable management strips to keep things tidy. Paint the nook a different color from the rest of the basement to visually define the space. A simple room divider or half-wall adds privacy without blocking light. Budget under $500 for a complete DIY office nook setup.
7. Create a Kids’ Playroom
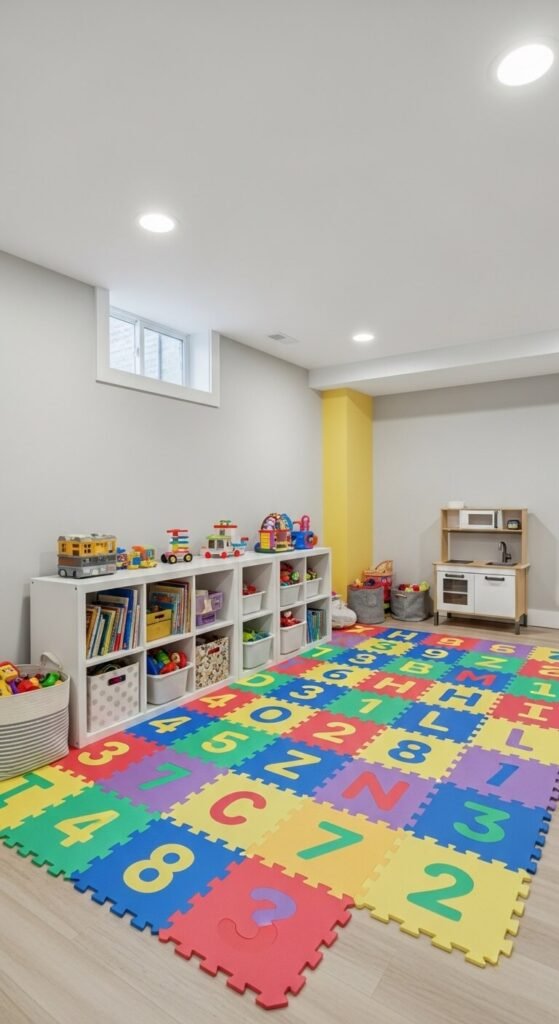
Basements are perfect for kids’ playrooms — mess stays contained below stairs. Foam interlocking floor tiles are soft, easy to clean, and cost about $1–$2 per square foot. Paint walls in bright, cheerful colors. Add low open shelving for toy storage — bins and baskets keep things organized. A chalkboard wall (just use chalkboard paint) gives kids a creative outlet. Keep electrical outlets covered and make sure the space is well-lit. A playroom basement also protects your main living areas from toy chaos, which every parent genuinely appreciates.
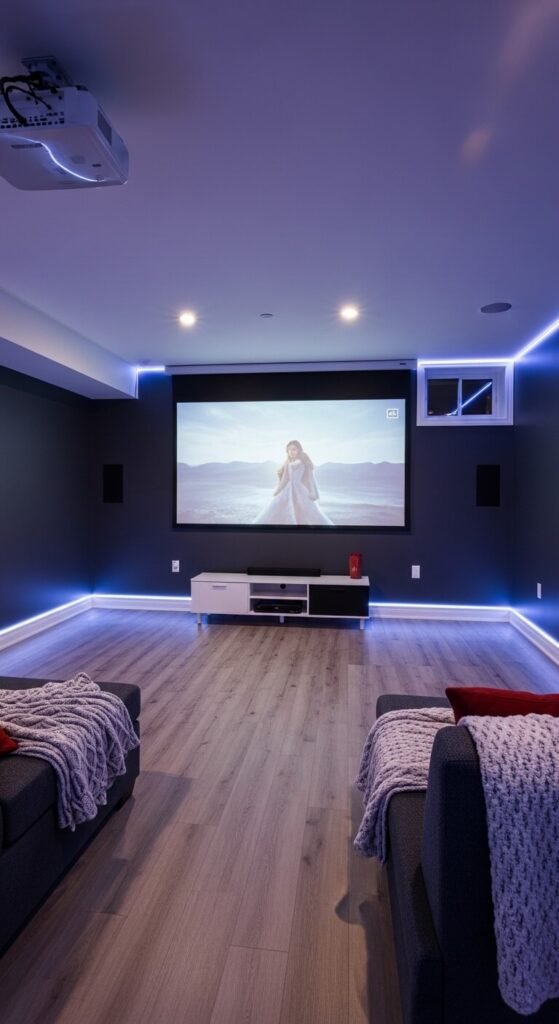
8. Design a Cozy Home Theater

A basement home theater is a crowd favorite. Start with a large TV or projector mounted on a dark-painted wall — dark walls reduce glare and improve picture quality. Add blackout curtains over any windows. Tiered seating (a simple raised platform with recliners) improves sightlines for everyone. LED strip lighting behind the screen and along the floor creates atmosphere without washing out the picture. A soundbar or basic surround sound setup completes the experience. Total cost can range from $2,000 to $5,000 depending on equipment, making it a popular mid-range basement project.
9. Finish a Basement Bathroom
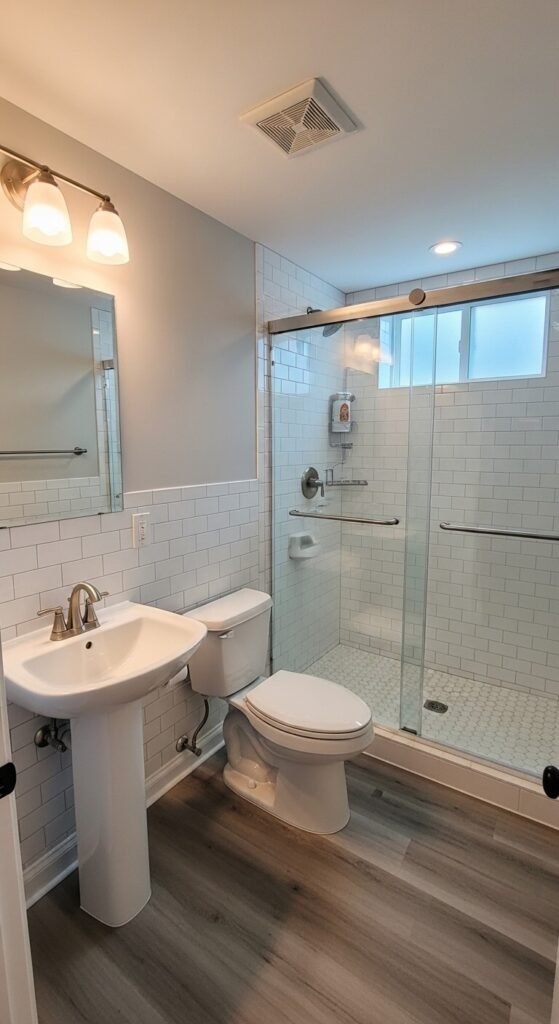
Adding a bathroom to your basement makes the whole floor livable. A basic 3-piece bathroom (toilet, sink, shower) costs between $5,000–$15,000 installed depending on plumbing complexity. The biggest variable is whether you need to break concrete for a drain rough-in. If the previous owners already roughed in plumbing, you’re saving thousands. Keep the design simple — white subway tile, a pedestal sink, and a compact shower stall. Proper ventilation is non-negotiable: install an exhaust fan to prevent moisture buildup, which protects your entire basement investment.
10. Build a Wet Bar or Beverage Station
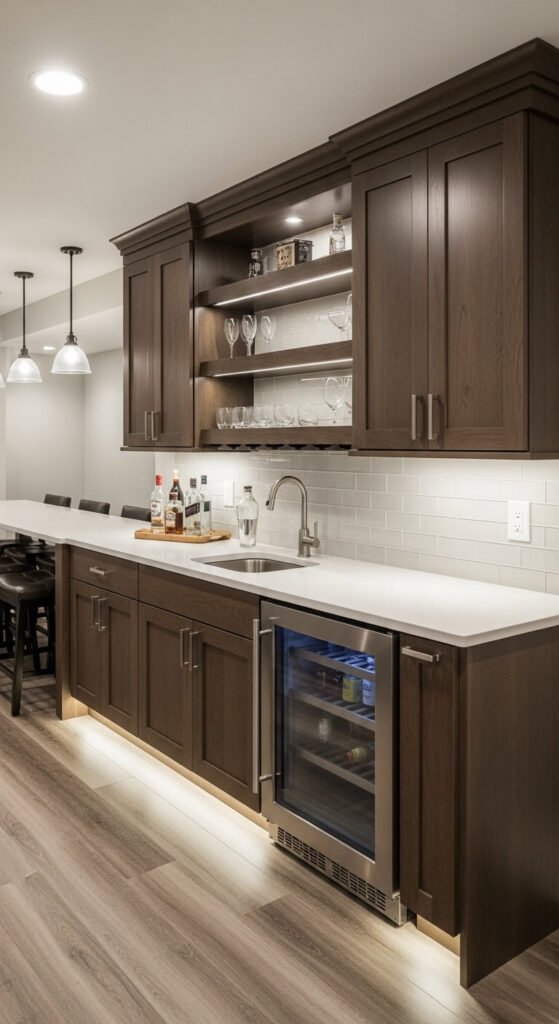
A wet bar makes your basement the go-to hangout spot. Start with base cabinets, a bar sink, and a small countertop. Add open shelving above for glasses and bottles. A mini fridge or wine fridge built into the lower cabinet is a game-changer. You’ll need a plumber to run a water line and drain — budget $500–$1,500 for that alone. Cabinet kits from home improvement stores keep costs manageable. A wet bar adds real perceived value to your home and is one of those features buyers consistently mention during showings.
11. Set Up a Guest Bedroom
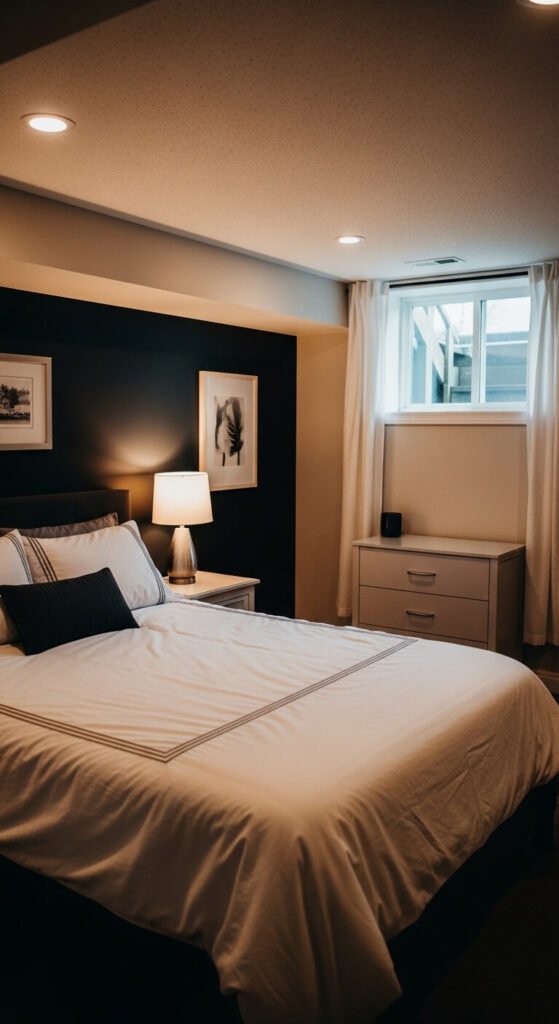
A basement guest bedroom requires one critical thing: a proper egress window. Building codes in most areas require an egress window in any sleeping room — it’s both a legal and safety requirement. Beyond that, a guest bedroom is simple to pull off. Use warm lighting, a comfortable bed, and enough closet space for visitors. A small ceiling fan keeps the room comfortable year-round. Paint in warm, neutral tones to counteract the underground feel. A well-finished guest room also doubles as an Airbnb opportunity for extra income in the right markets.
12. Install an Egress Window
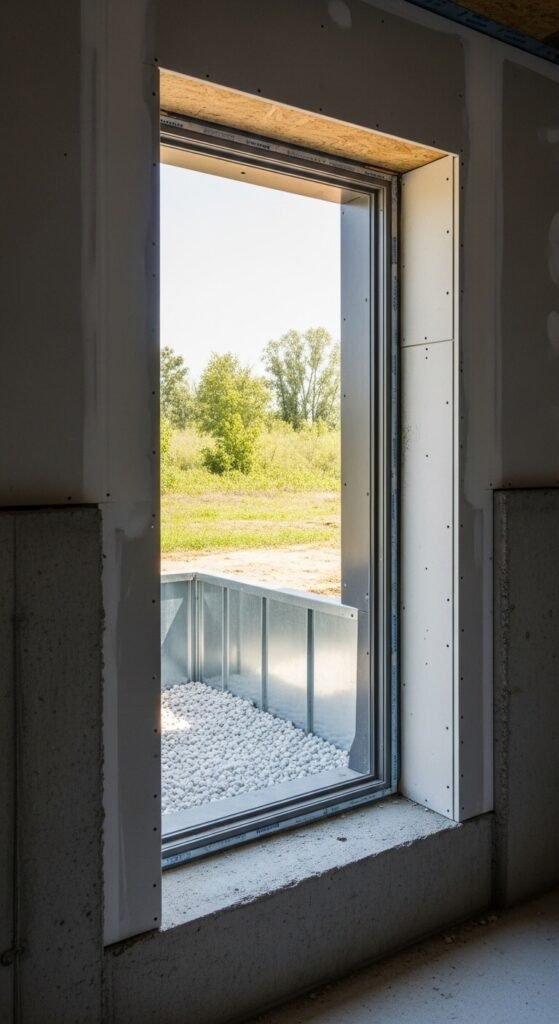
Egress windows are the single best upgrade for a dark, cave-like basement. They bring in natural light and fresh air, meet building code for bedrooms, and make the space feel dramatically less underground. Expect to pay $3,000–$5,000 professionally installed — the job involves cutting through concrete foundation walls. DIY is possible but requires specialized tools and careful waterproofing. The window well outside needs proper drainage to prevent water pooling. Even if you’re not adding a bedroom, one or two egress windows transform how a basement feels from the moment you walk down the stairs.
13. Build a Home Gym
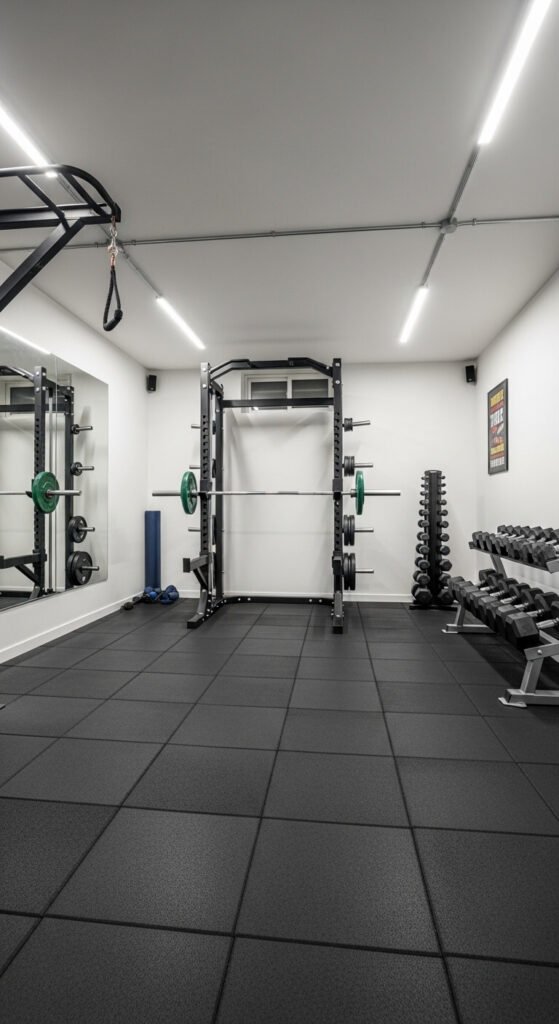
Basements are ideal for home gyms — low ceilings don’t matter much, and noise stays contained. Start with rubber flooring tiles — they protect the concrete and your joints. A squat rack, barbell, and a set of adjustable dumbbells cover 90% of workouts. Mount a large mirror on one wall to check form. Shop lights (not canned lights) give bright, even illumination cheaply. Keep the space minimal and functional. You can build a solid home gym for $1,500–$3,000 — a fraction of what a year’s gym membership costs over time, especially for a family.
14. Add a Laundry Room Upgrade
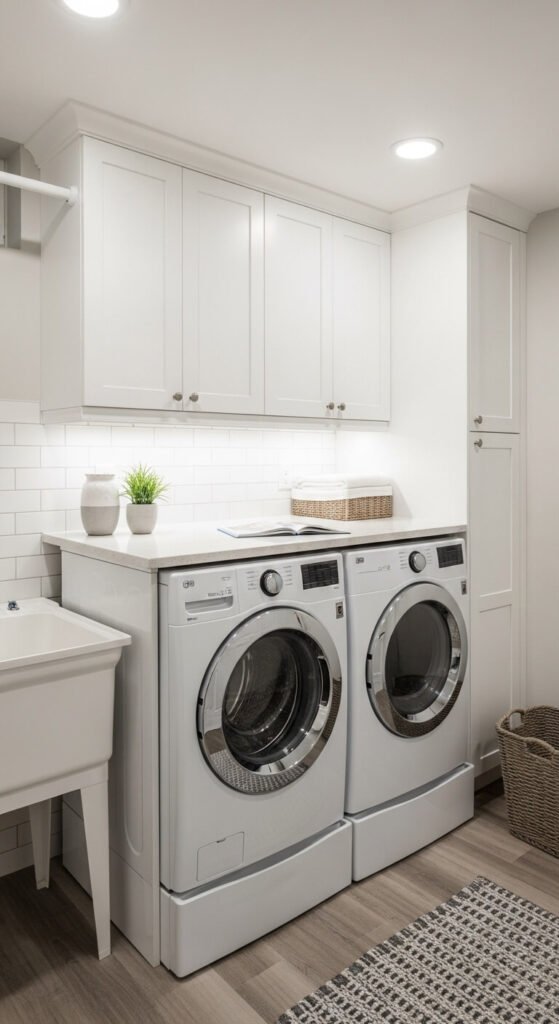
Many basements already have laundry hookups — make that area a real room. Add upper cabinets above the washer and dryer for storage. A small countertop between or above the machines creates a folding station. A utility sink nearby handles hand-washing and messy cleanup jobs. Use moisture-resistant paint on the walls. Good overhead lighting matters here — laundry rooms are often dark. A simple pegboard on one wall holds ironing boards, mops, and cleaning supplies. Finishing this space costs far less than finishing a full room and makes daily chores feel significantly more organized.
15. Create a Hobby or Craft Room
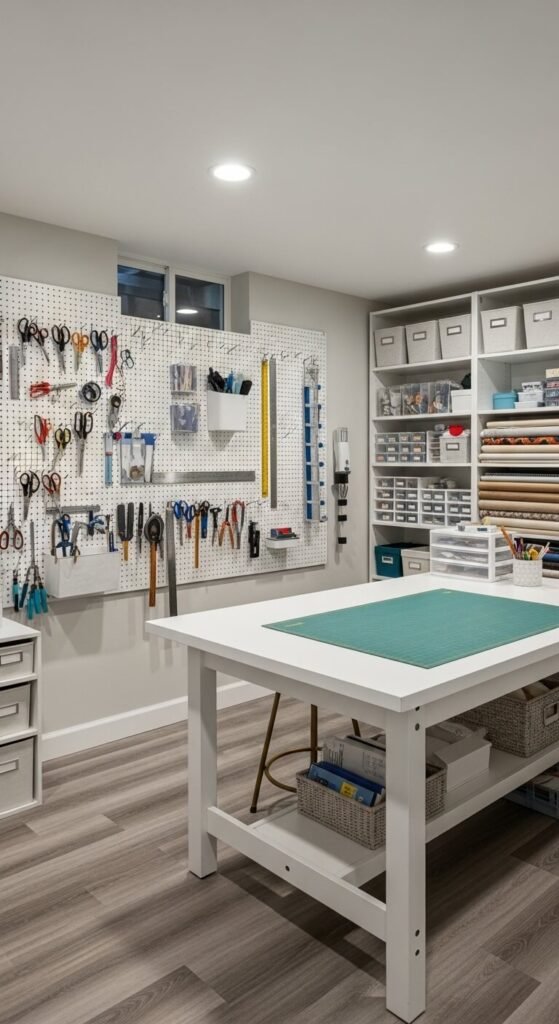
A dedicated craft or hobby room changes how much you actually use the space. A large work surface is the priority — build a simple workbench from plywood and 2x4s for under $100. Pegboard walls are inexpensive and keep tools and supplies visible and accessible. Use clear labeled bins on open shelving. Good overhead lighting prevents eye strain. Whether your hobby is sewing, woodworking, model building, or painting, having a dedicated space means projects stay set up between sessions. You’re far more likely to actually finish what you start when you have a permanent place to work.
16. Install a Drop-Down Projector Screen
A drop-down projector screen is a flexible alternative to a fixed TV wall. Motorized ceiling-mounted screens retract when not in use — the space doubles as a living area or play space. Manual pull-down screens cost as little as $100–$200 and work perfectly well. Pair with a budget 1080p projector ($400–$700) for a massive picture without a massive price tag. Paint the wall behind the screen dark grey or black to improve contrast. A projector setup feels more like a real theater than even a large TV does, and your guests will always comment on it.
17. Frame Around Mechanicals Creatively
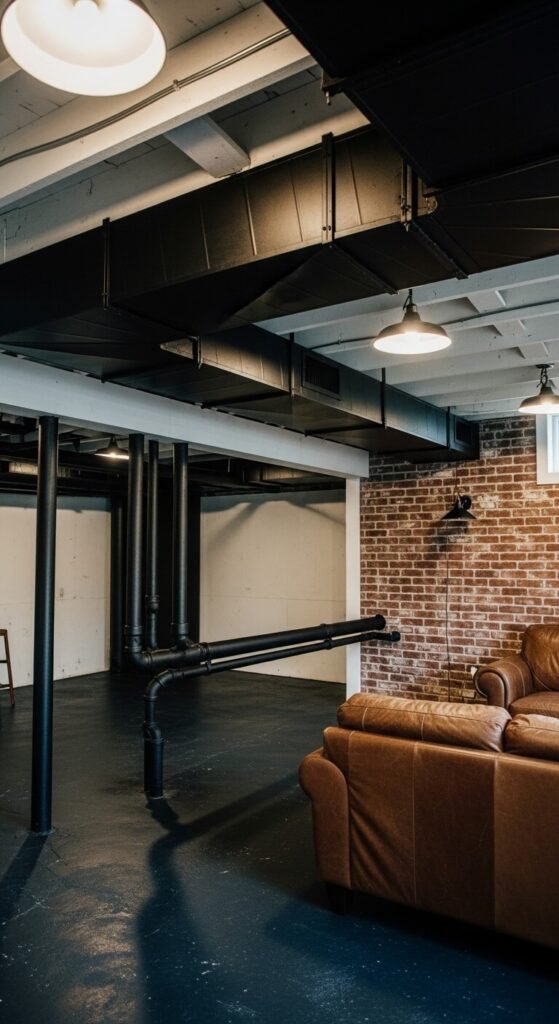
Pipes, ducts, and beams don’t have to be hidden — they can become a design feature. Paint all exposed mechanicals the same color (usually flat black or white) for a cohesive industrial look. Wrap load-bearing steel columns with wood planks to turn them into attractive posts. Build a simple box around awkward ductwork to create a soffit, then paint it to match the ceiling. Framing neatly around mechanicals is far cheaper than hiding them behind drywall. An industrial aesthetic with exposed elements is genuinely on-trend and works well in basement spaces.
18. Add a Murphy Bed for Multi-Use Space
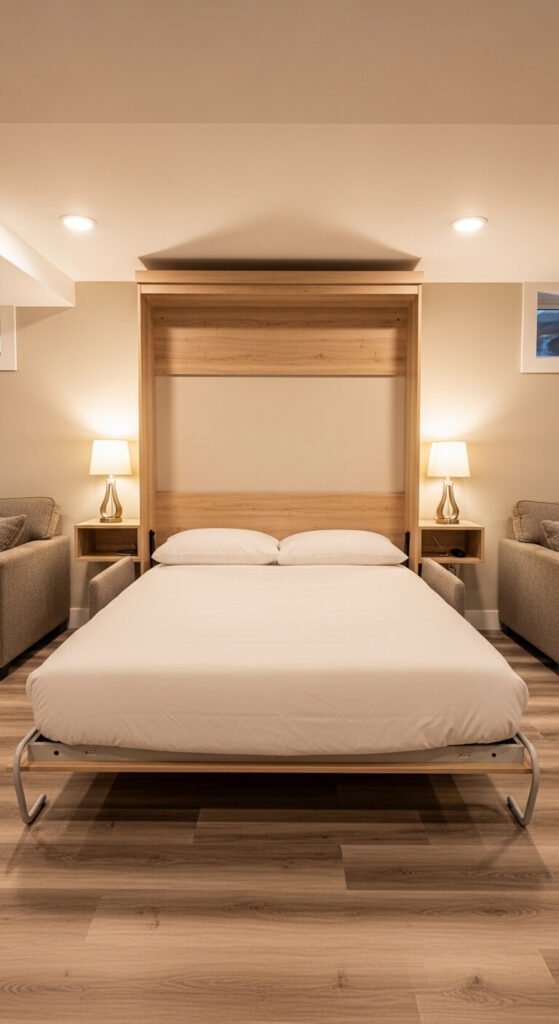
A Murphy bed (wall bed) lets one basement room serve two purposes. By day it’s a living room or office. By night it’s a bedroom. Murphy bed kits from IKEA or Amazon start around $500 and are DIY-friendly. The surrounding cabinet can include shelving, a desk fold-out, or even a sofa attachment. This is the smartest choice when you’re limited on rooms but want guest sleeping space. Pair it with a quality mattress — guests will actually sleep well. Murphy beds work especially well in basement spaces because the room is already on the smaller side.
19. Build a Custom Storage Wall
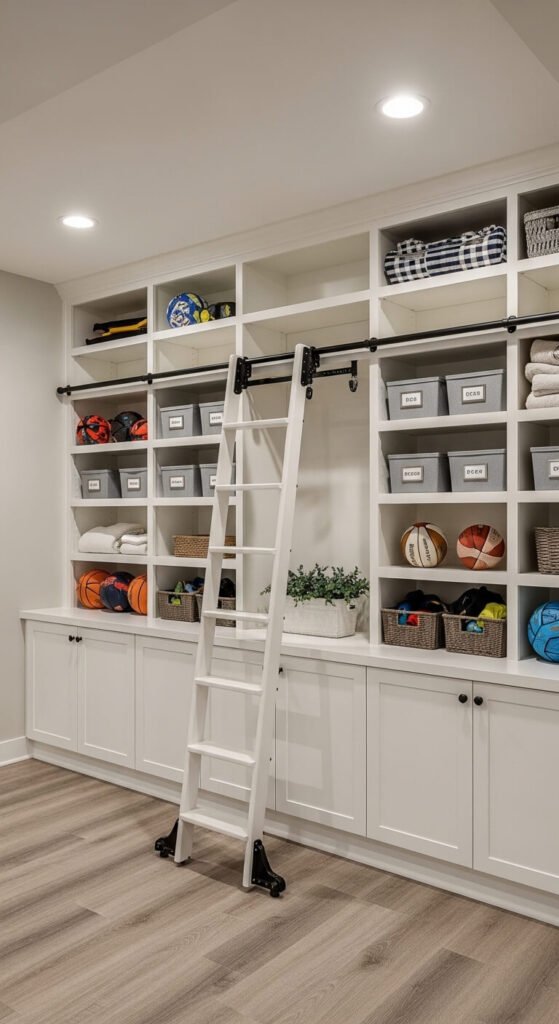
Storage is one of the most practical gifts a finished basement can offer. Floor-to-ceiling built-in shelving maximizes every inch of wall space. Use MDF or plywood for custom shelving — it’s far cheaper than buying standalone units. Include a combination of open shelves (for bins and frequently used items) and closed lower cabinets (for out-of-season or bulky storage). Label everything clearly. A well-organized storage wall prevents the rest of the basement from becoming a dumping ground. Build sections modularly so you can adjust shelf heights as storage needs change over time.
20. Create a Recording or Podcast Studio

Basements have natural acoustic isolation — they’re ideal for recording. Acoustic foam panels on the walls reduce echo and cost around $50–$100 for a basic setup. A USB condenser microphone ($80–$150), a simple audio interface, and free recording software like Audacity is all you need to start. A small desk, a good chair, and solid lighting round out the space. If you’re a musician, adding bass traps in the corners makes a big difference. A basement studio setup for under $500 is completely achievable and opens the door to podcasting, voiceover work, or music production from home.
21. Install Wainscoting or Shiplap Accents
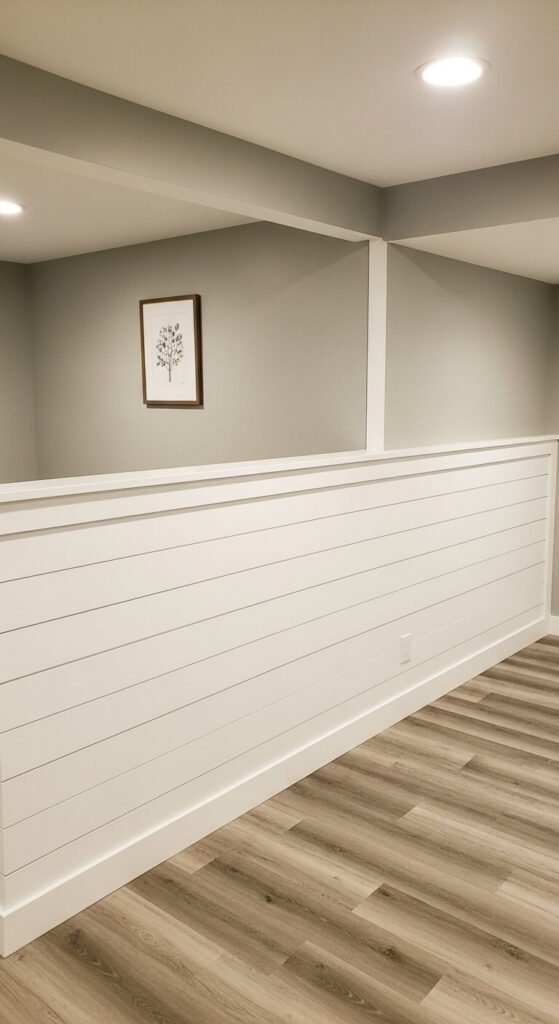
Wall treatments add character to a finished basement without breaking the budget. Shiplap planks (or even just 1×6 pine boards) applied horizontally to a wall cost $1–$3 per square foot in materials. Paint them white for a classic farmhouse look or grey for something more modern. Wainscoting (applying planks to the lower half of walls only) is a popular option that adds texture and protects the wall from scuffs in high-traffic areas. Both treatments are DIY-friendly and install quickly with a nail gun. They photograph beautifully and are consistently a selling point for buyers touring finished basements.
22. Add a Mini Kitchen or Kitchenette
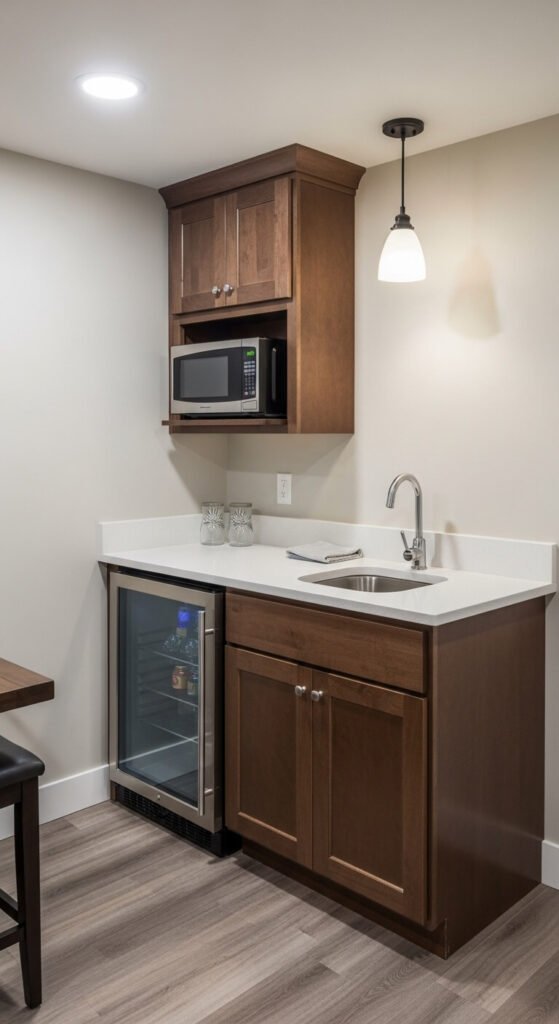
A kitchenette makes a basement feel like a self-contained suite. Start with a small run of base cabinets, a countertop, a mini fridge, and a sink. You don’t need a stove — a countertop microwave and small toaster oven handle most tasks. This setup is perfect for an in-law suite, teen hangout, or rental unit. Budget around $2,000–$4,000 for a simple DIY kitchenette with new cabinets and appliances. The plumbing is the main cost — if you can locate it near an existing drain stack, you’ll save significantly on installation.
23. Paint Concrete Floors as a Budget Option

Not every basement floor needs expensive flooring. Epoxy or concrete floor paint costs $100–$300 for a full basement and can look surprisingly sharp. Charcoal grey, slate blue, and classic grey-white are popular color choices. Proper prep is key — clean the concrete thoroughly, repair cracks with hydraulic cement, and use an etching solution before painting. Apply two coats for durability. A painted floor pairs well with area rugs for warmth and softness. It’s an honest, practical solution for basements where moisture is a concern or budget is tight.
24. Use Paint Colors Strategically
Paint is the lowest-cost, highest-impact upgrade in any basement. Light warm neutrals — greige, soft white, warm grey — make basements feel less underground. Avoid cool blues and harsh whites, which can feel clinical in low-light spaces. Painting the ceiling white (including exposed joists) dramatically brightens the room by bouncing light around. An accent wall in a deeper tone adds depth and definition without closing the space in. Budget $100–$200 for quality paint in an average basement. Roll two coats on walls and don’t skip the ceiling — it makes more difference than most people expect.
25. Soundproof the Basement Ceiling
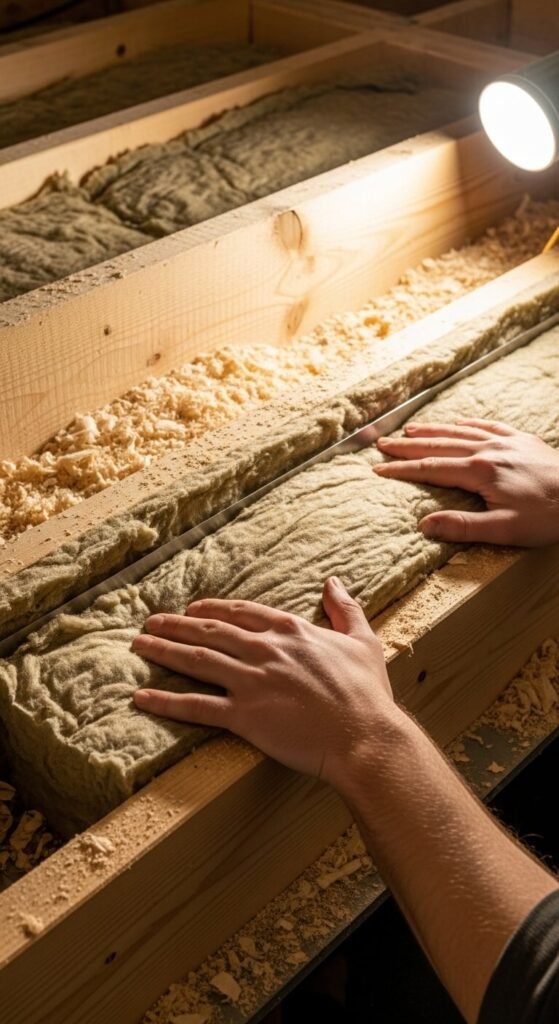
Sound travels easily between a finished basement and the floor above. Rockwool (mineral wool) insulation stuffed between ceiling joists is the most cost-effective soundproofing method. It costs around $1–$1.50 per square foot and installs quickly. For better results, add resilient channel clips to the drywall ceiling — they decouple the drywall from the joists and dramatically reduce sound transfer. This matters most for home theaters, home gyms, or music rooms. Good soundproofing also works both ways — it keeps basement noise from traveling upstairs and reduces the sound of footsteps coming down.
26. Finish the Staircase for a Complete Look
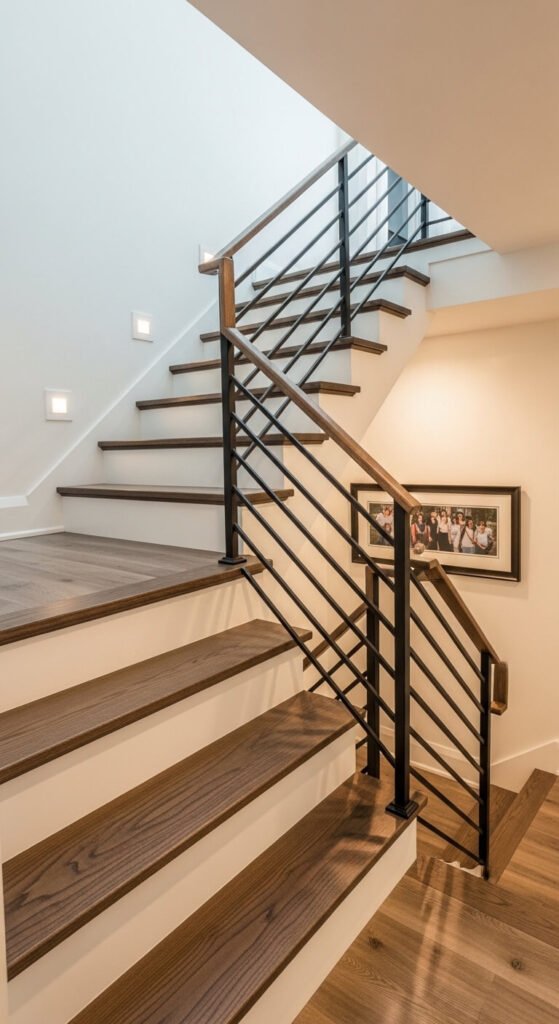
The staircase is the first thing anyone sees when entering your basement. Replacing carpet or bare wood treads with stained hardwood treads on white painted risers is a weekend project that makes an immediate impression. Sand and stain existing treads rather than replacing them if they’re in good condition — this costs under $150 in materials. Update the railing while you’re at it: swap spindles for sleek metal balusters and paint the handrail to match. Good staircase lighting (a recessed light or wall sconce on the stairwell wall) ties everything together and signals that the basement is a finished, intentional living space.
Conclusion
Finishing your basement doesn’t have to happen all at once. Pick two or three ideas from this list that match your budget and your family’s actual needs, and start there. A freshly framed and drywalled room with good lighting and LVP flooring is a finished basement — everything else is an upgrade you can add over time. The square footage is already there, sitting below your feet. With a clear plan, a weekend mindset, and a realistic budget, you can turn that unfinished space into one of the most-used rooms in your home. Start small, build momentum, and enjoy the process.