Open shelving is one of the most talked-about design choices in home decorating — and for good reason. Done right, it turns everyday objects into a display worth showing off. Done wrong, it becomes a cluttered mess that stresses you out every time you walk into the room. The good news? You don’t need a designer budget or a magazine-ready home to make it work. Whether you’re working with a small kitchen, a bare living room wall, or a bathroom with zero storage, these 24 practical open shelving arrangements will show you exactly how to display with purpose, personality, and a little patience.
1. The Rule of Three Shelf Stack
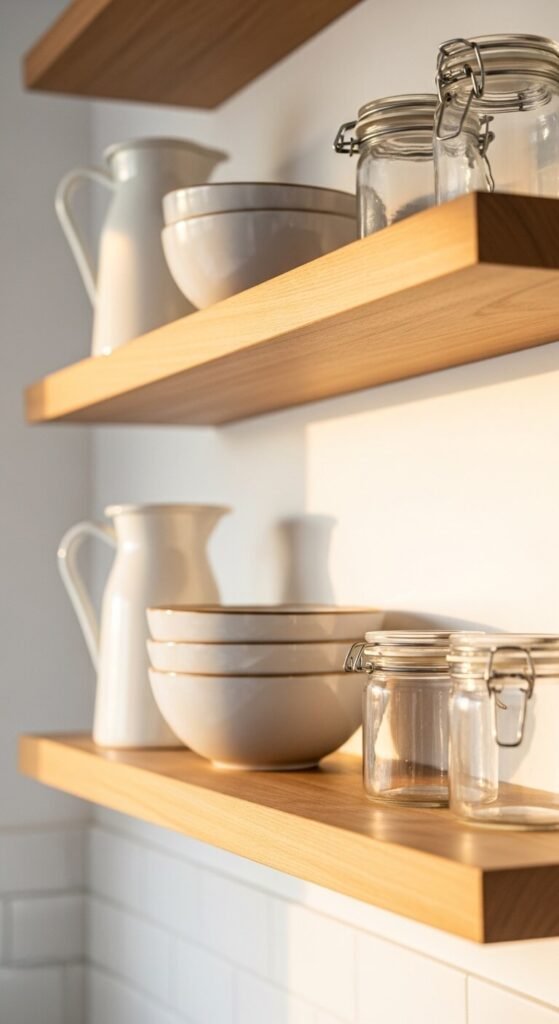
Group items in threes. It’s one of the oldest styling tricks, and it works every single time. Place three objects of varying heights together — a tall vase, a mid-size candle, and a small dish. The eye naturally moves across the grouping, creating visual interest. You don’t need expensive pieces. A thrifted pitcher, a stacked set of bowls, and a small plant do the job perfectly. Keep the spacing between groups generous. Crowding kills the effect. Less really is more on open shelving.
2. Color-Blocked Shelf Styling
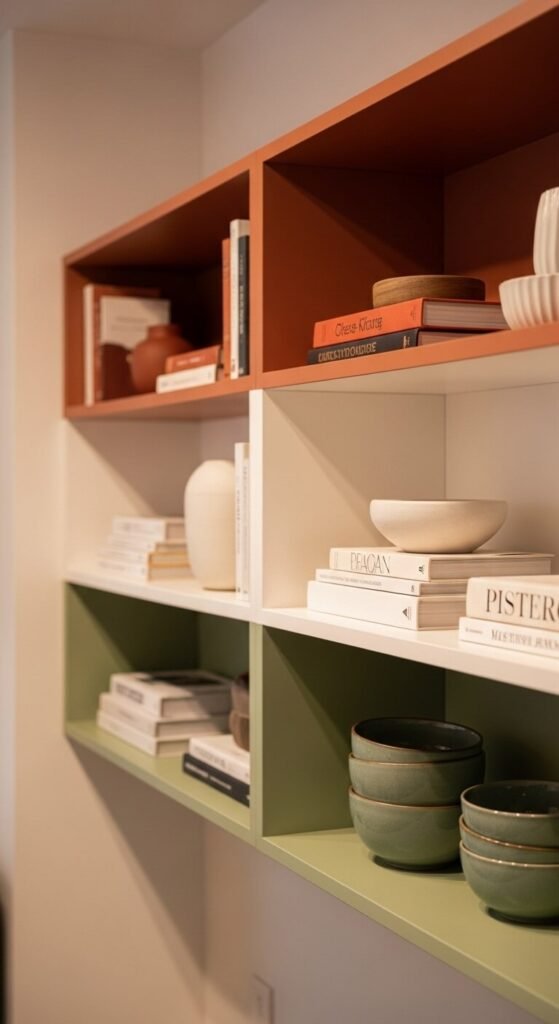
Pick two or three colors and stick to them across your entire shelf. This is called color blocking, and it makes even mismatched items look intentional. Start by pulling everything off the shelf. Sort your items by color. Put the warm tones together, the neutrals together, and so on. You don’t need to buy anything new. Most people already have enough pieces — they just need to be reorganized. A set of brown books next to an amber glass bottle next to a clay pot? That’s a color story.
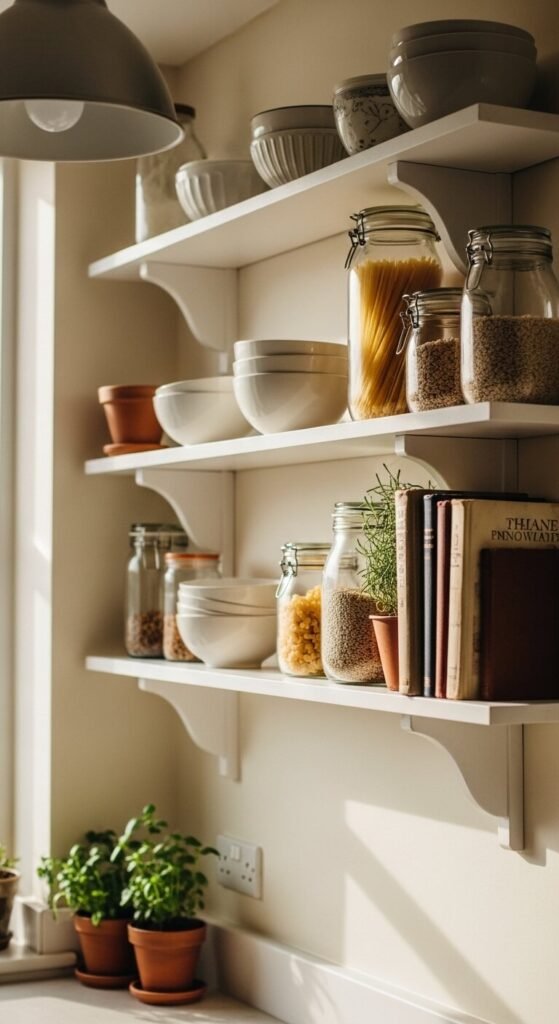
3. The Kitchen Staples-as-Decor Approach
Your pantry staples are décor waiting to happen. Transfer dry goods into matching glass jars and line them up on a shelf. Pasta, rice, oats, lentils — they all look beautiful when you can see through the container. Buy a set of 6 to 12 identical mason jars or swing-top glass bottles. Label them with a paint marker or a small chalkboard tag. The result looks expensive and organized. Total cost? Under $20 for the jars. This works especially well in small kitchens where every inch needs to pull double duty.
4. The Single Statement Shelf
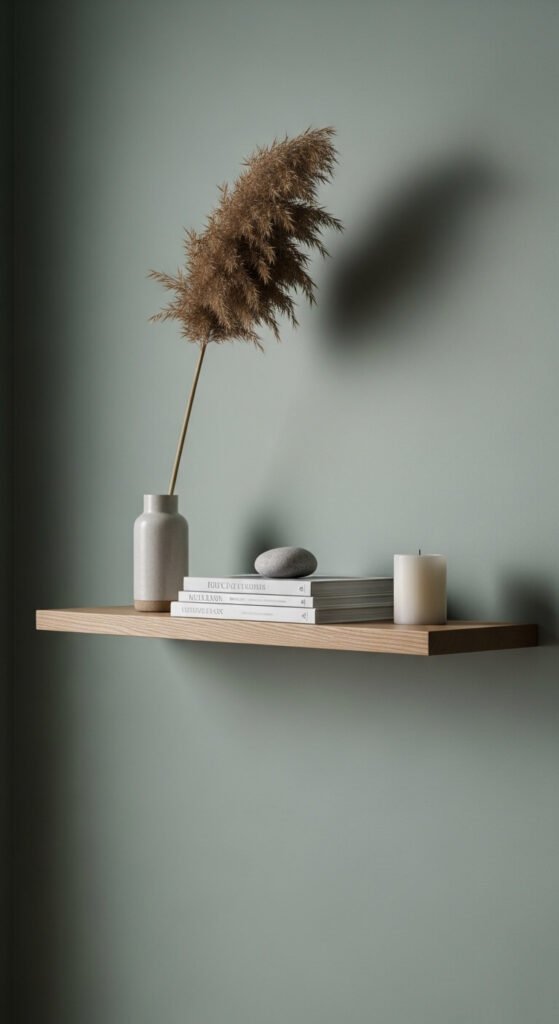
Sometimes one shelf does more than three. A single floating shelf with five or six intentional objects creates a focal point without overwhelming a room. It’s a great starting point if you’re new to open shelving. Pick one wall, mount one shelf at eye level, and choose five things you genuinely love. A plant, a book, a candle, a small sculpture, and one personal item. That’s it. The restraint is what makes it powerful. This is also the most budget-friendly option — one shelf bracket set costs around $15 to $30.
5. The Leaning Ladder Shelf Arrangement
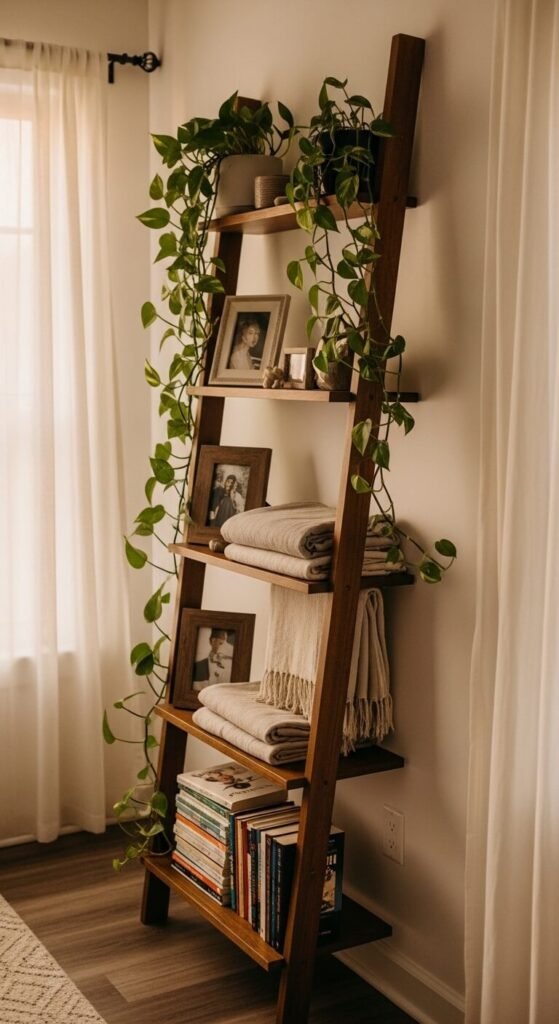
A leaning ladder shelf is one of the easiest, no-drill options for renters. It leans against the wall, requires no mounting, and can be moved whenever you want. Style it with a mix of heights and textures across each rung. Put trailing plants on higher rungs so they cascade down. Use the bottom rung for heavier items like baskets or books. You can find ladder shelves at big-box stores for $40 to $80, or build one with two long wooden boards and a few dowels for about $25 in materials.
6. The Floating Shelf Gallery Wall Combo
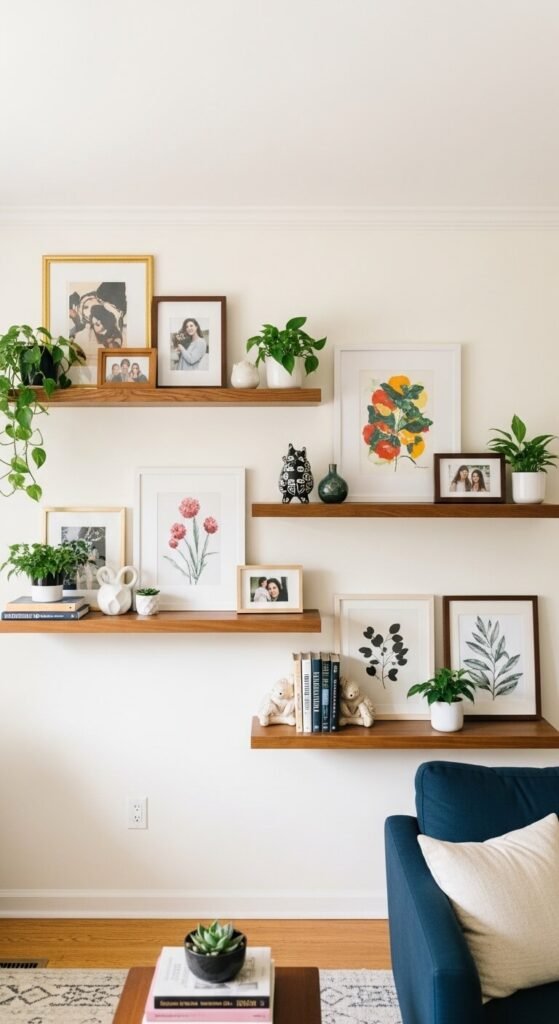
Mix shelves and frames on the same wall. This creates a gallery wall with dimension — some things hang flat, others project outward. Stagger the shelf heights so they don’t compete with the frames. Keep a 6 to 10 inch gap between shelves and nearby frames. Use picture ledges (shallow shelves about 3 to 4 inches deep) to lean small framed prints rather than hanging them. This approach makes the wall feel curated, not chaotic. It’s also easy to rearrange since most pieces aren’t permanently fixed.
7. Bathroom Open Shelving on a Budget
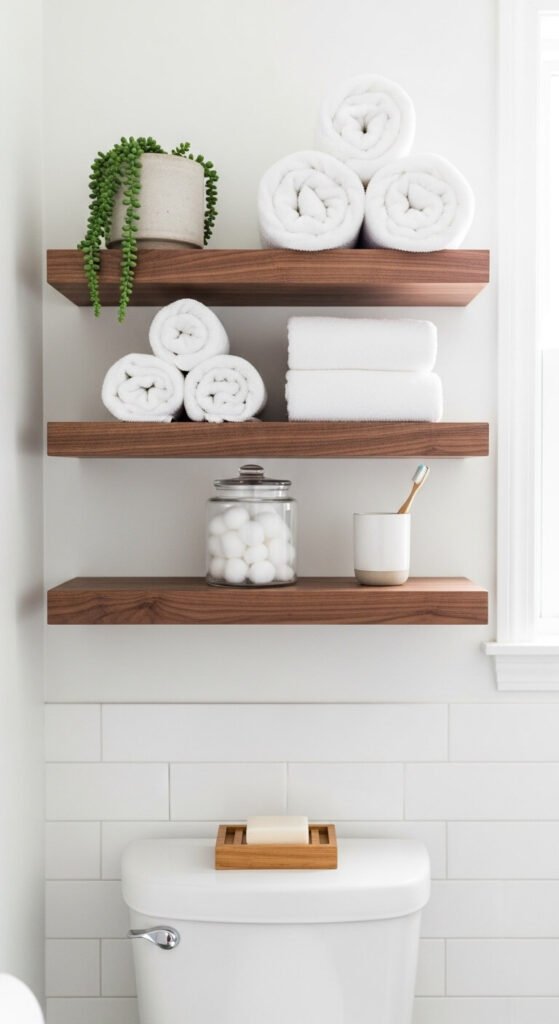
The space above the toilet is almost always wasted. Two small shelves there change everything. Use the top shelf for décor and the lower one for frequently used items — rolled towels, a small plant, a jar of cotton rounds. Keep everything in matching containers so it looks cohesive even if the items are different. A two-shelf bracket set from a hardware store costs around $20 to $30. Walnut-look contact paper on a basic pine shelf adds a high-end look for a few extra dollars.
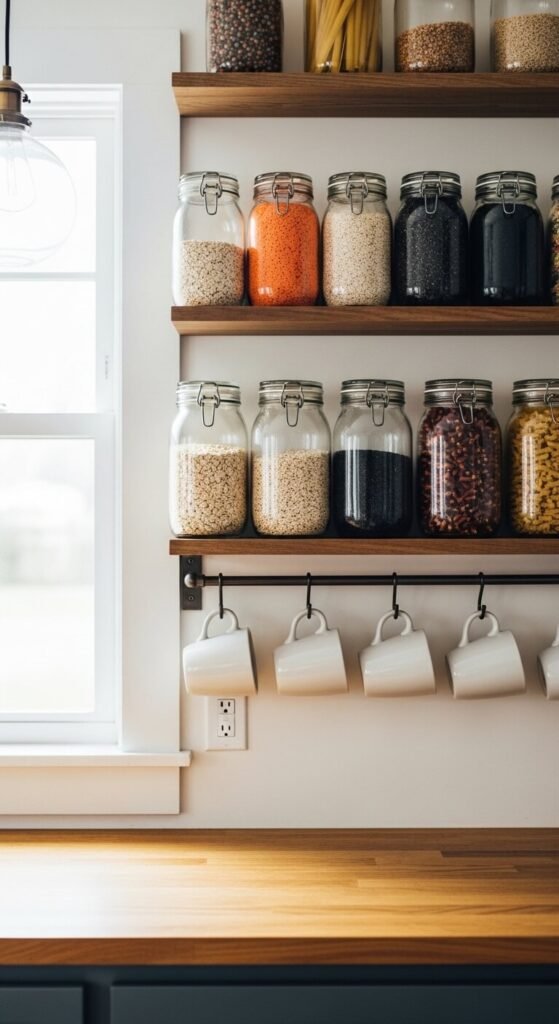
8. Open Kitchen Shelving With Hooks Below
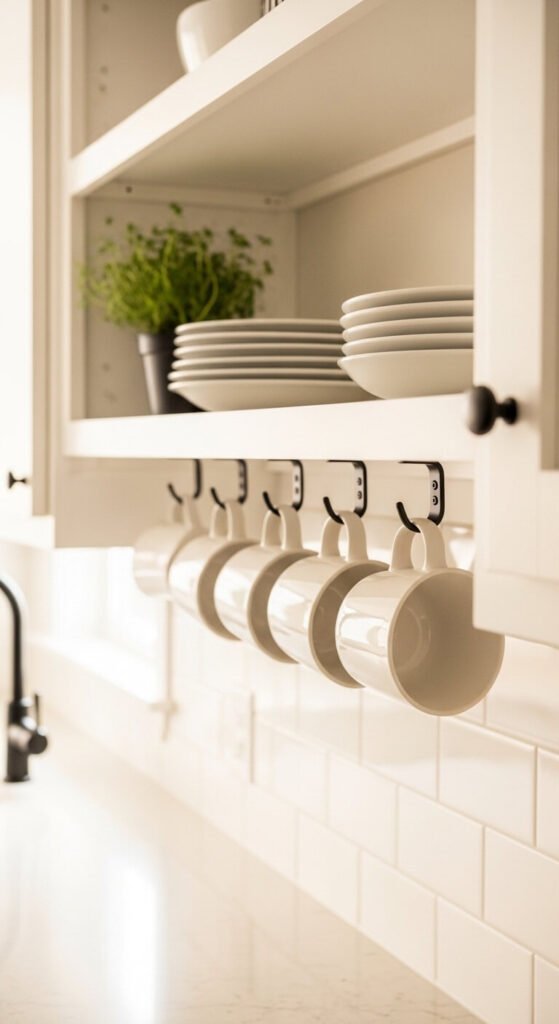
Add hooks to the underside of your lowest shelf to hang mugs, small pots, or utensils. This doubles your storage without adding another shelf. Use simple S-hooks on a small dowel rod, or screw cup hooks directly into the shelf bottom. It’s a 10-minute project that costs under $5. The hanging mugs also add visual interest — they break up the horizontal line of the shelf and add movement to the display. Works especially well in small kitchens where counter and cabinet space is limited.
9. The “Edit Down” Method for Clutter-Free Shelves

The most common open shelving mistake is putting too much on the shelf. Remove 40% of what you currently have displayed. Seriously. Take everything off, put it on the floor, then only return what you truly love or use. Leave breathing room between objects. Empty space on a shelf is not wasted space — it’s what makes the remaining pieces stand out. This costs nothing and takes about 20 minutes. The result looks more expensive and intentional than any new purchase could achieve.
10. Shelf Styling With Collected Natural Objects
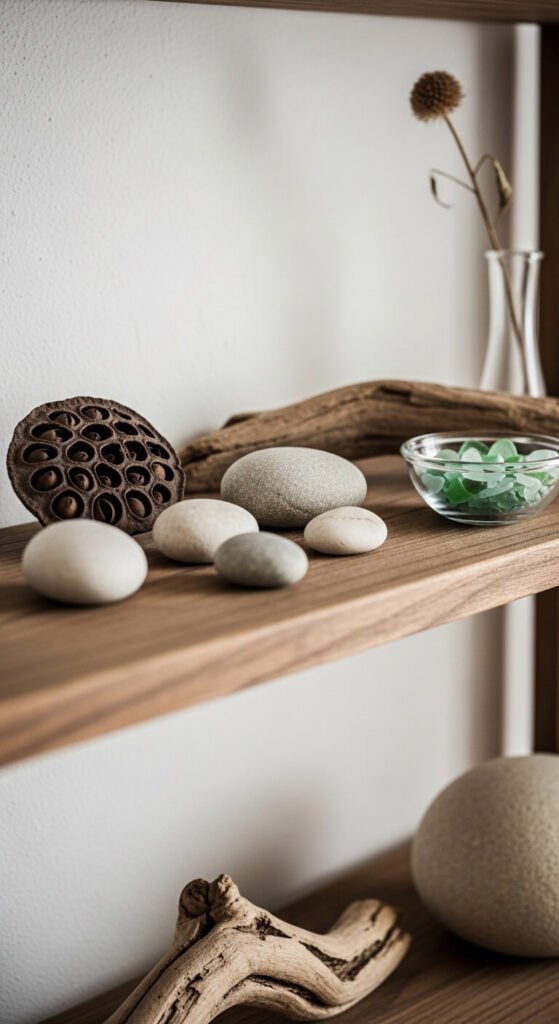
Nature is free décor. Rocks, driftwood, dried branches, seed pods, and shells all look beautiful on open shelves when arranged with intention. The key is to limit your palette to two or three types of objects so it reads as a collection, not a pile. Group similar items — all the stones together, all the dried botanicals together. Vary the height by propping items up on a small book or wooden block. This approach works in any room and fits every style from modern to rustic to coastal.
11. Matching Container Strategy
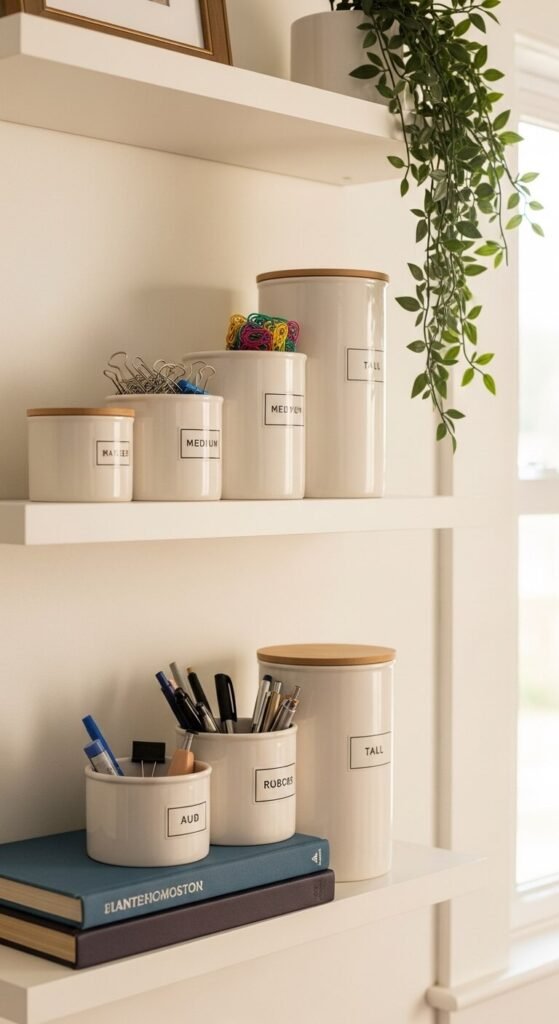
Mismatched containers are the number-one cause of shelf chaos. When you switch to matching storage — even inexpensive ones — shelves instantly look more organized. Matching doesn’t mean expensive. Identical baskets from the dollar store, same-size mason jars, or matching ceramic pots all work. Pick one material or color and use it consistently across the shelf. A set of six matching rattan baskets from a discount store runs about $15 to $25 and can transform a storage shelf into something that looks styled.
12. The Book-Spine Color Sort
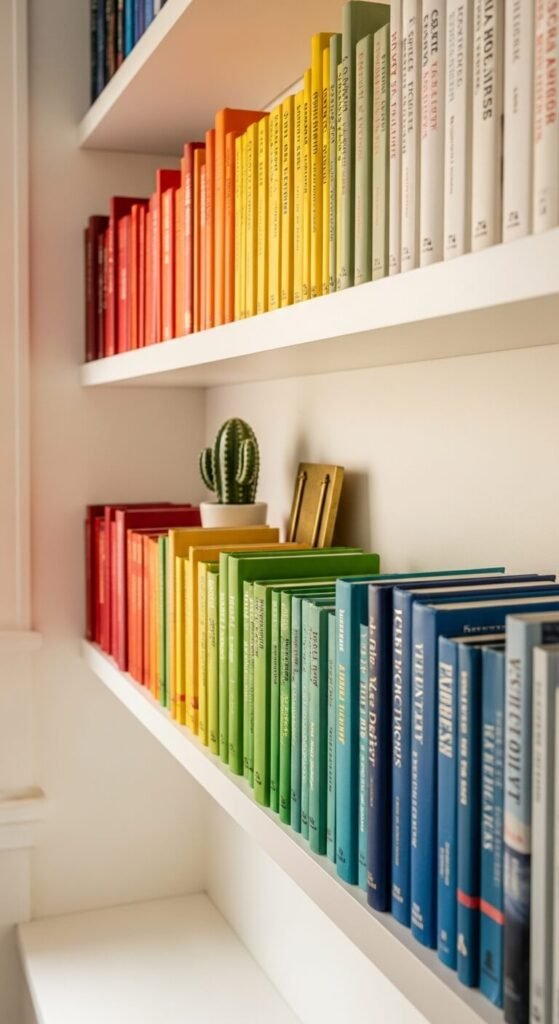
Sorting books by spine color turns any bookshelf into a piece of art. It sounds fussy, but it takes about 15 minutes and requires zero purchases. Pull all your books off the shelf. Sort them into color groups on the floor. Then reload the shelf in a gradient — warm tones on one side, cool tones on the other, neutrals in the middle. Tuck a small plant or object between sections to break up the rows. This is one of the most popular styling tricks online because it genuinely works for every shelf type.
13. Open Shelving in the Entryway
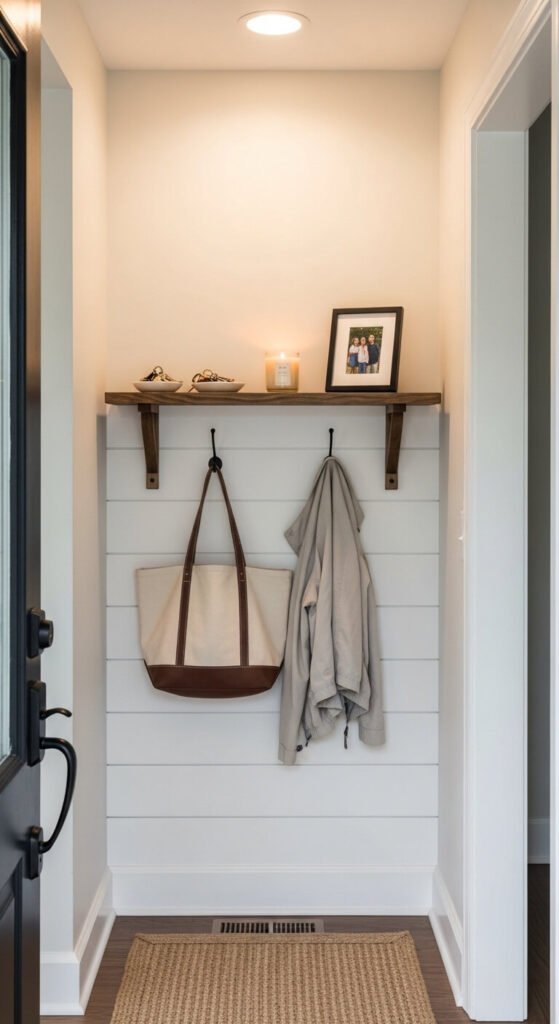
The entryway often gets ignored when it comes to styling. A single shelf plus two hooks turns a blank entry wall into a functional, welcoming moment. Use the shelf for a key dish, a small plant, and one meaningful object. Mount hooks just below or to the side for bags and jackets. Keep the shelf intentionally spare — this is a high-traffic area, so clutter builds fast. Wipe it down weekly. A simple pine shelf with two metal brackets costs around $20 to $30 and takes under an hour to install.
14. The Floating Corner Shelf Cluster
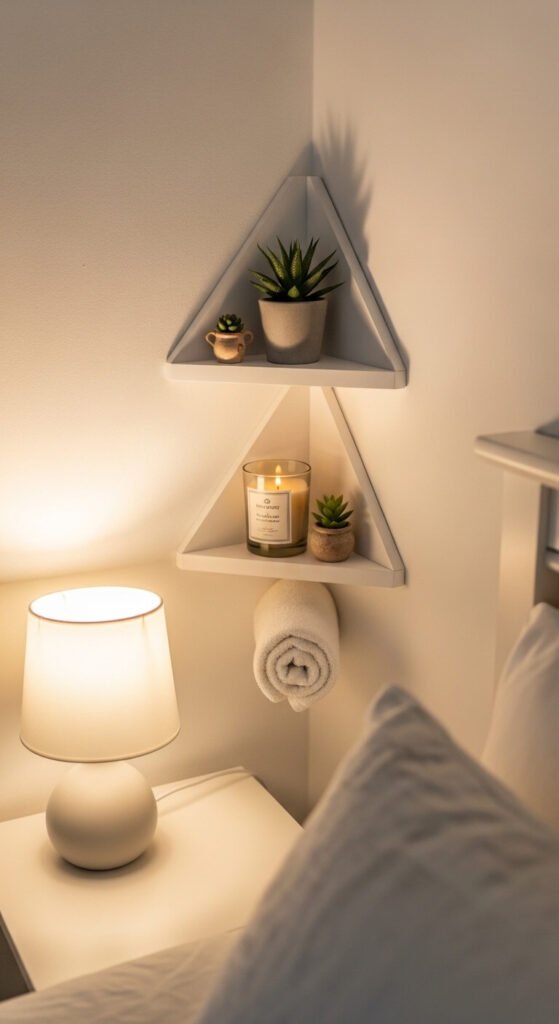
Corner shelves turn dead space into a display. Most rooms have at least one neglected corner. A cluster of two or three small triangular floating shelves — staggered at different heights — uses that space without taking up floor room. Style them lightly. One plant, one candle, one small object per shelf is enough. Corner shelves are among the most affordable shelf options — you can often find sets of two or three for $15 to $25 online or at home goods stores. Install with basic wall anchors on drywall.
15. Open Pantry Shelf With Decanted Goods
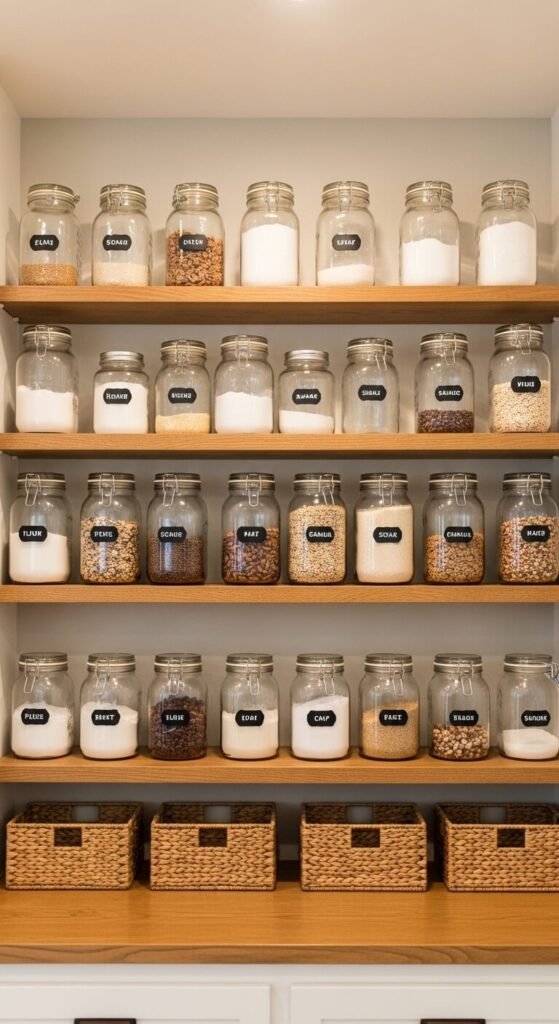
An open pantry looks intentional when everything lives in a matching container. Decant your dry goods into uniform jars and label them with a chalk marker or small tags. Arrange by frequency of use — daily items at eye level, occasional items higher up. Use baskets on the bottom shelf to corral oddly shaped items like chip bags or produce. The investment is mostly time and about $30 to $50 in jars. Once it’s set up, it’s also easier to see when you’re running low on something.
16. Plant-Forward Shelf Arrangement
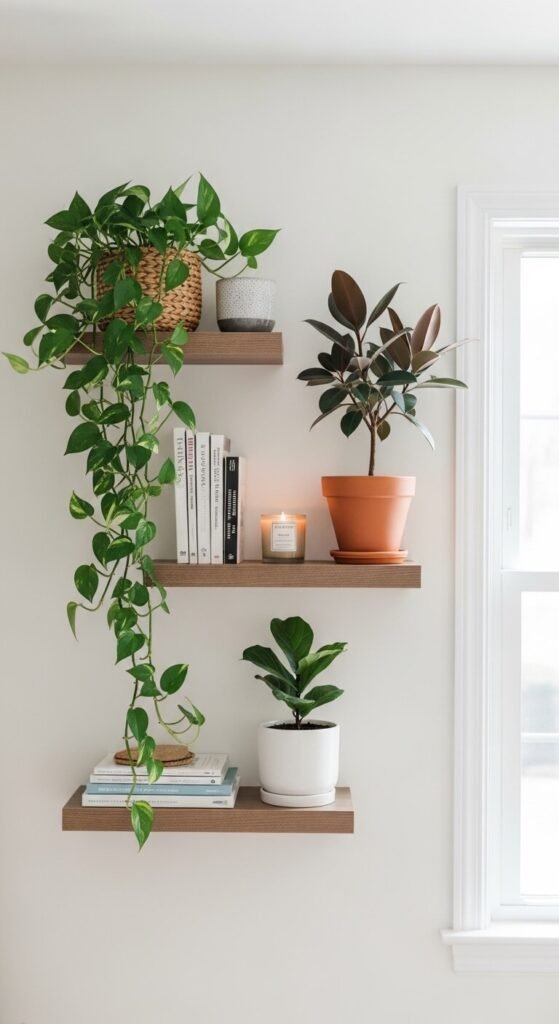
Let plants do the heavy lifting on your shelves. Instead of hunting for the right décor objects, anchor each shelf with one prominent plant and fill in the gaps with simpler items. Trailing plants like pothos or string of pearls are especially good — their vines soften the shelf edge and add movement. You can propagate cuttings for free from existing plants. A mix of terra cotta, ceramic, and woven pots in similar tones creates variety without chaos. Water weekly and rotate toward the light.
17. The Pegboard Open Shelf System
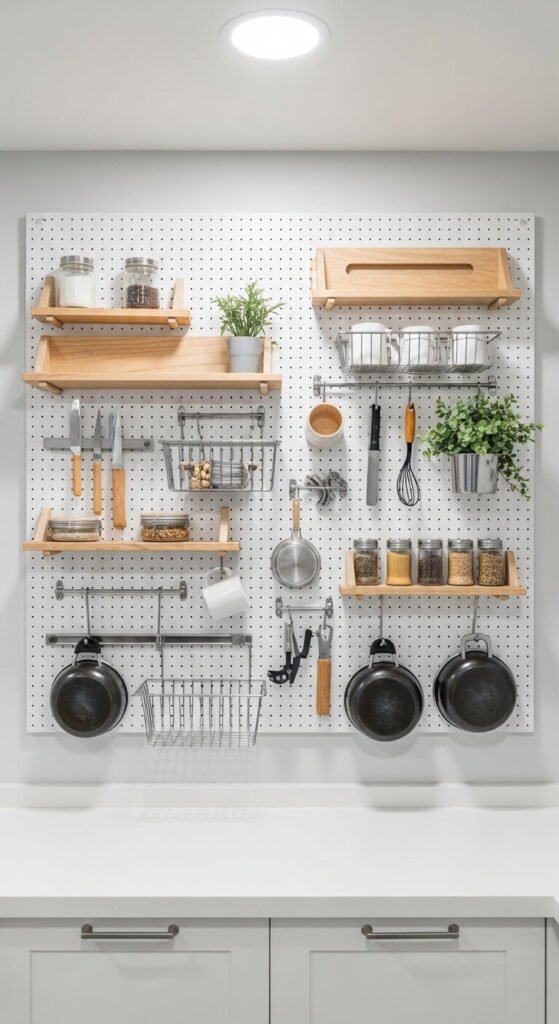
Pegboard is the most adaptable open shelving system available. Mount a 2×4 foot sheet on the wall, paint it any color, then use shelf brackets, baskets, hooks, and ledges to customize it however you want. Rearrange it any time with zero new holes. Pegboard sheets cost about $15 to $25. A full kit with assorted hooks and brackets runs another $15 to $30. It works in kitchens, home offices, garages, and craft rooms. The modularity means your storage can change as your life changes.
18. The Vignette Technique

A vignette is a small, self-contained styled scene on a shelf. Think of it like staging a tiny still life. You need three components: something tall (a vase, candle, or book stack), something mid-height (a bowl, small plant, or figurine), and something low (a stone, small dish, or flat object). Arrange them in a loose triangle. Leave open space around the grouping. You can create a strong vignette with items you already own. This technique works on any shelf, any size, in any room of the house.
19. Open Shelf Styling for the Home Office
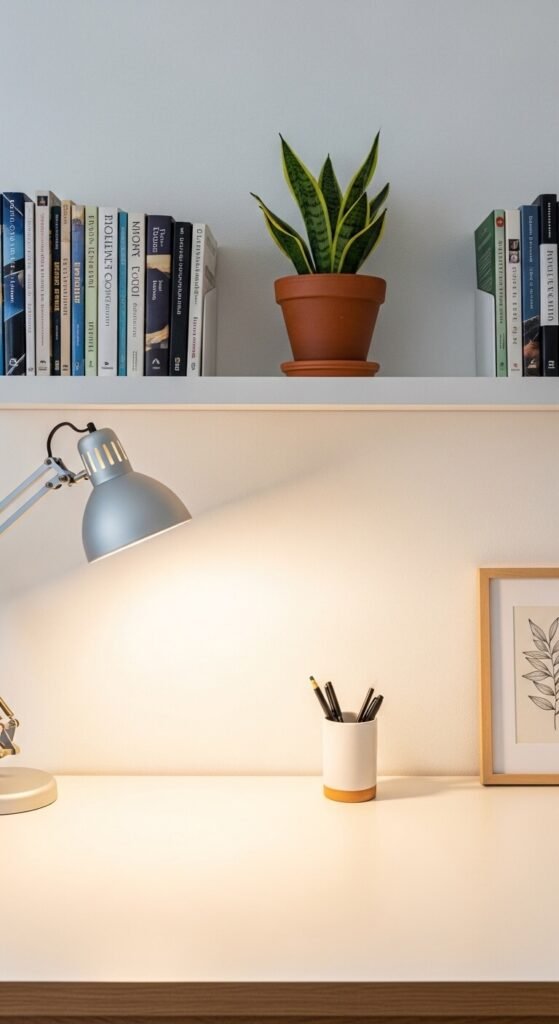
Office shelves should be functional first, styled second. Keep active supplies at eye level and in easy reach. Use matching desk organizers or small baskets so everything has a home. Style the areas between functional items with one plant, a few books, and one personal object. Avoid overloading shelves with supplies that would be better in a drawer. A clear, lightly styled office shelf reduces visual noise, which actually helps concentration. Start with one shelf and get it right before adding more.
20. Floating Shelf With Lighting Underneath
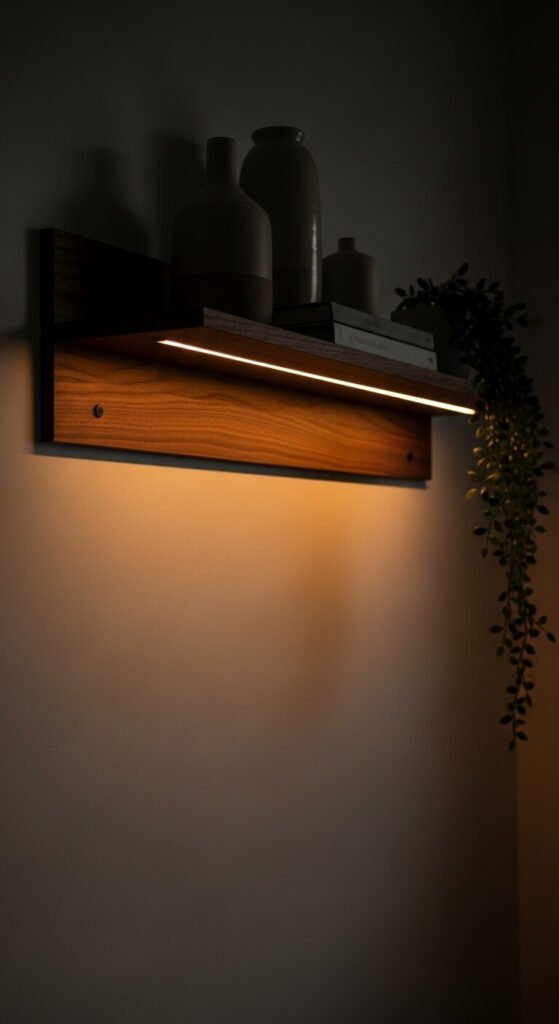
Add LED strip lighting to the underside of a shelf and the whole thing becomes a feature. It draws the eye, warms the room, and makes your display look intentional at any hour. Peel-and-stick LED strips cost $10 to $20 on Amazon. Warm white (2700K) works best for living rooms and bedrooms. Cool white suits kitchens and offices. This upgrade takes 10 minutes and requires no wiring. It also works as ambient lighting in the evening, reducing the need for overhead lights.
21. The Seasonal Rotation Approach
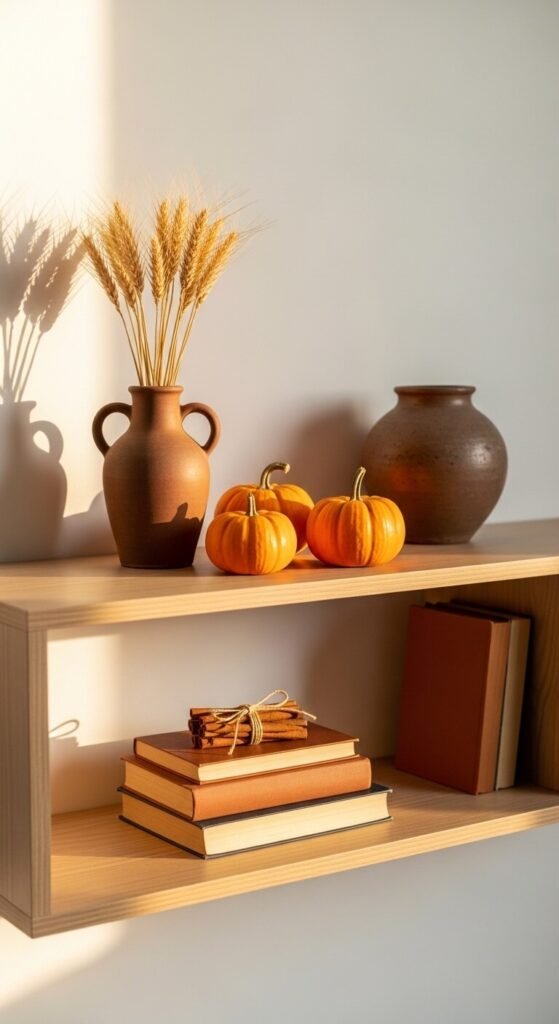
Swap your shelf styling with the seasons. This is a free way to keep your home feeling current without buying new furniture or repainting. You don’t need to change everything — just rotate two or three accent pieces. In fall, bring in dried botanicals, pumpkins, and warm textures. In spring, swap in fresh greenery, lighter colors, and ceramic pastel tones. Keep a small box in storage with off-season items ready to rotate in. Takes about 15 minutes to refresh and makes a noticeable difference in how the space feels.
22. Kids’ Room Open Shelf Display
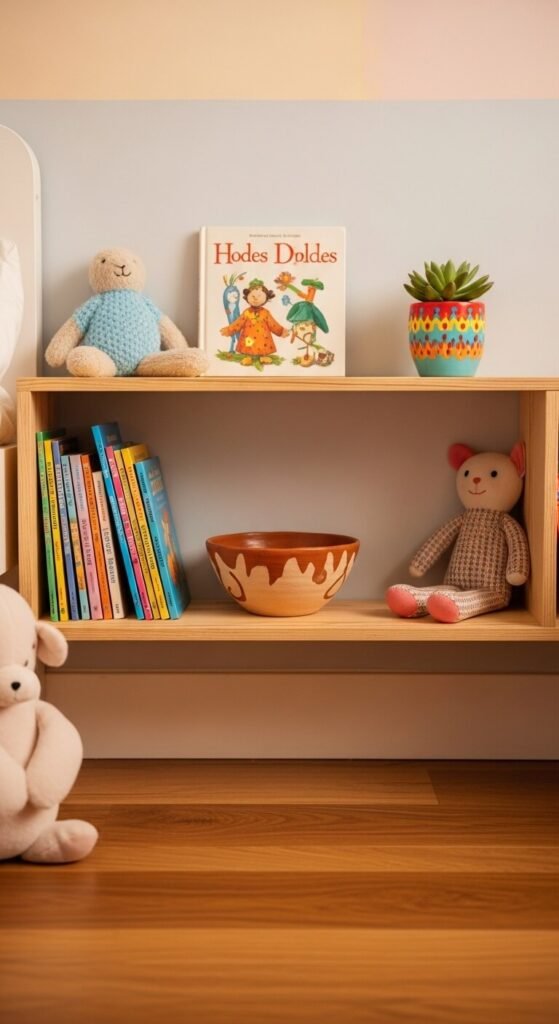
Low-mounted shelves in kids’ rooms serve double duty as display and accessible storage. Mount shelves at the child’s eye level — usually 24 to 36 inches from the floor. Face books outward instead of spine-out so kids can identify them and return them independently. Keep the display simple: a few toys, a plant they help water, and a rotating selection of books. Involve them in the styling. When kids have ownership of how their shelves look, they’re more likely to keep them tidy.
23. Industrial Pipe Shelf for a Textured Look
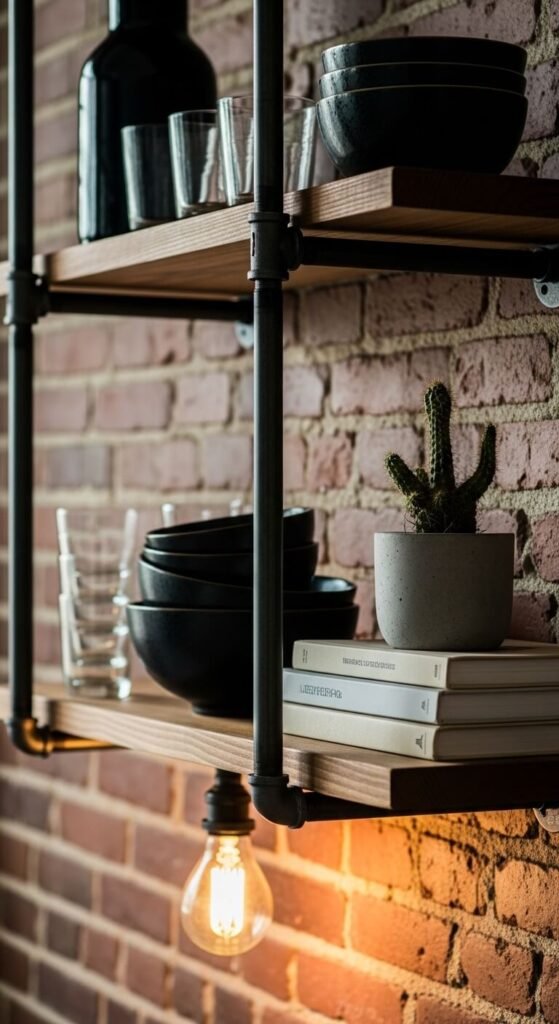
Pipe shelves use plumbing flanges and black steel pipe as brackets, paired with reclaimed wood planks. They look expensive but are genuinely affordable to build. A set of two shelves costs about $40 to $70 in materials depending on size. You can buy kits online or source the pipe from a hardware store. The raw metal and wood combination works especially well in kitchens, home offices, and lofts. Style them with earthy ceramics and dark-toned objects to complement the industrial material. A weekend DIY project with strong visual payoff.
24. The Invisible Shelf Book Float
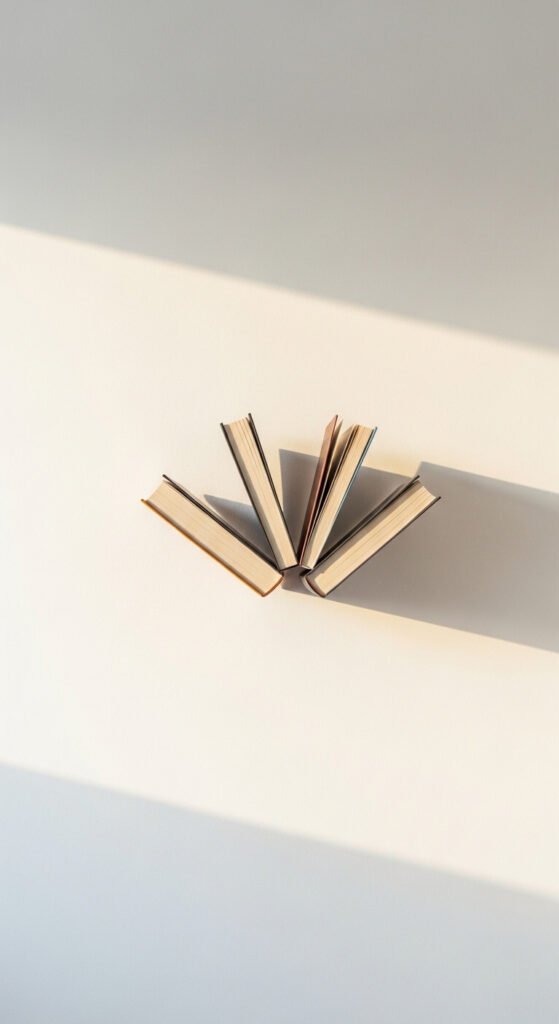
Invisible bookshelves are a clever trick that makes books appear to float on the wall. You mount a single hidden bracket that slides inside the back cover of the bottom book in a stack. The books above it rest on each other, hiding the mount. It looks like magic. Invisible shelf brackets cost $5 to $15 each online. They work best with hardcover books that have some weight. Place three or four of these clusters at staggered heights across a wall, and the effect is a gallery installation that requires almost no money and about 20 minutes of work.
Conclusion
Open shelving is not about having the most beautiful objects or the biggest budget. It’s about being intentional with what you display and how you arrange it. Every idea in this list can be done with things you already own, small purchases from discount stores, or simple weekend DIY projects. Start with one shelf. Clear it off completely. Choose five things that mean something to you. Arrange them with space between each one. Step back and look. That’s the whole method. Once you see how much difference one well-styled shelf makes, you’ll want to work through the rest of the house — one arrangement at a time.